Showing posts with label MSE. Show all posts

Sunday, September 13, 2009

More alcohol ink on Friendly Plastic

Peg and I agreed we could sit and do this forever. Not just fun - but I think a bit of some kind of therapy involved here. So we wanted to show you the different looks you can get with the same stamp, same Friendly plastic - just using different colors and inking techniques. I used silver on this.....

And Peg used gold on hers....

How do you decide which one you like the best? LOL!
This next one is a much lighter impression - and I like it just as well


And these 2 are really deep impressions - with different inking techniques (above and below)
But all of these simply used alcohol inks, blending solution, 91% alcohol, stamps, and white Friendly Plastic strips.

And at $1.99 per strip - it really is cheaper than therapy!!!

OK, just one more night of ideas tomorrow and then on to something else!

Sunday, June 15, 2008

4 ways to use Alcohol Inks

I thought today we'd compare background techniques. The first is just a straight polished stones technique using Stream, Cranberry and Lettuce alcohol inks.


This second one is the very same process, but on clear acrylic, done twice. So apply the ink, let it dry, then apply a second layer using the same piece of felt (no additional ink) on top of the first layer of ink. Back it with white cardstock. I like using peel-offs on the acrylic.


For this next technique, apply the 3 colors of AI to the felt, then apply a drop of pearl metallic mixative. Apply it to glossy cardstock. Then add some blending solution to the felt and apply a second layer. Really gives a nice, soft mottled background. The little kids and swirls are new stamps from MSE that I picked up last week. I just love the little kids!


This last one is a little different. Squiggle some copper mixative onto your non-stick craft sheet. Then I added cranberry and stream AI and some blending solution. Took my glossy cardstock and placed it shiny side down on top of the craft sheet and twisted and lifted it up. A completely different kind ol background. The copper is quite shimmery.


I used a little AI to color the silver dragonfly brad as well. That's my mom's mom as a little girl, printed on mat cardstock and colored with Ranger's foam nibs. These are 4 more techniques that I'll be teaching next month at Scrapbook Your Life!

Sunday, April 27, 2008

Happy Mother's Day!

Another acrylic word book. I need to remind you that you these run between $11.99 and 14.99 each and you can custom order any word up to 15 letters. "Mom" is a standard generic one that the store has in stock. I did the polished stones technique on the back of "mom, backed it with white paper so it would show and added chipboard cutouts on top.


Created my photo mounts on the back...then decided since I don't have photos with me, I'd stamp and use my Ranger white pen. The girl and the flourish are 2 separate stamps.


The next 3 pages are all clear acrylic. I painted on these and stamped with acrylic paint. Then drew my "photo mounts" with a black pen. I also used the white pen....but look closely, you can see through to what's on the 2 pages behind this page. The best way to "watch" this is to look at th epink flower on the far left side.


Now you see 3 flowers...pink paint in a smaller area than where the white paint was. Another "photo mount" squared off in black


and here you see the whole flower. This was a really fun project. The "M" on this page is done with pale pink embossing poswer...just be careful not to heat the acrlic! It will melt!

Just ask me how I know this! LOLOL!


Should have said I'm using a few MSE stamps on this one...but the girl here is from 100 Proof Press, with an MSE swirl from her had. More Ranger white pen.


I love these little girls from CI Stamps. More MSE swirls and chipboard on this page. Note, for this one, I used black pen against the light background.


Finally, a Stampin Up stamp and an MSE swirl repeated with white pen. Totally fun!


I'm only blogging one project per day....and there are so many more that I haven't posted yet. This has truly been such a fun time out here in San Diego.

So I must end today's blog with a shout out to Liz and Kristal. Today, I walked into the store and they surprised me with a Revolution (die cut system)!!! I spent the whole evening playing with it and I'll have it with me Tuesday so you can come play with it, too!!! I really didn't think I wanted to learn yet another diecut system...but you know what? It's just another way to spend my time playing!!!

Sunday, April 20, 2008

Pieces of Me

I thought it would be fun to do this project on National Scrapbook Day at "Scrapbook Your Life!"....we will "scrapbook your life"! Get it?

This is a 12 pocket star book and you can use it for grades 1-12, 12 photos of your life, your ancestors...anything. And as you will see..you can also do less than 12 photos. So, this is the class sample for May 3 at Scrapbook Your LIfe! in San Diego.

This front tag is a Spellbinders nestabilities oval die...embossed 3 dies smaller. Relly has a nice ruffly look.


The book opens up to a star


And there's me...quite the chubby baby. I'll be showing different ways to cut and emboss these nestability dies.


More proof that I've had bad hair all my life!


These are MSE's new swirl stamps. I adore them!!! So, don't bother asking about that hat...it was a phase circa 1972!


For this one, I used the heart inside the oval, then nested the heart.


Love the fact that you can place the die anywhere and cut it out!


Sorry about the shadows...it's that great San Diego sun!!! I do think I'm getting warm!


This class is going to be so much fun...you will just love it!!! I used the Scor-it and the Bind-it-all and will have them at the store for you to use, but I know you will want to buy your own! The store has ordered them and they should be here just in time for class!!! And there you have it...you've seen "pieces of me" from birth til now.

Friday, April 4, 2008

Unmounting my stamps

Lots of you have sent me emails with questions about my decision to unmount all of my rubber stamps, why I picked the products I picked, if I'm happy......so I've decided to just show you all here!

But first....If you are a Stampin' UP rep....or love their stamps....do not read this! LOLOL! I just don't want to be responsible for anyone having a heart attack! Yes....I unmount my SU stamps, my Tim Holtz stamps (gasp!)...everything!!! If there are plastic stickers on the wood, I will use undu and take it off and then adhere it to the front of my Stamp n Store panels.


I like these panels because the stamps cling directly to the back of them, and they are tabbed across the top. I simply cut them to the size that I need.


I have mounted some of my stamps on EZMount, but have decided to go with the Thin Mount for all my current and future stamps. It truly is quite thin and it works extremely well.


I cut the Stamp n store panels to fit inside my new MSE stamp storage boxes....and these are the stamps that I travel with. You can see that I can also drop in Tim's new sheets as well....that's the game sheet right in front. But yes, I've unmounted all his wood stamps and love them in this system. So easy to find and see!


The lid goes on and this box sits on the corner of my main work table. It's absolutely perfect!


Using the thin mount, I find the stamps are a little more flexible. Now, that may not be important to you, but I tend to stamp on some rather lumpy surfaces and find this is so helpful.


I just stick it on anything acrylic. My metal clay rollers work wonders with these! Oh, by the way, I also unmounted all of my wheel type rubber stamps and they are all now flat!


Just put the ink directly on the stamp


And flip it over and stamp. With these gridded positioners you can pretty much get your spot right every single time.


Now, we all know how unconventional I am! So I should tell you that I will often unmount a wood stamp and then trim the rubber just as close as I can....that way when I get to this step, I can have even better luck at positioning my stamp! Just a suggestion!

So, this is really a 2-part tutorial because from this, I plan to show you how to make your own stencil to emboss in the Wizard. That will be for tomorrow!

In the meantime, I have ordered all of these products and should have them in our little store in the next week. If you are interested, just email me.

EZ Mount - $4.50 for each 8x11 sheet
Thin Mount - $4.50 for each 8x11 sheet
Stamp N' Stor tabbed panels, package of 5 - $6.99
CD case storage panels, package of 10, $3.49
MSE storage case - $15.99 Actual Storage Kit Size 7.75" tall x 10"deep x8" wide

Tuesday, March 25, 2008

Stenciling vs Reverse Stenciling

I thought I would use the cali-lilly die to showcase the difference between stenciling and reverse stenciling. You might want to go back to yesterday's blog for a little refresher.

So, on the cut side of the die, I used my Fluid Chalks and applied ink directly to the die. I sort of made the flowers purple, the stems green and then just added different colors wherever. This is an edgeability die, so the sandwich is just a little different because you have the back side of the card that you do not want to cut or emboss (or ink!)


Place the inked die, ink side down on the FRONT side of an open card. Note that I have started to bend the back of the card up here.


Place the thin white spacer plate on top of the die


Then fold the back of the card up over the top of the thin white spacer plate


You will place this "package" on top of the white cut mat, cut side up.


Place your emboss mat on top of this, emboss side down and run it through the Wizard.

When you remove the cut mat and the emboss mat, you will have a cut line that looks like this.


For the emboss sandwich, you want to place that cut line that you just saw against the tan embossing mat. AFTER you remove the thin white spacer plate.

I know, it's a little confusing, but hang in there...once you've done a hundred of these...it's a piece of cake! LOL!

OK, the emboss sandwich will be (from the bottom to the top)

White cut mat, cut side up
tan polymer pad
paper that has been cut, still in the die
die, cut side down
fold the back of the card to be on top of this
White emboss mat, emboss side down

And run it back through the Wizard


When you take the card out of the die, you will then have ink on the de-bossed areas of the card. The embossed areas will remain white like the original card. Sort of cool, huh?


As you can see, the die is a bit shorter than the card, so next, just trim off the top and bottom, if you want.


That is "reverse stenciling" or "direct-to-die inking" that I talked about yesterday. The embossed areas are not inked.

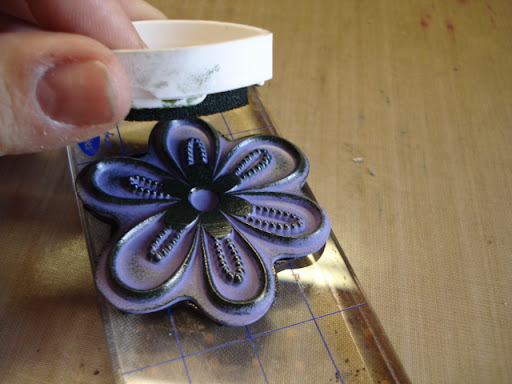
With this die, you also get 2 separate flowers. I diecut and embossed these, then while the paper is still in the die, flip it over and add fluid chalk to the openings in the die.


This inks the embossed areas of the die....and the debossed areas stay white


Whe you lay the embossed-inked stems next to the debossed-inked card...you can see the difference:


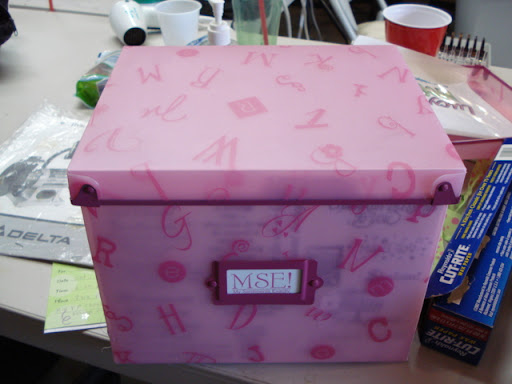
And then I added sentiments from MSE. I just thought this would make a great sympathy card....and I happen to need one to send out this week.


When you open the card...you get the sentiment from the window and the 2 little stems.


And my little bonus secret....take those stems, cut and emboss them 3 times in paper type Art Clay Silver, fire them layered as a bouquet and it makes a gorgeous little pen!!!


So many ways to play with this die....so little time!!! Sort of the story of my life!!!