Showing posts with label Spellbinders. Show all posts

Monday, February 3, 2014

The bottle

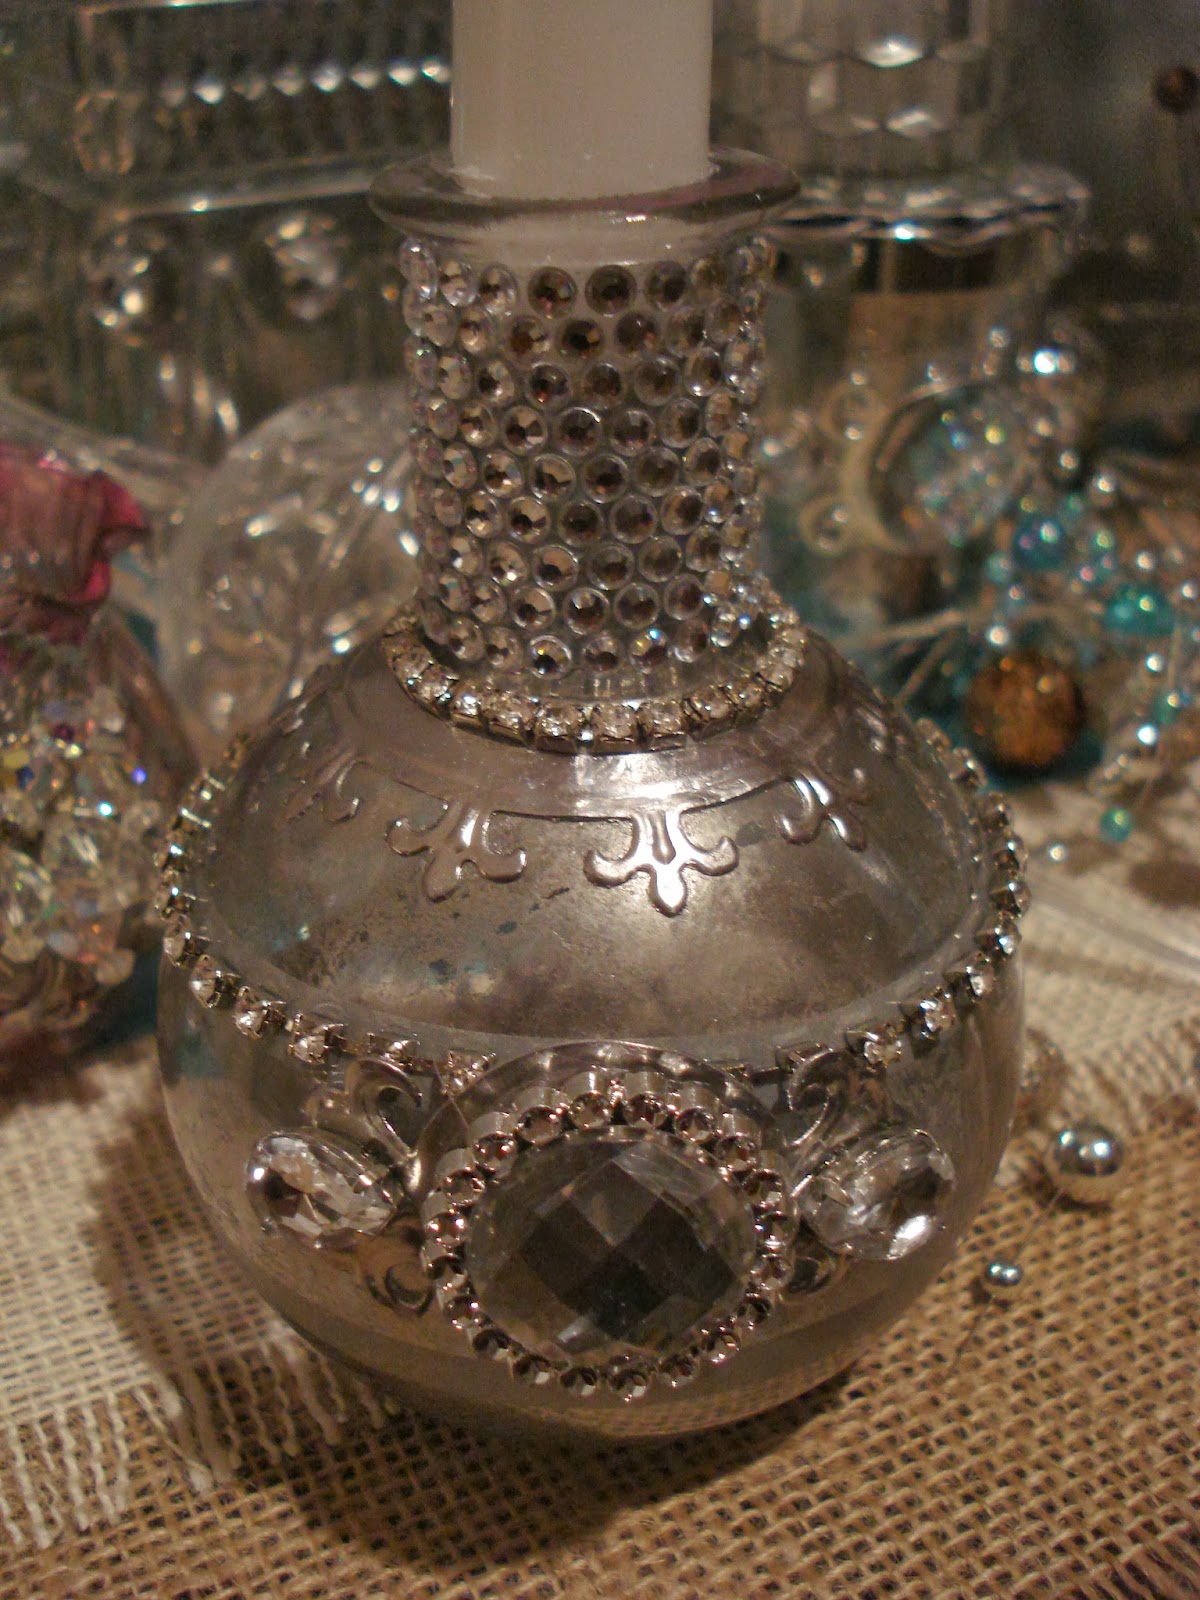
The girls at the retreat drank this bottle Friday evening....it's 18" tall!!  And it came from Las Vegas as I understand it.  I had asked to have the empty bottle....


My "theme" for the weekend was dress forms so I decorated the bottle as such.  It is absolutely gorgeous!  Lots of rhinestones, bling, and pewter.


A second bottle showed up so I could compare the 2 together.  Never toss out a bottle again!  Just decorate it!

Around the top is a Spellbinders die in pewter with a layer of rhinestones and a teardrop crystal.

Next is a Spellbinders label with the word "Create" from Elizabeth Craft Designs.

Then an oval die cut with a dress form die cut in the middle of it.

The bottom border is another spellbinders die.  


I'm calling it "the bottle" - don't think you'll ever see another one like it!  :o)

Monday, December 16, 2013

Mercury glass - day 3

Today I'm sharing some of my favorites - and some of the easiest to do!    This first one was a clear glass candle holder.  Maybe 3" tall.  Airbrushed with copic marker RV09 , then Amaco's pewter die cut, with a broken earring attached to the front center.  What do you think?  This one was 47 cents at one of our thrifty stores here in town.


This one was blue glass.  So I simply sprayed the outside with the looking glass paint, spritzed the vinegar/water mix on top of that, then waited 2 minutes and lightly blotted it off so the blue glass would show through.  I used Spellbinders S4-365  Create-a-flake four die for this.  I think that die has been discontinued, but look for it on ebay.  I took apart an ornament from Hobby Lobby for the center of the die and added some bling to the round points.


This was another clear votive holder and I simply love it!  I used Copic marker B06 for the color and this time, I used a ton of color with very little of the looking glass paint.  The pewter is a different element from the Create-a-flake four die above with another pice of the same ornament.  So simple, yet so elegant!


This is a tiny little votive, about the size of a shot glass.  I die cut the border and airbrushed it with colic's B06 as I wanted color on this one.  The snowflake is from the same die.  I love this die - so many different flakes and I haven't even started layering them!


And the last one today.  This is my favorite - so far!  This one is about 5" tall.  The rim around the top of the glass was chipped so I got it for 50 cents.  It was already faux mercury glass, so I didn't have to do a thing with the glass.


I used the large die from the Venetian Motifs, S5-119.   A rather large ornament from Hobby Lobby on the front.  How fun to get these at half off and then take them apart with undue!


The top border is cut from S5-042, Fleur de Lis accents and then…..


Folded over the top rim and pressed down around the top and the bottom to fit snugly against the glass. You can no longer see or feel the cracks that were in the rim.  


All of these just glimmer and shine in the sunlight.  So incredibly pretty in the day, but I have lights under them and at night, it's just stunning!

Tomorrow, I'm going thrifty store shopping in Co Springs with my sis.  I hope we find a ton of clear glass so I can come home and play some more.  Can you believe that I am completely out of glass???

Sunday, December 15, 2013

Mercury glass - day 2

Today, I'm going to share just one of my candlesticks because there is so much detail in this one.  It started out as 2 pieces of clear glass.  The top is a vote and the bottom was a short candlestick.  When I hunt for glass, I will hold it up to a window and pick the pieces that have the most shine to them.  Some cuts of glass are just plain dull.

To add color, I use my copic airbrush system.  For these pieces, I picked my copic sketch marker RV09.  I love that shade of bright pink.  I simply airbrushed the color to the outside of the glass.  Different types of clear glass will give you different results.  The more lead content in the glass, the more shine you will get as well.

Next, I did the same technique as yesterday to get the faux mercury look.  When you blot off the vinegar/water mix, the copic color will show through.  You also need to know that the more layers of Krylon's looking glass paint that you use, the less of the pink copic color you will see.  It's all a matter of balance.

Note - you spray the copic color onto the glass before you add the looking glass paint.  Everything is done on the outside of the glass.

For lots of this, I then sealed the color in with a coat of


I do plan to make a youtube video showing some of these techniques - but I need to get more glass first!

Around the base, I have used Spellbinder's S5-079 Persian Motifs - the large circle.  In order to get it to fit, I simply cut it open in the back.  The center was removed using #3 from The Standard Circles Large Die.  This is cut in Amaco's pewter which can easily be shaped around the glass.

I use either E6000 or 527 adhesive (both at Walmart) when adhering my embellishments to glass.  On occasion, I can get a cool glue gun to stick, but that will usually pull right away from the glass.


around the top of the bottom candlestick, I used #5 from Spellbinder's Parisian Motifs.  The center was removed using #5 from the Standard Circles Large set.  Look at how nicely it wraps around the edges to make a wonderful border.  And this pewter simply shimmers in the sun!


For the center, front, I used the square motif from the Parisian motifs die (see link above) and covered it with another piece of an ornament that I took apart.  I added a broken piece of jewelry in the middle center front.


There is quite a bit of depth to this piece as you can see from this side shot.  See how nicely the pewter will shape to the contour of the glass?


and from the top looking down, you can pick up hints of silver on the rim


remember, this all started with 2 pieces of clear glass from the thrifty store that someone else discarded. I think this is a great example of what you can do with someone else's trash.  :o)


And just think….I haven't even lit a candle yet and there's so much shimmer and shine going on!  Gotta love Spellbinders die cuts in pewter!

Saturday, December 14, 2013

Mercury glass and more - 1

Oh what fun it is to play…..


I'm going to spend the next few days sharing how I made these.  So first, you need to go to your local thrifty store and find glass.  Almost anything will do.  Clear glass, colored glass….all sizes and shapes.  Here's an example of a bottle and a candle votive that I found (of course, they were clear glass when I picked them up).  


While you are in the store, stack them together.  Get different heights.  Get some that will use votive size candles, tall tapers, short fat candles….and pick up used candles while you are at it.  I have several youtube tutorials showing you how to repair, restore and reuse old candles.  


In the days to come, I will share a variety of techniques, but for the look above, you will need Krylon's looking glass paint  (Walmart is the cheapest place if you can find it there).  You need a fine mist spray bottle filled with a mix of 1/2 water to 1/2 vinegar.  I don't think it matters what type of vinegar.  

For this particular bottle, I sprayed 1 coat of paint on the outside of the glass, then patted it off with a Viva paper towel (Viva is soft and flat, no embossed design in it).  Let it dry for a couple of seconds, then sprayed another layer, patted it off….did that 3 or 4 times.  

Next, I immediately spritzed the outside of the glass with the mix.  Let that set for 2 minutes.  It might not be dry, but that's ok.  Pat it off with your paper towel.  It will remove a little bit of the paint.  If you want a different look, rub it a little.  If you don't like the results, just soak the glass in 1 cup of vinegar in a sink full of water and rub all the paint right off.  I make several mistakes so always need a useable remedy!


I've made 23 of these in the past couple of weeks, so lots of experiments, loads of failures, and I'll be sharing different shots of the sun reflecting through them all.


 First up is this little glass bottle.  Remember - it started out clear.  It was someone else's junk.  Now it's my little treasure!  Rows of adhesive crystals around the top and then at the bottom of the top, a row of sequins.  These are the kind that you can buy by the yard in the fabric section at Hobby Lobby.  Note, you can slide them apart, or scrunch them up close together which is what I did here.

Below that is a Spellinder's die.  This is from the Fleur de Lis Motifs and the center was removed using #3 from the Standard Circles Large die set.  Cut using Amaco's pewter - which is very flexible and will bend down around the glass and stretch to fit whatever you need.


In the front center of the glass, I used the medallion from the Fleur de Lis Accents set.  The bling on top of it comes from a half off ornament at Hobby Lobby.  Look at the ornaments carefully as most of them will just pop apart with a little bit of undue.  

Note that I'm using just the paint on these.  Tomorrow, we'll add a bit of color using the Copic Airbrush system!  Can't wait to share!!!

Sunday, December 8, 2013

Sneak Peek Sunday

Me, Amaco's Pewter, Copic airbrush, Spellbinders dies and glass.  I have had so much fun playing  all weekend on this little fun project and while I'm not quite done, I couldn't wait to share a sneak peek!!!

It all started with an empty bottle from the thrifty store.


I combined my copic airbrush, and a few other ingredients to come up with this colored faux mercury glass look (which I absolutely love!)  And it's just so easy with the airbrush!!!


Took some of Spellbinder's dies and some pewter and made a gorgeous bottom border…


and a ring for the top...

Used a label die for the center with a little wedding bling from Hobby Lobby….


and the end result is something that I absolutely love!!!


Just a little sneak peek of things to come in a few days!!!  Can't wait to share it all!

Sunday, November 17, 2013

snowflakes

They have 6 points.  You do know that?  There are some doubles with 12 points, but there are no 8 point or 7 point or 5 point snowflakes!  Isn't that amazing?  That God created so many different designs and they all have 6 points!  

When I was a little girl, we had a snow back in Indiana.  It was so magnificent that dad woke us up and we all bundled up to go outside and watch it.  Pitch black night, but a very bright farm pole light.  The flakes had to have been 4" across!  We were literally chasing after them!  Catching them in our mittened hands.  Admiring them.  Watching them vanish away.  I remember that it seemed to snow forever like that….huge snowflakes softly, slowly, drifting to the ground.  I have never seen a snow like it since then.


I do know that God's art is so much more than anything I can ever put together, but I am having such a good time creating things that bring back fun memories!  And because I'm not home, I'm using mostly white paper.  It's easy to find!  But after cutting all these dies in white, I decided to use my airbrush on them.  What fun!!!  


But then I sort of went crazy.  2 layers of Spellbinders behind the stamped image, then Memory Box on top that are air-brushed and stickled.  But still….I love the results!!!


Layers of dies…..layers of huge, gigantic snowflakes when I was a little girl.  Maybe not too different? Layers of life that Jehovah has blessed me with.  It all seems to fit!

Thursday, September 2, 2010

Plain Jane Journaling with Spellbinders newest dies and more

Kerry says I don't do anything plain except food! LOL!!! Well, it's true. I really really really tried to do some plain journals....it just doesn't work for me. One was so bad I'm going to tear it up and start over!

This journal is a stuggle for me. It's not plain at all. This is another pendant that I made in a Tim Holtz class years ago. But having just the pendant on the journal is plain to me.

# 7 $15.00


I wanted to go back and show you some more possibilities with Spellbinders newest dies. And then I thought, why not use this as the basis for a simple journal? The possibilities - endless!

Again, I'm using multiple dies to do this with - just more reasons to buy more! ha ha!

2 wings and a key - sound like a song!


I think this next one would be great for a genealogy layout:


I absolutely love, love, love how these all intertwine. So I decided to turn this set into my next "simple" journal and I love it:

# 8 - $12.00

On lots of these journals, I have adorned the inside and back cover. But for this one, one simple verse:
Eph 6:17 - the sword of the Spirit, which is the Word of God.


Remember the wall hanging I did with the huge medallion made out of diecuts? This is just a smaller version on another journal cover. With lots of swarovski crystals from Creative Crystal - another one of my favorite companies!

# 9 - $15.00


What fun, huh? I may have to make some more journals like these. Maybe I can do "plain" after all!!!

Hope you can come to our sale! It's going to be so much fun!!!