Showing posts with label copper. Show all posts

Saturday, January 1, 2011

Linda Peterson - amazing stuff!

Wow!  15 minutes after the class is over and I'm done and posting my necklace.  Is this just amazing?


From her online class.  What a fantastic way to start 2011!!!


Take a closer look - that's a simple washer covered with modge podge and paper!  How cool is that?

So, you can order kits with everything you need in advance  I didn't.  My copper wire wasn't patina'd.  But I took my trusty little creme brulee torch and fired it up, giving it nearly the same look.  I sort of like the untorched copper next to the stuff that was torched!

Check out Craft Tech U  and Linda Peterson's blog!  and if you're on Facebook, be sure to "friend" both!

Now.....I'm in a creative mood!  What next?  LOL!

Thursday, April 23, 2009

Things to do with your Cuttlebug

Great flight to San Diego yesterday - I was stuck between a dad and a mom, each holding an 8 month old twin. My idea of a "wonderful" flight! LOLOL!!!

My last class in Poway is going to be a jam-packed technique class showing you some fun things you can dow in your Cuttlebug. This is my latest CTC (creative technique cards) class and bound to make your head spin! Here's preview (ok, some of these sandwiches even amazed me!!!)

Make your own stencil - give texture to any diecut

Make your own matching charms

Emboss a brass stencil with no lines from the outside of the stencil:

 
Cut a die inside a die in a single pass!!!  You will love this one!  I used the seedpacket die and the small nested bird for this one


Negative space inking vs inking:


Cuttlebug (open) folder embossing with brass stencils (or without)

Make your own dimensional foam stamp:


Mirror embossing (one die, both right and left are embossed)


Diecutting transparencies and airbrush painting


Watercolor painting on copper (my absolute favorite diecut technique!)

When I started experimenting with these techniques, I was delighted at how well they all work in the cuttlebug!  I've also got a sandwich for cutting sizzix 12" border dies in the cuttlebug and a couple of surprises for this class! 

Hope you will join me!  Just click here to get the class calendar.

Thursday, January 29, 2009

A huge thank you....

to Amaco for sponsoring the Butterfly contest at CHA 2009!!! My "Penance Art" piece won "Most Inspriational" and I couldn't be happier!!! How fun to create something so wonderful, and have it recognized.

I thought I'd share a couple more views of it here as well as what I wrote on the back of it.

The piece is done on an 8x10" piece of artist's canvas and then encased in a clear acrylic enclosure so that nothing get's dusty, knocked off, etc:


In my 8 nights of lights, I did a video showing how to get your Friendly Plastic thin enough to diecut using a Sizzix Originals die.  So lots of swirls were dicut and then fused to the canvas background.  While they are still warm, you can simply stick charms down into the plastic and they will adhere.


If you search my blog for copper watercolor painting, you can see how to paint the copper.  Yep, that top butterfly is copper!


I really like how Friendly Plastic will melt together when you layer one piece on top of another.  You can also move it around with a toothpick covered in vasoline (so the plastic doesn't stick to the toothpick!)


Here's a closeup of another diecut Butterfly using a Spellbinders die.  

The poem is just printed on glossy cardstock and then framed with strips of Friendly plastic melted together.


And here's what I wrote on the back of the piece:

When I visited the Children’s Holocaust Memorial in Jerusalem in 2005, I had no more entered into the museum, realized the magnitude of the children lost in the holocaust as represented by the 1.5 Million flickering lights suspended 360 degrees around me, and I fell to my knees, crippled with grief over this hideous crime. I have prayed daily since that moment for Israel and for Jewish children around the world . I am inspired to create pieces like this because they cannot. Even though I am not Jewish, I write poetry that moves me to remember that moment when I fully realized what a generation before me had done. I hunt butterflies in their honor, I sing and dance because they can’t. But most of all, I pray my work will cause you to pause and remember…..

never forget, never again.


Thanks Amaco!!!

Thursday, January 1, 2009

Happy Anniversary

Today is our wedding anniversary. A typical day in our lives - we woke up and Kerry had a bad cold and I said, "OK, I will NOT be kissing you today!!!" LOL!!!

Traditionally, we are supposed to give each other gifts of wool or copper this year. Hmmmm - I think I'll pick both!! We've been married for 7 years. I keep telling him I'm waiting for him to get the "seven year itch" and he keeps replying, "My arthritis is so bad I couldn't scratch a thing!" Oh, he does make me laugh!!!


Guess I'll keep him another year!!!

I used Amaco's copper and heat painted it. Then embossed it, then sanded off the embossed areas to bring the copper back to the candles and flames:


And then I knitted a tiny little rug out of wool - using copper tubes as I don't have tiny knitting needles. OK, I probably won't do this again....but it's perfect for this card. I left 1 copper tube in and twisted the ends to hold the knitting in place.


And I wrote the poem:

You've kept the candles burning bright
Thru thick and thin, both day and night

You give me hope, you bring me light
You are my love, my soul's delight!

Happy Anniversary


Who knew copper and wool could be so cool??

PS - He loved the card!!!

Wednesday, November 26, 2008

Opals on copper and transparencies

I'm starting to think you can just put opals on everything!!! First up - on transparency. Laserjet or inkjet, doesn't matter. Just lay it flat, rub a versamark pad over it, sprinkle on the opals, heat it with your heat tool. Them immediately, while still warm, run it thru your cuttlebug with an embossing folder. I put some fantasy film behind these just for fun - but excellent backgrounds!!!


That one was green and blue opals. The next one is blue and pearl (new) - love this combination!


Next experiment was copper. We ran a piece of copper thru a cuttlebug folder. Then ran the versamark over it and dusted on a pale mint green shade of opals. When you heat set that, it looks like an instant patina! Next, we ran a green stazon pad over it and heat set that, then fingerpainted stickles on top of all that. Pretty fun!


Do you have the latest cuttlebug embossing strips? For borders and envelopes, but we put one on copper, used green opals over it and then patina stickles - just too cool!!!


And for the last background, copper, red inks with black stazon on top of that and a mixture of stickles on top of that.


What amazing backgrounds we created with just opals, stickles, copper and/or transparencies. Are you starting to see how my brain operates? I just start with one product and then add another on top of that, add a 3rd or 4th product...just keep experimenting. The results last weekend were just incredible!

And check back as there's more to come!!!

Tuesday, November 18, 2008

Record highs today

it was 83 degrees here......and I believe it!!! A perfect day to work on the back deck experimenting with copper etching.

So, who says you need ferric chloride? Yes, it does a great job, but it was $35.00 for the bottle. Peroxide and Hydrochloric Acid mixed together will do the same thing. I did 3 plates today, 2 were done with FC and 1 with the other mix. See if you can tell the difference!

This first one was done using stamps from A Stamp of Excellence.


Tried to photo this so you could see how it etches away and leaves the inked portions the original thickness so they are raised or embossed on the copper


Using Lucy McGoo stamps from After Midnight Stamps:


And Lucy stamps with seashells from Pugnacious


Just so you know, with either method, you are working with extremely dangerous chemicals. Work outside only. Do not do this inside. And wear gloves and a mask at all times. Even when you are sanding. Use only real copper, not copper painted metal. Read all the labels and warnings on the products. Be careful! Don't even try this if there are kids around! You can see here how it will eat the edge of the copper away where I failed to ink the back good enough.


So, the next step is to patina these. I'm loving the colors on this one. We'll see how they turn out tomorrow.


I will be doing a lot more of these as there are so many different possibilities. I'd like to try the watercolor painting technique after etching.....and do an overnight etch and see if I could get the embossed detail thick enough to emboss into paper using the Wizard....endless possibilities.

Sunday, February 24, 2008

Reviewing the Scor-it

Well, I'm not so sure this is a legitimate review as I'm NOT going to use paper....I'm going to score copper! WOW!!

Not sure if you can see the black zip bag that comes with it. I truly love this! I am such a collector of bags, boxes, suitcases, trunks....it's just sad!


Here it is close up. I like that stop. It's moveable. And it's a great feature for repeat scores..which we'll discuss in an upcoming blog.


This little tool makes very nice deep scores in copper. You need that if you are planning to fold copper.
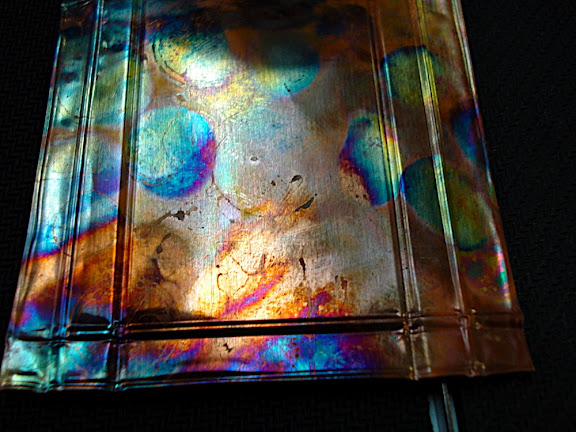


Just place the copper over the center metal strip, and press the tool down into it.
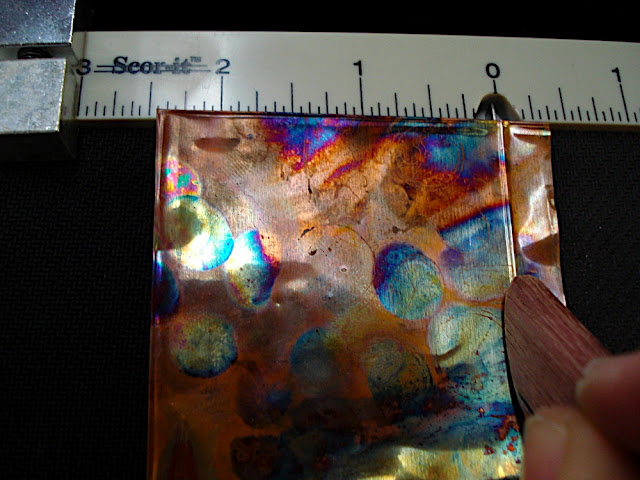


I scored this on the front and the back
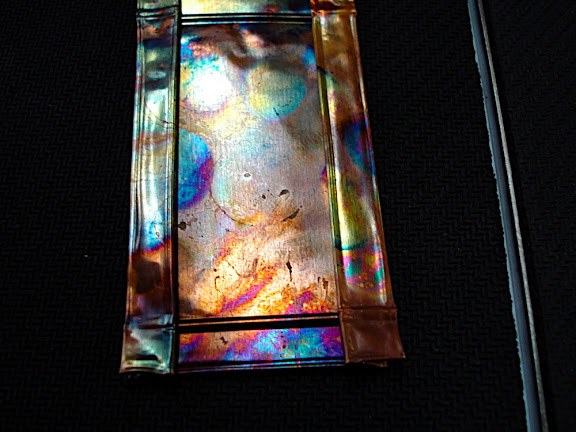


and then folded it in, out and back to make a frame. So all one single piece of copper. By the way, this is a scrap from one of my demos where I show students how to flame paint copper. Just love this stuff...but needed to figure out something fun to do with all my scraps!


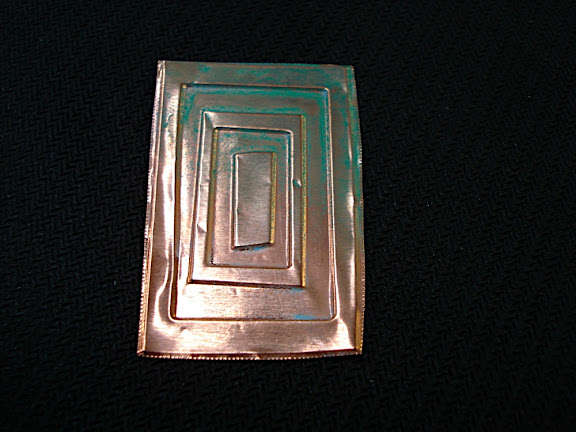
Next, I embossed copper in a cuttlebug folder and cut it out. Then chalked it with my colorbox queues. Just for fun!


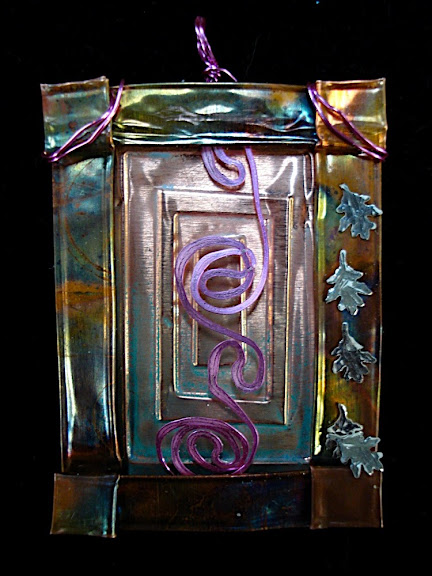
Yesterday, I did hammered wire on stones and added silver. Today, I decided to do hammered wire on these pieces and then I decided to switch from brass to colored wire to bring out the colors from the painted copper. Note the tiny little diecut leaves down the side...that's .999 fine silver!


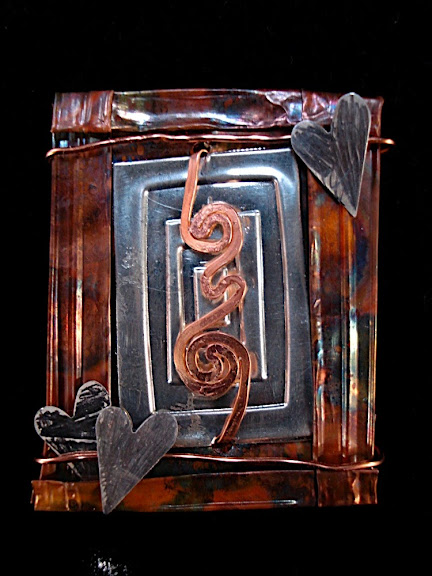
So, of course, I had to do another piece. This one has some Amaco pewter in the background and silver hearts.


And then because I was playing with different colored wires, I decided to see what silver wire looked like on stone with a diecut flower.


I do think I'm going to have to talk to Kerry.....he is going to have to start taking me out more so I have somewhere to wear all this gorgeous jewelry! LOL!!!

So...if you have heard about the Scor-it and were wondering if you should get one...my recommendation is that there are more ways to play with it than you can imagine! It's not just for scoring paper....it's for scoring anything you want! If it will score through copper, it will score leather, fabric, chipboard.....the possibilities are endless!

You know....I love it when I can enable my artistic pals! I'd have to say...just buy it!

Wednesday, February 13, 2008

Keepsake Embossing Boards

More pre-CHA play from this week! I was fortunate enough to get to play with some embossing boards from the Glitter girls. Fun stuff! Now, usually, I think these boards are used by cardmakers and they asked me to try using them on layouts. I did have a bit of fun. This first one used the Romance Board. Their website has all kinds of videos that show you how to use the boards. You simply emboss the design into the paper and if you want, you can cut the designs out and adhere them to the paper.


I've used Scrapperdashery paper for these projects. For this second layout, I used the Bookatrix board. I also have used Amaco's copper.


In this corner (no, this is not boxing! LOL!) I embossed the flowers and cut them out. Yes, you can emboss and cut them out in copper as well. I used my copper flame painting technique on the flowers.

My friend, Sherri Burrisk, was here on Wednesday, and she made all the elements using polyshrink and gave me an ok to use them on this LO for CHA. I will have to do another blog showing how to create these fun, dimensional elements for a page.


I titled this LO "Past Fall" and the journaling reads, "12 little girls, long past fall, born in the early 1900, only one, Aunt Dorothy, the baby in this photo is still living. The seasons of life....Spring, Summer, Fall and Winter. I think I like Fall best. It's wiser than summer and more agile than winter. And the leaves are so pretty and there is time to notice them."


You can see in the next scan that I've embossed the leaves into the background paper, highlighted them with distress ink, and then embossed them into copper, cut them out, heat painted them and adhered them to the top of the layout.


And here are 2 more of Sherri's gorgeous elements created with polyshrink! I just love it when the collaboration of 2 artists comes together to make a fun project! Again, If you are attending CHA, you can see this up close in the Glitter Girls booth!


I think one of these days I should have a play day with all my creative friends....we should just make as many fun things as we can, toss them all out into the center of the table and see what we can come up with as an end project.....I know it would be great! But for today, if you haven't tried an embossing board....give it a try....sort of fun, even on a layout!

Monday, January 28, 2008

Creative Jewelry from diecuts

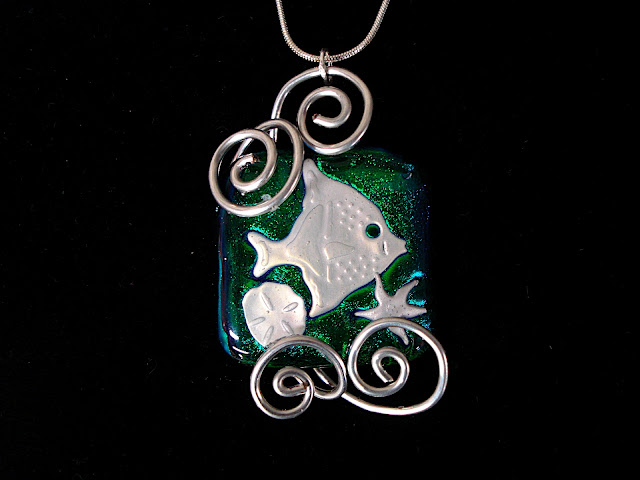
I often think I limit what I do because there are just moments when I cannot think outside the box! I've had this piece of glass sitting on my table for weeks (ok...months!) This is paper type Art Clay Silver, diecut and embossed using a Spellbinders Style Die. I fired the silver over a layer of dichroic glass and under clear glass. Yeah, they still tell me this can't be done without getting a silver stain...but I'm getting less and less stain and none in this piece!

So there it sat....and I couldn't figure out what to do with it. Then it hit me...make a "cage" for it from swirled wires. I've been sitting here all day makine several of these, some in sterling silver that I've soldered together, others in cheap wire...and you can barely tell the difference!


The glass in this piece was sort of an experiment as I wanted to see if I could fire multiple pieces of silver on the same piece of glass. So thrilled that it worked! Just need to perfect my firing times a bit...have another batch in the kiln as I type this!

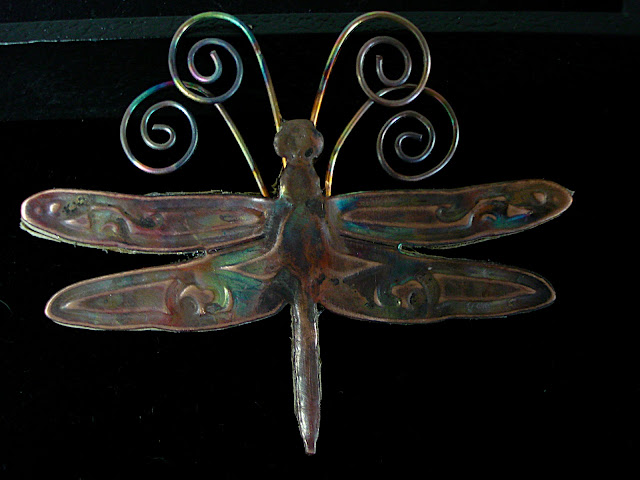
Awhile back, I did a tutorial on copper flame painting. I decided to make a pen out of the dragon fly and give it some swirls. I think it turned out just fine!


When I first used my Wizard in December, 2004, I never in my wildest dreams thought I might one day be using it with metal clay and flame painted copper to make such lovely pieces. Thinking outside the box. Look where it took me!