
I did quench most of these in water, but none in ice water. I will be doing more experiments using a bigger torch (just bought one at ACE) and using more oils and lotions to experiment with. I think that's the key...just play!
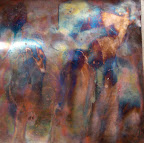
Circles made by taking the torch in and out from the copper and dipping in water between layers of color:

Inked a Paper Artsy rubber stamp with Mr. Clean Blue, stamped the copper, then heated it, then dipped in water.

This was done by spritzing with Mr Clean blue while holding the copper perpendicular during heat. As the solution runs off you get these lovely streaks....
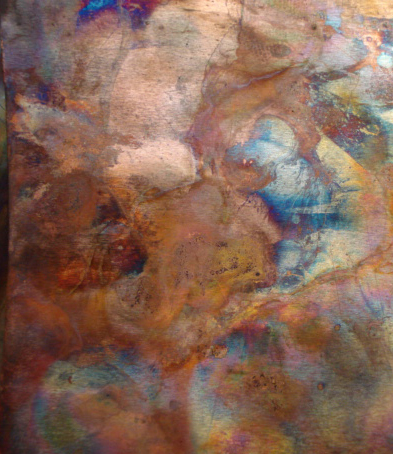
For this piece, I heated the copper, dipped it in water, spritzed with Mr. Clean, heat, dip, spritz...just keep repeating til you get something you like.
Just a variation of the same technique
this is with kitty litter:

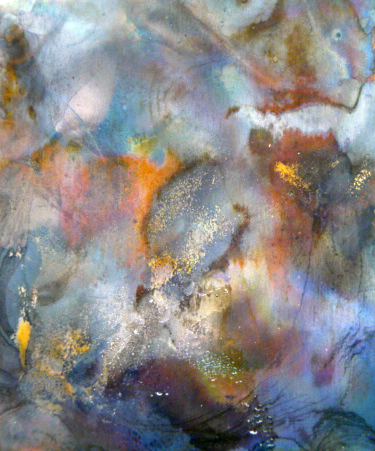
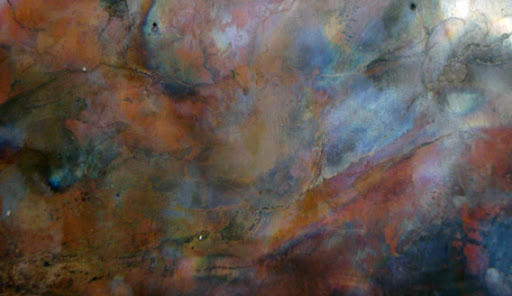
and yet another example of repeat dipping with Mr. Clean. I think we used Liver of Sulpher here as well.

After 4 or 5 dips, the Mr. Clean starts to form black lines....now this is what I call watercolor painting! But rather than a brush, it's done with a torch!
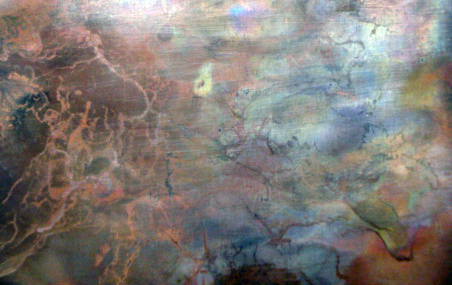
And this one..just lovely...I like it almost the best!
Want to know more? Well...stay tuned for the book! I have loads more experiments to do first. But painting copper with a torch....what fun!
Basic things to consider:
1. Dipping in ice cold water is not essential to get great colors. But dipping in something that is cooler than the temp of the hot copper gets amazing results.
2. Never follow the "rules" that someone else writes (including me!) Just do your own thing, play, and have some fun with it!
3. Since you are working with a torch, KNOW where the fire extinguisher is! LOL!!
4. Make sure you have a burn kit in your first aid kit.
5. Work over a firing brick, or outside on a day with no wind - don't want to be burning down your neighbor's house either!
6. Cooking oils will burn off. Fish oils will leave a pattern. Other oils...just play with them and see what you get!
7. Stamps give great background designs for this technique.
Now, I'm sure I've forgotten something. I'll keep you posted as I experiment and play! I want to try ammonia and salt, potato chips and water, sawdust and vinegar! LOLOL!
Ahhh....retirement! It sure is great!!!
14 comments:
So So Cool! I have to try this.
quick question-what do you use to protect the copper from the natural patina evolution after "flame painting"? everything i have used seems to dull/cloudy the amazing colors that were acheived during the process
Spary it with Krylon sealer. I use that on my metal clay that I patina and it works just fine.
will the Krylon sealer protect the copper..I am trying to retain the natural copper color, I do not want a patina. Also will the Krylon sealer retain the colors acheived during the flame painting process or will the color be altered by the sealer? If yes, can you recommend anything else? Thanks for your time..the coper art looks great
Krylon Workable Fixitive. Did not change my colors. Do not know if it would patina over time. It's the only product I use....because so far, I've been very happy with it. Hope that helps!
What's this "Mr. Clean blue" that you used above? Is it an ink or cleaning product??
I love the results you got from using it...
Can you update how the Krylon sealer worked and if the pieces have shown a patina overtime? If so, can you recommend another product that will keep the original copper color and not patina overtime
Also I have read a lot about Oil painting on copper-do you know anything about acrylic painting on copper and the techniques used/ Can't seem to find anything! Love to hear updated info about your techniques! Thanks
I just looked at the pieces and can't really see any change in them at all.
I have found another product I like - Creative Imaginations Super Seal. It is great! Hasn't been long enough since I used it, but I have to say I am loving the product as a protective sealer on metal.
I have used acrylic paints on copper and other metals. The key is to sand the metal first. Then apply the paint. There's an article on this in the current issue of Cloth Paper Scissors. But know that if you bend the metal, the paint will come off, so you need to either sand really well, or keep the piece stationary. Hope that helps!
Jen thanks for all the updated info it is a big help! Have you considered posting a video of your technique for the copper flame painting? That would be very educational to see you in action! Thanks a bunch- Salute
I hope to do a video as soon as it gets warm enough - I need to be outside to do this in order to show the vibrance in the colors. We had 16" of snow on Friday - so it will be a couple more weeks at the earliest - it's on my "to do" list!
I did not want to sand and "scratch" the copper because I am trying to keep the original copper look where it will show through the acrylic paint-will the super seal help it to stay on the copper? I guess I may have to mount the copper with liquid nails on wood to keep it stable? Any other suggestions appreciated!
Try spraying it with Krylon's preservative Fixative spray. Or Super Seal. Either should work.
I would use E6000 to mount it to wood. It will take a little bit to dry....but it's not going to come off!
Hi Jen,
I just stumbled across this thread and was wondering if you could give an update on the results of using Krylon's spray for protecting the flamed colors on copper. Otherwise, is there a better product that you have found?
Thank you!
Lori
Lori, the pieces still look the same, no change in patina over time. However, the Creative Impressions product is not longer available as that company closed, so I would stick with the Krylon product.
Post a Comment