Showing posts with label flame painting. Show all posts

Saturday, January 1, 2011

Linda Peterson - amazing stuff!

Wow!  15 minutes after the class is over and I'm done and posting my necklace.  Is this just amazing?


From her online class.  What a fantastic way to start 2011!!!


Take a closer look - that's a simple washer covered with modge podge and paper!  How cool is that?

So, you can order kits with everything you need in advance  I didn't.  My copper wire wasn't patina'd.  But I took my trusty little creme brulee torch and fired it up, giving it nearly the same look.  I sort of like the untorched copper next to the stuff that was torched!

Check out Craft Tech U  and Linda Peterson's blog!  and if you're on Facebook, be sure to "friend" both!

Now.....I'm in a creative mood!  What next?  LOL!

Sunday, February 24, 2008

Reviewing the Scor-it

Well, I'm not so sure this is a legitimate review as I'm NOT going to use paper....I'm going to score copper! WOW!!

Not sure if you can see the black zip bag that comes with it. I truly love this! I am such a collector of bags, boxes, suitcases, trunks....it's just sad!


Here it is close up. I like that stop. It's moveable. And it's a great feature for repeat scores..which we'll discuss in an upcoming blog.


This little tool makes very nice deep scores in copper. You need that if you are planning to fold copper.


Just place the copper over the center metal strip, and press the tool down into it.


I scored this on the front and the back


and then folded it in, out and back to make a frame. So all one single piece of copper. By the way, this is a scrap from one of my demos where I show students how to flame paint copper. Just love this stuff...but needed to figure out something fun to do with all my scraps!


Next, I embossed copper in a cuttlebug folder and cut it out. Then chalked it with my colorbox queues. Just for fun!


Yesterday, I did hammered wire on stones and added silver. Today, I decided to do hammered wire on these pieces and then I decided to switch from brass to colored wire to bring out the colors from the painted copper. Note the tiny little diecut leaves down the side...that's .999 fine silver!


So, of course, I had to do another piece. This one has some Amaco pewter in the background and silver hearts.


And then because I was playing with different colored wires, I decided to see what silver wire looked like on stone with a diecut flower.


I do think I'm going to have to talk to Kerry.....he is going to have to start taking me out more so I have somewhere to wear all this gorgeous jewelry! LOL!!!

So...if you have heard about the Scor-it and were wondering if you should get one...my recommendation is that there are more ways to play with it than you can imagine! It's not just for scoring paper....it's for scoring anything you want! If it will score through copper, it will score leather, fabric, chipboard.....the possibilities are endless!

You know....I love it when I can enable my artistic pals! I'd have to say...just buy it!

Wednesday, February 13, 2008

Keepsake Embossing Boards

More pre-CHA play from this week! I was fortunate enough to get to play with some embossing boards from the Glitter girls. Fun stuff! Now, usually, I think these boards are used by cardmakers and they asked me to try using them on layouts. I did have a bit of fun. This first one used the Romance Board. Their website has all kinds of videos that show you how to use the boards. You simply emboss the design into the paper and if you want, you can cut the designs out and adhere them to the paper.


I've used Scrapperdashery paper for these projects. For this second layout, I used the Bookatrix board. I also have used Amaco's copper.


In this corner (no, this is not boxing! LOL!) I embossed the flowers and cut them out. Yes, you can emboss and cut them out in copper as well. I used my copper flame painting technique on the flowers.

My friend, Sherri Burrisk, was here on Wednesday, and she made all the elements using polyshrink and gave me an ok to use them on this LO for CHA. I will have to do another blog showing how to create these fun, dimensional elements for a page.


I titled this LO "Past Fall" and the journaling reads, "12 little girls, long past fall, born in the early 1900, only one, Aunt Dorothy, the baby in this photo is still living. The seasons of life....Spring, Summer, Fall and Winter. I think I like Fall best. It's wiser than summer and more agile than winter. And the leaves are so pretty and there is time to notice them."


You can see in the next scan that I've embossed the leaves into the background paper, highlighted them with distress ink, and then embossed them into copper, cut them out, heat painted them and adhered them to the top of the layout.


And here are 2 more of Sherri's gorgeous elements created with polyshrink! I just love it when the collaboration of 2 artists comes together to make a fun project! Again, If you are attending CHA, you can see this up close in the Glitter Girls booth!


I think one of these days I should have a play day with all my creative friends....we should just make as many fun things as we can, toss them all out into the center of the table and see what we can come up with as an end project.....I know it would be great! But for today, if you haven't tried an embossing board....give it a try....sort of fun, even on a layout!

Monday, January 28, 2008

Creative Jewelry from diecuts

I often think I limit what I do because there are just moments when I cannot think outside the box! I've had this piece of glass sitting on my table for weeks (ok...months!) This is paper type Art Clay Silver, diecut and embossed using a Spellbinders Style Die. I fired the silver over a layer of dichroic glass and under clear glass. Yeah, they still tell me this can't be done without getting a silver stain...but I'm getting less and less stain and none in this piece!

So there it sat....and I couldn't figure out what to do with it. Then it hit me...make a "cage" for it from swirled wires. I've been sitting here all day makine several of these, some in sterling silver that I've soldered together, others in cheap wire...and you can barely tell the difference!


The glass in this piece was sort of an experiment as I wanted to see if I could fire multiple pieces of silver on the same piece of glass. So thrilled that it worked! Just need to perfect my firing times a bit...have another batch in the kiln as I type this!

Awhile back, I did a tutorial on copper flame painting. I decided to make a pen out of the dragon fly and give it some swirls. I think it turned out just fine!


When I first used my Wizard in December, 2004, I never in my wildest dreams thought I might one day be using it with metal clay and flame painted copper to make such lovely pieces. Thinking outside the box. Look where it took me!

Monday, November 26, 2007

Copper flame painting

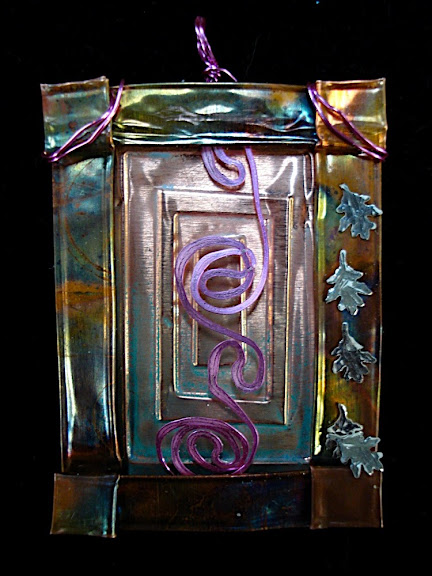
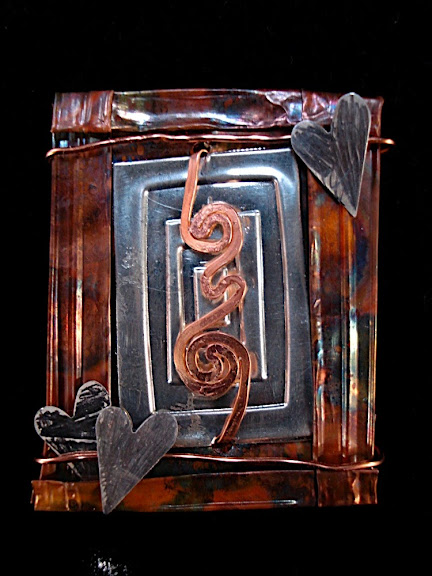
Well, I may have a new hobby! LOL! And I will probably burn down this house! But oh! What fun! These were all done using a small kitchen torch and Amaco's light weight and medium weight copper.

I did quench most of these in water, but none in ice water. I will be doing more experiments using a bigger torch (just bought one at ACE) and using more oils and lotions to experiment with. I think that's the key...just play!

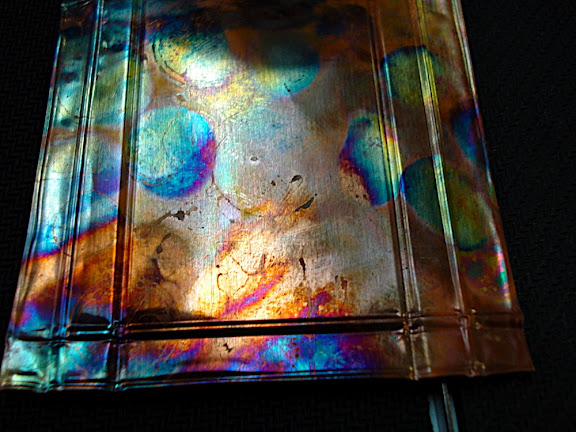
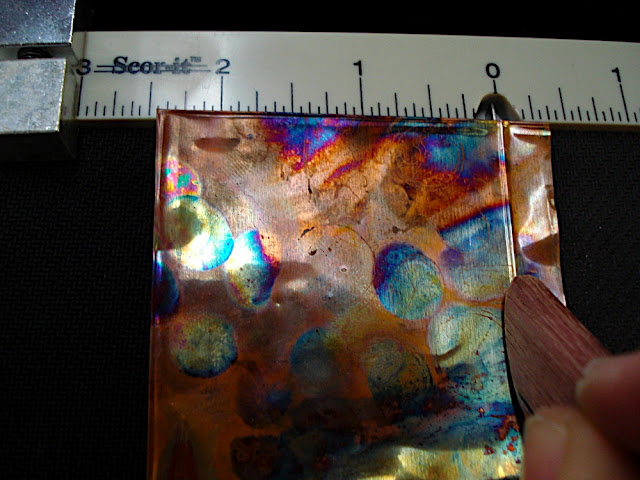
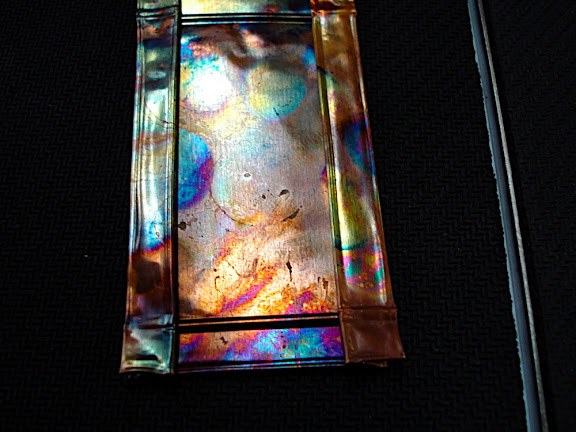
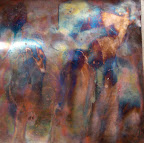
Circles made by taking the torch in and out from the copper and dipping in water between layers of color:


Inked a Paper Artsy rubber stamp with Mr. Clean Blue, stamped the copper, then heated it, then dipped in water.


This was done by spritzing with Mr Clean blue while holding the copper perpendicular during heat. As the solution runs off you get these lovely streaks....


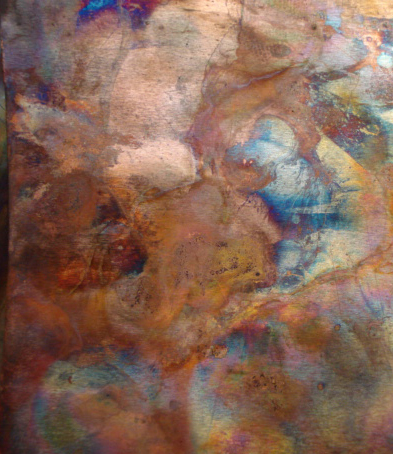
For this piece, I heated the copper, dipped it in water, spritzed with Mr. Clean, heat, dip, spritz...just keep repeating til you get something you like.


Just a variation of the same technique


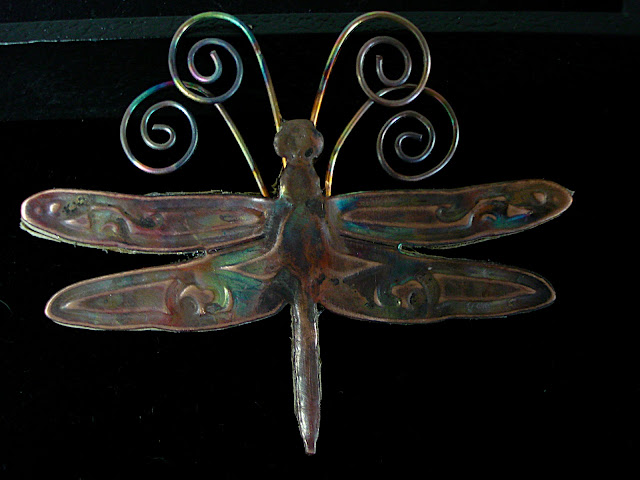
this is with kitty litter:


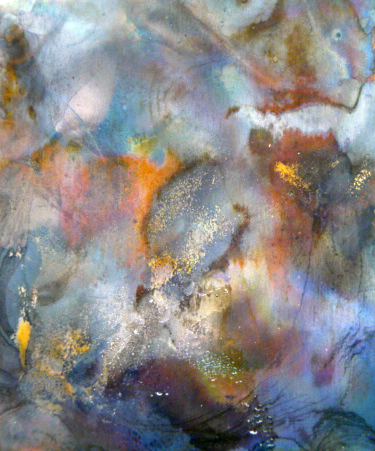
and yet another example of repeat dipping with Mr. Clean. I think we used Liver of Sulpher here as well.


After 4 or 5 dips, the Mr. Clean starts to form black lines....now this is what I call watercolor painting! But rather than a brush, it's done with a torch!


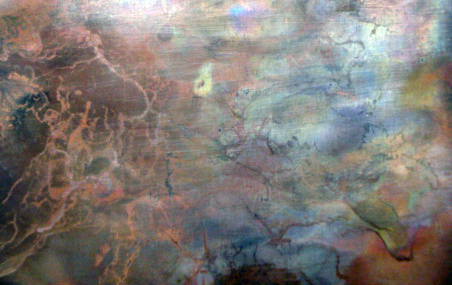
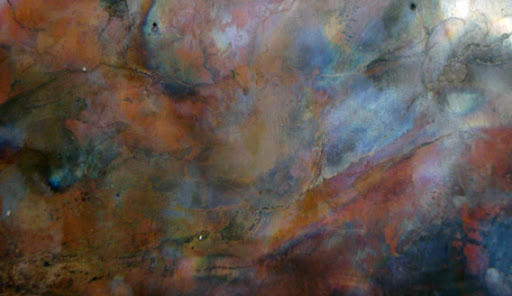
And this one..just lovely...I like it almost the best!


Want to know more? Well...stay tuned for the book! I have loads more experiments to do first. But painting copper with a torch....what fun!

Basic things to consider:
1. Dipping in ice cold water is not essential to get great colors. But dipping in something that is cooler than the temp of the hot copper gets amazing results.
2. Never follow the "rules" that someone else writes (including me!) Just do your own thing, play, and have some fun with it!
3. Since you are working with a torch, KNOW where the fire extinguisher is! LOL!!
4. Make sure you have a burn kit in your first aid kit.
5. Work over a firing brick, or outside on a day with no wind - don't want to be burning down your neighbor's house either!
6. Cooking oils will burn off. Fish oils will leave a pattern. Other oils...just play with them and see what you get!
7. Stamps give great background designs for this technique.

Now, I'm sure I've forgotten something. I'll keep you posted as I experiment and play! I want to try ammonia and salt, potato chips and water, sawdust and vinegar! LOLOL!

Ahhh....retirement! It sure is great!!!

Thursday, November 22, 2007

Flame painting

One of the ways I continue to develop as an artist is to take classes, learn new techniques and then experiment with that technique to see what I can do with it. I used to think that when you heated copper past the color change to gray, you were done with it. Can't tell you how many pieces I've thrown in the trash over the years! Not any more!

This is "flame painting" on copper, using a torch, LOS, Mr Clean, water, etc. to give brilliant colors. I think the more you heat and dip, spritz and dip, experiment and play, the better it turns out.


These butterflies are the same dies I posted yesterday where I used paper and chalk. Today, I diecut and embossed them in copper, then flame painted them. I plan to purchase a "real" torch this week just to see what I can come up with. For these I just used a little kitchen torch. But it still gave me some brilliant colors and when I overlaid these on the cards I did yesterday, they are truly magnificant!

I think a flame painting instructional video is in the near future...I just need to figure out the mechanics of how to do that. In the meantime, I will work on more samples.

I had my first of 5 soldering classes last night where we used a large propane torch that had to be lit with a cigarette lighter. Being a non-smoker....I couldn't get the cigarette lighter to light! Pretty funny! But at least I am starting to get over my fear of torches, propane and lighters. We finished 2 sterling silver rings last night and the teacher said my joints were just fine. I'm anxious for next week. Once I learn how to solder silver...my next step will be to tackle soldering copper. I can see these butterflies soldered into lovely rings and swirls and then turned into pendants. I can hardly wait to learn so I can play even more!

But flame painting? Who ever thought I would one day turn to a torch to paint! Maybe I will eventually get around to painting on paper, but for now, this is a bit fun!