Showing posts with label techniques. Show all posts

Thursday, April 23, 2009

Things to do with your Cuttlebug

Great flight to San Diego yesterday - I was stuck between a dad and a mom, each holding an 8 month old twin. My idea of a "wonderful" flight! LOLOL!!!

My last class in Poway is going to be a jam-packed technique class showing you some fun things you can dow in your Cuttlebug. This is my latest CTC (creative technique cards) class and bound to make your head spin! Here's preview (ok, some of these sandwiches even amazed me!!!)

Make your own stencil - give texture to any diecut

Make your own matching charms

Emboss a brass stencil with no lines from the outside of the stencil:

 
Cut a die inside a die in a single pass!!!  You will love this one!  I used the seedpacket die and the small nested bird for this one


Negative space inking vs inking:


Cuttlebug (open) folder embossing with brass stencils (or without)

Make your own dimensional foam stamp:


Mirror embossing (one die, both right and left are embossed)


Diecutting transparencies and airbrush painting


Watercolor painting on copper (my absolute favorite diecut technique!)

When I started experimenting with these techniques, I was delighted at how well they all work in the cuttlebug!  I've also got a sandwich for cutting sizzix 12" border dies in the cuttlebug and a couple of surprises for this class! 

Hope you will join me!  Just click here to get the class calendar.

Friday, July 4, 2008

San Diego class schedule

Liz has it posted on her website - I'm teaching TWENTY THREE classes in 8 days!!! And most of them are just $10.00 each - what a deal!!!

Schedule of classes in San Diego

She didn't get the "ad" up yet, but here's the overall class description:

Here's your chance to learn ALL 75 techniques that Ranger taught their design team! Learn cool ways to use alcohol inks, colorwash, pigment inks, UTEE, perfect pearls, distress ink and embossing powders! JLo is coming back to San Diego to teach the first series including 43 techniques. She'll be back later this year to teach even more using embossing powders, accents, pigment inks and dabbers

JLo attended Ranger University and is a certified educator for them in ink and embossing powder. Then she was selected for their design team in 2007 and learned even more. You will go home with completed samples that have the instructions on the back so you never need to forget what you learned in these fantastic classes.

Complete all 6 classes and attend a free class where JLo will show you her "secret" techniques that she came up with using Ranger products including how to make faux mica, how to make faux dichoric glass and more!!!


and if you click HERE, you can see the slide show of all 43 techniques I'm teaching in San Diego! I am going to come home and need to rest for a month! LOL!

If you live in southern California, come say "hi"! I'll be at Scrapbook Your Life! from July 19 - 27. It's going to be so much fun!!!

For my regular readers, this is just and extra post on the classes - I'll post Jason's shadowbox next!

Monday, June 30, 2008

Creative Technique Cards!!!


Click on any card and it will take you to my picasa album and there is a tag# and title below the technique! There's a total of 43 techniques and I'll be teaching them in a series of 6 classes in San Diego the end of July. Each class is only $10.00!!! So pick and choose based on what you like. But if you take all 6 - there's a bonus surprise - just keep reading!

I already have almost 40 more tecniques that we'll teach in September.

If you can't find the 7Gypsies ATC rounder, punch, etc, just email me as I can order it and ship it to you! Post a comment here and you'll get 10% off your order! LOL!

OK - class descriptions:

Alcohol Inks (Tags 1 - 7) One of my all time favorite mediums - there's so many fun things to do with these inks! Polished stones is just a great way to cover up mistakes, to give something old a new look, or to just play! Learn how to use alcohol inks on metal foil, acrylic, glass, acetate and more. Learn how to mix other products with alcohol inks. The alcohol ink resist is the same technique I blogged about here.

Colorwash (Tags 8 - 13) It never ceases to amaze me the vibrant, brilliant combinations you can get when using colorwash. Whether its a background, on mulberry paper, on glossy photo paper...it all looks great! Come play with this medium and just see how you can liven up a layout, alter the look of a diecut, make your silk flowers "pop" and so much more! Plan to get a little ink on you, so wear old clothes!

Adirondack Inks (Tags 14 - 19) This is really a true technique class because you will learn how to use simple ink pads with other mediums and tools. This is a chance to learn a whole lot about ink pads, markers, the different types of inks and more. We will even be doing a little watercolor painting! Oh, trust me - it's all just fun!!!

Melt Art (Tags 20 - 27) So many of you have told me that you have a melting pot, but don't know what to do with it! Here's your chance to learn! We will be playing with UTEE, To Dye For, BeesWax, Flex, stamps, and more! You will even learn how to do the underwater transfer trick! This is a packed class, so come ready to play!

Perfect Pearls (Tags 28 - 35) Another action packed class where you will learn how to make faux leather, faux metal, and we'll do some watercolor painting and make some gorgeous glimmery backgrounds. Just one of my very favorite products and I think you will find it has more uses than you ever imagined!

Distress Inks (Tags 36 - 43) Well, just in case you thought you knew all there was to know about distress inks, come and spend a couple of hours with me! A little spritz & flick? or burnt edges? No, I promise, we won't be lighting matches! But I will even show you how to tint old black & white photos with distress inks. And a bonus in this class - I'll show you how to make your own masks using your Revolution (or other diecut system) and your Xyron! Guaranteed laughter!!!

If you take all 6 classes, then you are invited to come take my bonus class. So far, I'm up to six techniques that I've come up with using Ranger products that I know you will find fun and entertaining! But I'm keeping them a surprise until after I get home from San Diego!

All classes have the same supply list:

Scissors
Tape runner
Glue Stick
Ruler
Apron
Grungy clothes!
pencil/pen

But I know how you all are, you always want to bring your entire studio to the store! I'll get a supplemental supply list up in a few days. In the meantime, Liz will get these classes posted this Wednesday and you can call in and sign up! Just click on her store at the top of my blog!

Monday, June 23, 2008

Make your own mica!!!

OK, I think you will love this technique! Faux mica! I'll post the photo first, then all the instructions for the different kinds of mica that I've come up with. Just click on the photo and it should open in a separate window so you can have the photo up as you read through the techniques


Faux mica:

1. Cut pieces of laser transparency into the shapes of mica
2. Place 1 drop each of Ranger’s Sepia, Crackle and Glossy accents on the mica
a. Finger paint or paint it with a brush across the surface, blending all three drops
b. Works best if you leave a faint design horizontally across the transparency
c. Bubbles are great…makes it look like faux vintage glass!
d. Let dry
3. Flip transparency over and apply Ranger Latte Alcohol ink on the other side.

The end result is a piece that looks very much like mica…and a whole lot cheaper! See “A” in the photo.

Mica Opals:

Using the above technique, instead of latte AI, use a polished stones technique and apply color to one side.

1. Place in heated level melting pot (just place the lid under the top of the pot and it will be level)
2. Let heat just a few seconds and place a small piece of frozen opals (After Midnight Stamps) on the piece.
3. Let melt, remove from pot

Gorgeous enough to wrap and wear as a pendant…or you can stamp on this, too! See “B” in the photo.

Faux Mica Opal Pendants:

Photographs just do not show the glimmer and shine you can get from this technique. For these pendants, I just used 2 pieces of faux mica. Did the technique above then placed a piece of Faux mica over the piece of Mica Opals. Either wrap wire around them, or edge with Ranger Memory tape and then wrap with wire (Amaco Fun Wire). Photos “C”.

And for photo “D”, I simply did the above and sandwiched in between 2 pieces of Memory glass in a Memory frame.

©2006 JenLoweDesigns

Monday, May 19, 2008

SBYL! Technique classes

I'm going back to San Diego in July and will be teaching a series of technique classes. So I've decided to post my "teasers" here. I'll share a little...but if you want to learn it all...fly on out and join us for a couple of weeks of sheer fun!!!

Guess I'd best figure out the dates real soon, huh?

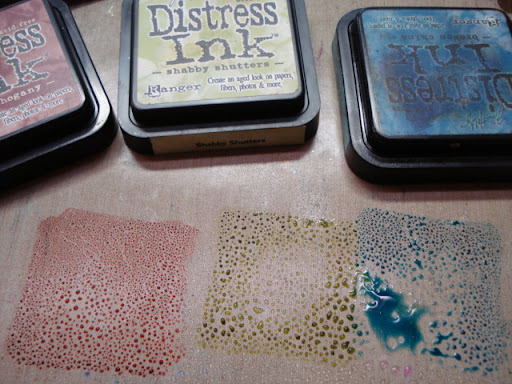
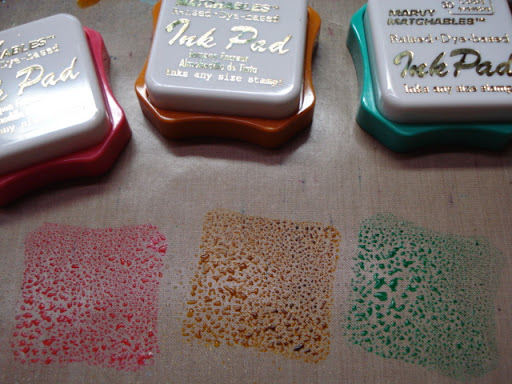
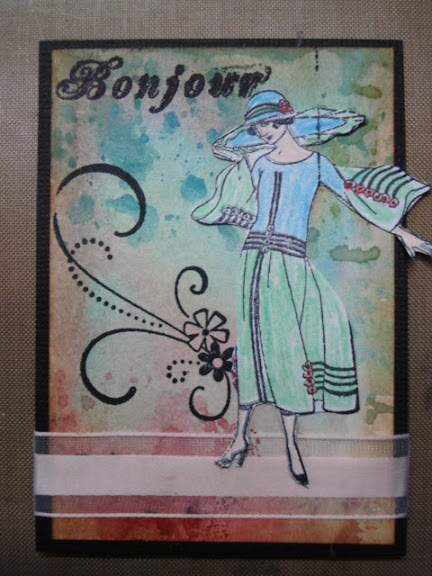
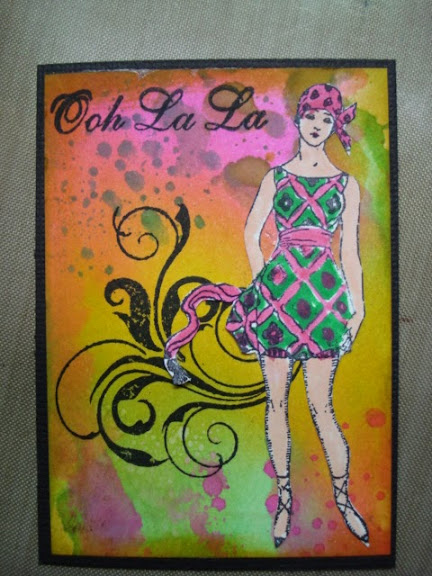
Ink and spritz transfer. Stamp the ink pad direct to a craft sheet or wax paper. Spritz water onto the ink. I did this with distress ink first:


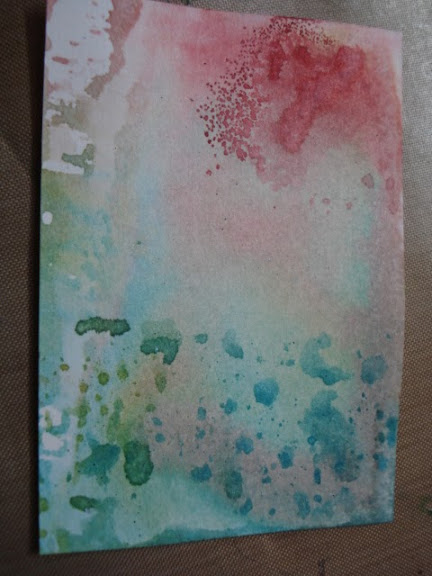
Drag the card through the water/ink mix, dry, drag again or blot. Do this as often as you like to get layers.


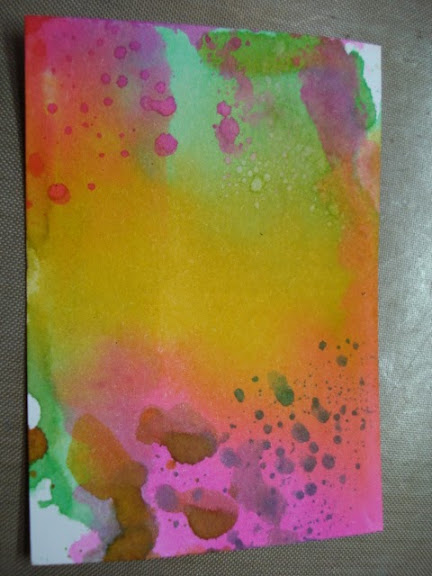
I'm using white paper for these. Try different shades of paper for different looks! Here I'm using Marvy inks. You can try this with any ink...just have fun!


Look at the vibrant colors I got here.


My final card with distress inks:


and my final card with Marvy inks:


These are ATC sized cards. I used B-Line, MSE and SU stamps on these.

I need to come up with a name for these classes. Here's what I have so far:

TTCs - technique trading cards - but you probably wouldn't want to "trade" these!
CTCs - creative technique cards - but what if some are not so "creative"?
DTCs - designer technique cards - but they really aren't "designer" either!
ITCs - imagineered technique cards
JTCs - JLo's technique cards
LTCs - Linjeneered technique cards - but then I gotta get Lindy Lou to help me out!!!
STCs - scramping technique cards - but I think someone might think they are sexually transmitted! LOLOL!

OK....got any other ideas? What title would lure you into a class? These are all going to be techniques that you can use with backgrounds, cardmaking, rubber stamping, scrapbooking....just ways to help you use the products you already have. Each class will teach several techniques using the same product....and then the we'll move on to different products. I'll use at least 2 brands of each product when I can. I think it's going to be fun!