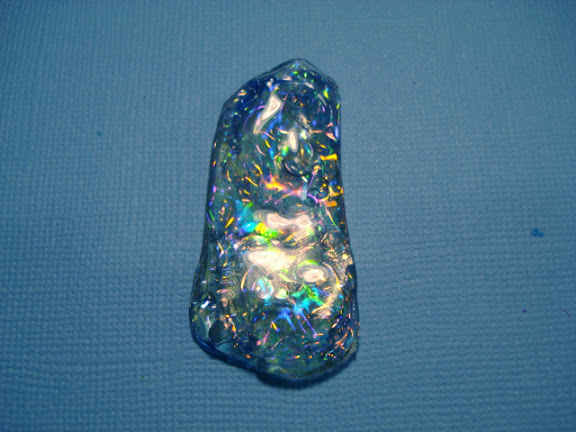
This is a make-n-take I designed for After Midnight Stamps. Totally fun and just so quick and easy to do!
Youtube link
AFter watching the video, I decided we don't need closeup photos. Hope you have fun with this one!!!

Showing posts with label After Midgnight Stamps. Show all posts
Showing posts with label After Midgnight Stamps. Show all posts
Friday, January 30, 2009
Wednesday, December 24, 2008
Eight Nights of Light - Night 4
The 4th night is about sharing food traditions, recipes, and enjoying time together.
Have you ever had a latke? Do you prefer traditional, sweet potato, apple, zucchini or cheese? Have you ever tried Sufganiyot?(it's a jelly doughnut without the hole!) When I started looking at food served during Hanukkah, I have to wonder if there aren't Jewish roots somewhere in my family tree? Aunt Marilyn always made the very best braided bread - is that Challah? Spaetzlis - the same ingredients for Grandma Myrtle's egg noodles! And yes, Grandma Moore made potato pancakes - so she made latkes all year long!

Most cooking traditions are handed down from one generation to the next. A holiday favorite of mine was always a jelly roll - we would roll out thin slices of cake, layer it with jelly, roll it up and slice it. How close is that to Sufganiyot?

Tonight, I'm taking a tutorial that Linda Hanson did on the After Midnight Ranch blog and adding another ingredient to come up with something just a little different - putting my spin on her technique. And I just have to wonder if the same thing doesn't happen in the kitchen? Grandma's potato pancakes could well have been latkes a few generations back. And my other Grandma's egg noodles - were they once Spaetzlis?
On this 4th night of lights - may you have have good food - both the kind that feeds your body....and the kind of "food" that feeds your soul.
Have you ever had a latke? Do you prefer traditional, sweet potato, apple, zucchini or cheese? Have you ever tried Sufganiyot?(it's a jelly doughnut without the hole!) When I started looking at food served during Hanukkah, I have to wonder if there aren't Jewish roots somewhere in my family tree? Aunt Marilyn always made the very best braided bread - is that Challah? Spaetzlis - the same ingredients for Grandma Myrtle's egg noodles! And yes, Grandma Moore made potato pancakes - so she made latkes all year long!
Most cooking traditions are handed down from one generation to the next. A holiday favorite of mine was always a jelly roll - we would roll out thin slices of cake, layer it with jelly, roll it up and slice it. How close is that to Sufganiyot?
Tonight, I'm taking a tutorial that Linda Hanson did on the After Midnight Ranch blog and adding another ingredient to come up with something just a little different - putting my spin on her technique. And I just have to wonder if the same thing doesn't happen in the kitchen? Grandma's potato pancakes could well have been latkes a few generations back. And my other Grandma's egg noodles - were they once Spaetzlis?
On this 4th night of lights - may you have have good food - both the kind that feeds your body....and the kind of "food" that feeds your soul.
Tuesday, December 23, 2008
Eight Nights of Lights - Night 3
When I was a little girl in Sunday School, we sang this song:
This little light of mine, I'm going to let it shine, this little light of mine, I'm going to let it shine, let it shine, let it shine, let it shine. And it went on verse after verse after verse. Shine til Jesus comes again. Shine all over Perkinsville. ...we just made them up and sang it forever!

My blog has become my little light and while it may not shine all over....I hope it brings a little light into your night. Now, light can be fun stuff, education, wisdom, quirky sayings....it can mean all kinds of things. I hope if nothing else, you find my comments interesting and/or entertaining!

Tradition states that the first 2 nights of Hanukkah are important celebrations, but tonight the festivities become quieter and you spend time with immediate family, keeping the focus on tradition. I've just spent the past 2 days with mom - quiet and peaceful. Moments filled sharing memories and making new ones.

I gave up the hustle and bustle of this holiday season a few years back. And I absolutely love it! Because now I have the luxury of time....time to share this fun tutorial with you!!!
You can purchase black hot glue at After Midnight Stamps. Click here for Accent Scrapbooking's website.The snowflake blossoms are from Creative Impressions - another Colorado company. Swarovsky crystals are from Creative Crystal. And all my backgrounds are done with Ranger products. Credit for much of this technique goes to my good friend, Sherri Burrisk. I just "altered" it a bit! Who would have thought that a little alcohol ink or powdered mica would make hot glue embellishments this cool?
Tonight, may you find peace and joy with your family. May your little light shine a little brighter this 3rd night of lights!
This little light of mine, I'm going to let it shine, this little light of mine, I'm going to let it shine, let it shine, let it shine, let it shine. And it went on verse after verse after verse. Shine til Jesus comes again. Shine all over Perkinsville. ...we just made them up and sang it forever!
My blog has become my little light and while it may not shine all over....I hope it brings a little light into your night. Now, light can be fun stuff, education, wisdom, quirky sayings....it can mean all kinds of things. I hope if nothing else, you find my comments interesting and/or entertaining!
Tradition states that the first 2 nights of Hanukkah are important celebrations, but tonight the festivities become quieter and you spend time with immediate family, keeping the focus on tradition. I've just spent the past 2 days with mom - quiet and peaceful. Moments filled sharing memories and making new ones.
I gave up the hustle and bustle of this holiday season a few years back. And I absolutely love it! Because now I have the luxury of time....time to share this fun tutorial with you!!!
You can purchase black hot glue at After Midnight Stamps. Click here for Accent Scrapbooking's website.The snowflake blossoms are from Creative Impressions - another Colorado company. Swarovsky crystals are from Creative Crystal. And all my backgrounds are done with Ranger products. Credit for much of this technique goes to my good friend, Sherri Burrisk. I just "altered" it a bit! Who would have thought that a little alcohol ink or powdered mica would make hot glue embellishments this cool?
Tonight, may you find peace and joy with your family. May your little light shine a little brighter this 3rd night of lights!
Friday, December 19, 2008
New videos showing "Nesting Nestabilities"
Way back in March, I did a tutorial on Nesting Nestabilities. And now, Linda (After Midnight Stamps) has done a great video of the technique - so I thought I'd add it here, or you can check out the After Midnight Ranch blog to see more great videos and techniques.
This was a fun design that we did in Linda's booth in San Diego. It uses the circle nestabilities, Lucy McGoo Stamps and Wonder Goo....just a few more of "my favorite things"!!!
Now, Linda.....are you going to do a video showing the "other" flower design? I know! I know! I really must get this video thing figured out!!!
Wednesday, December 17, 2008
These are a few of my favorite things.....
When the dog bites
First up - Opals And I'm giving you the links so you can order all of these products. You might not get them in time for the first night....but you will have them fast!!!
So, yes, you can use UTEE - but it's not the same. Opals are more pearlized (i.e. think Australian opals - the gemstone). And my fav colors are Wild Hibiscus (hot pink), Alpine Heath (mint green) and Macquarie (turquoise) with Franklin (clear) and Abalone (pearl).

Black hot glue sticks
Fantasy Film My fav shades are Aurora, Watermelon, and Satin. But then I really love them all!!!

Snowflake stamps (oh! I hope these links work!!!)
A hot glue gun - I like Aileen or Black & Decker best. And transparent (transluscent) glue sticks. Hot or cool, doesn't matter.
A Milwaukee heat tool - or something that really heats fast. Or you can use a Ranger heat it tool - and just take your time! LOL!
A Melting Pot, non-stick craft sheet, alcohol inks, distress inks......
Radiant Rain Daubers
time.
Yes - time to play. Time to be creative. Time to make fun things!!! And of course, I will be telling you how to substitute product where I can. Like you can use your double broiler from the kitchen instead of a melting pot. It just takes a lot longer. But then, one of my favorite things is "time"!!!
How did time pass so fast? This was Christmas c 1963 - all 5 of us kids and 3 cousins.

When the bee stings
When I'm feeling sad.....
I simply remember
my favorite things...
and then I don't feel so bad!!!!
OK, now that you have that little song going around in your head for the rest of the day.....here are a few of my favorite things that you are going to need for 8 Nights of Lights....starting in just 4 days!
And no....I'm not ready at all!!! LOL!!!
First up - Opals And I'm giving you the links so you can order all of these products. You might not get them in time for the first night....but you will have them fast!!!
So, yes, you can use UTEE - but it's not the same. Opals are more pearlized (i.e. think Australian opals - the gemstone). And my fav colors are Wild Hibiscus (hot pink), Alpine Heath (mint green) and Macquarie (turquoise) with Franklin (clear) and Abalone (pearl).

Black hot glue sticks
Fantasy Film My fav shades are Aurora, Watermelon, and Satin. But then I really love them all!!!

Snowflake stamps (oh! I hope these links work!!!)
A hot glue gun - I like Aileen or Black & Decker best. And transparent (transluscent) glue sticks. Hot or cool, doesn't matter.
A Milwaukee heat tool - or something that really heats fast. Or you can use a Ranger heat it tool - and just take your time! LOL!
A Melting Pot, non-stick craft sheet, alcohol inks, distress inks......
Radiant Rain Daubers
time.
Yes - time to play. Time to be creative. Time to make fun things!!! And of course, I will be telling you how to substitute product where I can. Like you can use your double broiler from the kitchen instead of a melting pot. It just takes a lot longer. But then, one of my favorite things is "time"!!!
How did time pass so fast? This was Christmas c 1963 - all 5 of us kids and 3 cousins.

Sunday, December 14, 2008
Radiant rain on a frozen winter's day
 It's ZERO degrees here today with about 4" of fresh powder. A complete frozen tundra out there....so it's time for a little radiant rain in my life - Radiant Rain Daubers that is. Have you played with these? Available from After Midnight Stamps
They come in 2 fl oz bottles, are totally liquid as in watercolor paints, and go on with a very nice shimmer.

Take the lid off and gently tap until color comes onto your non-stick craft sheet:

Put down 3 colors and try not to overlap them - but it's ok if you do!

Put a piece of glossy cardstock glossy side down into the paint:

Turn it 1 time, about 45 degrees to the left of where you started:

Lift up, turn over and blot one time with a flat paper towel. I prefer VIVA paper towels as they are smooth - no pattern, and really absorb all the excess paint with only a single pat.
Here's the look I got first time!

It you have white areas, just swipe that area of the card back into the paint. These make great backgrounds! To finish off this project, I tapped my snowflake stamp into paint I put on the craft sheet then stamped it onto the background. Then I took 2 images and stamped them with black ink and used Crystal Stickles over the black ink. Comes out almost holographic.
You really need to try this technique to see just how much the Radiant Rain shimmers on the background - it's like Twinkling H2Os....just a whole lot faster and easier! For the final step, I went around the edges with the tip of the dauber.
I do hope you're having fun on this cold wintery day!!!
Monday, December 8, 2008
Queen of Flakes
Some days, I just sit here and crack up! "Queen of Flakes" - ok, that's SNOW flakes - not me! LOLOL!

I started doing Tim's tag today....but I think I got totally side swiped! I don't do Christmas, and I didn't have any grungeboard that I liked, so I decided to use acrylic crowns to start with. From Accent Scrapbooking - great local Colorado Company! (If nothing else, I LOVE Colorado companies!!!)
I think the crackle distress paint turned out fine on acrylic. For the top one, I used a very light coat of antique linen crackle paint and put cranberry alcohol ink over it. For the bottom one, I used Aged Mahogany Crackle Paint with copper alcohol ink over it. I decided I liked the bottom one best.

This is one of my fav things to do....put a bunch of stamps on the same block. Using After Midnight snowflakes here, really small because remember, this is just an ATC sized card.

Keep in mind that they will stamp in "reverse"

I actually ended up covering the entire card with snowflakes.

I didn't have a sentiment stamp that I liked, so I used a versamark pen and wrote my title, then used Queen's Gold embossing poswer on it. It just didn't pop enough, so I outlined it with a black sharpie pen. All of the snowflakes are from Creative Impressions in Colorado Springs.
I used a water brush and painted Stickles on the stamped snowflakes (be sure to stick the brush in water right after you finish this one!) and I used Stickles to embellish the crown. Oh, and I did get a rubon in the background - but it's almost completely covered up.
So I think I did all the steps Tim did....but it sure looks different! I have so much stuff I just can't see going out and buying what he uses....so I'll just keep on making modifications and play with what I have! Learning how to alter someone elses instructions just makes it all the more fun to play!!!
I started doing Tim's tag today....but I think I got totally side swiped! I don't do Christmas, and I didn't have any grungeboard that I liked, so I decided to use acrylic crowns to start with. From Accent Scrapbooking - great local Colorado Company! (If nothing else, I LOVE Colorado companies!!!)
I think the crackle distress paint turned out fine on acrylic. For the top one, I used a very light coat of antique linen crackle paint and put cranberry alcohol ink over it. For the bottom one, I used Aged Mahogany Crackle Paint with copper alcohol ink over it. I decided I liked the bottom one best.
This is one of my fav things to do....put a bunch of stamps on the same block. Using After Midnight snowflakes here, really small because remember, this is just an ATC sized card.
Keep in mind that they will stamp in "reverse"
I actually ended up covering the entire card with snowflakes.
I didn't have a sentiment stamp that I liked, so I used a versamark pen and wrote my title, then used Queen's Gold embossing poswer on it. It just didn't pop enough, so I outlined it with a black sharpie pen. All of the snowflakes are from Creative Impressions in Colorado Springs.
I used a water brush and painted Stickles on the stamped snowflakes (be sure to stick the brush in water right after you finish this one!) and I used Stickles to embellish the crown. Oh, and I did get a rubon in the background - but it's almost completely covered up.
So I think I did all the steps Tim did....but it sure looks different! I have so much stuff I just can't see going out and buying what he uses....so I'll just keep on making modifications and play with what I have! Learning how to alter someone elses instructions just makes it all the more fun to play!!!
Sunday, December 7, 2008
Brrrr......
So, the older I get, the less I like Colorado weather. It is just too cold. Yesterday, bitter wet winds that just blew right through you. Today, I was out working on the jacuzzi. Tomorrow - bitter cold and more snow. I WANT FLORIDA!!! Or Phoenix! Or San Diego.....Brazil....you know, anywhere where I can get warm and stay that way.
OK, without hot summers! LOLOL!
In the meantime, I played along with Tim again today and here's my version.

BUT....here's what I did differently:
Instead of using white crackle paint for the snowman (which I made from 3 circle dies - so easy!) - I painted my chipboard white, then spread crackle accents on it with my finger, then heated that When you heat crackle, it bubbles up and really makes such a cool texture! Then I painted white acrylic paint over that. A completely different look!
I used stickles for the arms and hats. For the eyes, I just used a sharpie pen and then put dots of glossy accents on top of that.
And finally, I made my snow mixing Franklin & Abalone Opals with Diamond Dust and Glossy Accents. Put that all down and then drizzled glossy accents over it.I wanted the look of melting snow...since you just never know what the weather is going to be like around here!
And the snowflakes stamped on the background are from After Midnight Stamps.
Sorry, I didn't have grungeboard, or white UTEE or....or....or....so I just reinvented the wheel using what I had. And since I'm doing mine all on ATCs....I have to downsize as well! Have to admit...I LOVE the snow!
OK, without hot summers! LOLOL!
In the meantime, I played along with Tim again today and here's my version.
BUT....here's what I did differently:
Instead of using white crackle paint for the snowman (which I made from 3 circle dies - so easy!) - I painted my chipboard white, then spread crackle accents on it with my finger, then heated that When you heat crackle, it bubbles up and really makes such a cool texture! Then I painted white acrylic paint over that. A completely different look!
I used stickles for the arms and hats. For the eyes, I just used a sharpie pen and then put dots of glossy accents on top of that.
And finally, I made my snow mixing Franklin & Abalone Opals with Diamond Dust and Glossy Accents. Put that all down and then drizzled glossy accents over it.I wanted the look of melting snow...since you just never know what the weather is going to be like around here!
And the snowflakes stamped on the background are from After Midnight Stamps.
Sorry, I didn't have grungeboard, or white UTEE or....or....or....so I just reinvented the wheel using what I had. And since I'm doing mine all on ATCs....I have to downsize as well! Have to admit...I LOVE the snow!
Wednesday, November 26, 2008
Opals on copper and transparencies
I'm starting to think you can just put opals on everything!!! First up - on transparency. Laserjet or inkjet, doesn't matter. Just lay it flat, rub a versamark pad over it, sprinkle on the opals, heat it with your heat tool. Them immediately, while still warm, run it thru your cuttlebug with an embossing folder. I put some fantasy film behind these just for fun - but excellent backgrounds!!!

That one was green and blue opals. The next one is blue and pearl (new) - love this combination!

Next experiment was copper. We ran a piece of copper thru a cuttlebug folder. Then ran the versamark over it and dusted on a pale mint green shade of opals. When you heat set that, it looks like an instant patina! Next, we ran a green stazon pad over it and heat set that, then fingerpainted stickles on top of all that. Pretty fun!

Do you have the latest cuttlebug embossing strips? For borders and envelopes, but we put one on copper, used green opals over it and then patina stickles - just too cool!!!

And for the last background, copper, red inks with black stazon on top of that and a mixture of stickles on top of that.

What amazing backgrounds we created with just opals, stickles, copper and/or transparencies. Are you starting to see how my brain operates? I just start with one product and then add another on top of that, add a 3rd or 4th product...just keep experimenting. The results last weekend were just incredible!
And check back as there's more to come!!!
That one was green and blue opals. The next one is blue and pearl (new) - love this combination!
Next experiment was copper. We ran a piece of copper thru a cuttlebug folder. Then ran the versamark over it and dusted on a pale mint green shade of opals. When you heat set that, it looks like an instant patina! Next, we ran a green stazon pad over it and heat set that, then fingerpainted stickles on top of all that. Pretty fun!
Do you have the latest cuttlebug embossing strips? For borders and envelopes, but we put one on copper, used green opals over it and then patina stickles - just too cool!!!
And for the last background, copper, red inks with black stazon on top of that and a mixture of stickles on top of that.
What amazing backgrounds we created with just opals, stickles, copper and/or transparencies. Are you starting to see how my brain operates? I just start with one product and then add another on top of that, add a 3rd or 4th product...just keep experimenting. The results last weekend were just incredible!
And check back as there's more to come!!!
Tuesday, November 25, 2008
Opal swirls on seaglass
OK, I LOVE opals!!! What fun to just experiment and play with them. Here are just a few of the pendants we made over the weekend. Want some jewelry?


For this one, we melted leftover opals, stickles glitter and pieces of fantasy film in the melting pot. poured it onto seaglass and drizzled stickles on the edges. Pretty cool!

The stickles will boil up and create dimension in the opals. We added swarovsky crystals to this. The "red" spot on the upper right is some fantasy film that bubbled to the top.
For this one, we spooned 3 colors of Opals on top of seaglass, then used a skewer to make the designs
Just 2 shades of Opals, skewer design, swarovsky crystal. I do really like this one!
This is the same technique, except we went back over the top and just sprinkled opals of a different color over the base color:
Then we decided to just play in the melting pot. Threw in "stuff" and then scooped it out on top of sea glass. Sort of fun to see what you can do with what you have!
This was leftover opals - just a lot of colors blended togther.
Orange, purple and blue. NOT colors that I would pick, but I do like how they turned out.
If you work quickly with the skewer, you can actually plan out the design you want to make like above. This is one of those things where you get addicted in about 2 seconds and can make piece after piece.....all day long.
How many pendants can you make in a day? I need to find some smaller pieces of sea glass and make some earrings to go with a necklace!!!
Oh! It's fun to play!!!
Sunday, November 23, 2008
Opals in ornaments
What a fantastic day today was! More playing with products from After Midnight stamps and Linda!!!
We played with so many things, but tonight, I'm going to share ornaments. What fun! This is a 3 part process. For the first part, spoon opals inside the ornament. Then add some Diamond Dust. Swirl it around. Then apply heat with a heat tool from the outside as you move the ornament around. It will adhere to the glass as the glass starts to heat up. (OK, some of these ornaments are heavy duty plastic and that works fine, too.)

Swipe some versamark on the outside and apply opals to that. Embed swarovsky crystals. You can see the depth and dimension in this shot:

For this next one, I wanted the look of melting ice on the top. I think I got it! I did the colors inside and then mixed Franklin opals with Diamond dust and carefully heated it as I move the ornament around on the top. It really is gorgeous as it totally glitters from the Diamond Dust.

Got a great shot here. When I dumped out the excess, it looks just like "rock candy" that we bought as kids.

And here's the back - just as great!

My brain is on complete overload tonight from all the different things we did today. We have laughed and played and experimented until I think my brain might explode! It has been so much fun! Linda flies home tomorrow and I will truly be sad to see her go, but check back - I've got several more things to share in the next few days.
These ornaments came from our local Hobby Lobby store - I'm sure you can find them at any craft store.
And you can purchase the Opals direct from After Midnight Stamps - but you can email me and buy them thru me as well. No minimum order - just go to their website, pick out what you want and let me know! They are beyond fun to work with! You won't be disappointed!
We played with so many things, but tonight, I'm going to share ornaments. What fun! This is a 3 part process. For the first part, spoon opals inside the ornament. Then add some Diamond Dust. Swirl it around. Then apply heat with a heat tool from the outside as you move the ornament around. It will adhere to the glass as the glass starts to heat up. (OK, some of these ornaments are heavy duty plastic and that works fine, too.)
Swipe some versamark on the outside and apply opals to that. Embed swarovsky crystals. You can see the depth and dimension in this shot:
For this next one, I wanted the look of melting ice on the top. I think I got it! I did the colors inside and then mixed Franklin opals with Diamond dust and carefully heated it as I move the ornament around on the top. It really is gorgeous as it totally glitters from the Diamond Dust.
Got a great shot here. When I dumped out the excess, it looks just like "rock candy" that we bought as kids.
And here's the back - just as great!
My brain is on complete overload tonight from all the different things we did today. We have laughed and played and experimented until I think my brain might explode! It has been so much fun! Linda flies home tomorrow and I will truly be sad to see her go, but check back - I've got several more things to share in the next few days.
These ornaments came from our local Hobby Lobby store - I'm sure you can find them at any craft store.
And you can purchase the Opals direct from After Midnight Stamps - but you can email me and buy them thru me as well. No minimum order - just go to their website, pick out what you want and let me know! They are beyond fun to work with! You won't be disappointed!
Saturday, November 22, 2008
Fantasy film day
What an amazing day! So much fun to sit and play with artists! Linda showed us what to do with leftover scraps of fantasy film. Just sprinkle a little opals over them, place them between 2 non-stick craft sheets and iron them.

what a gorgeous patchwork quilt!

that you can even diecut......

We did some copper watercolor painting, diecutting, made some opals pendants, quilted on copper, mixed opals with other products, poured it into molds that Linda gave away! Jane gave away stamps and Marcia gave away beeswax. Kelly and I shared our latest scarves. It was truly a totally fun day.

And I got so busy playing that I forgot to take photos! I promise I'll try to do better tomorrow!
what a gorgeous patchwork quilt!
that you can even diecut......
We did some copper watercolor painting, diecutting, made some opals pendants, quilted on copper, mixed opals with other products, poured it into molds that Linda gave away! Jane gave away stamps and Marcia gave away beeswax. Kelly and I shared our latest scarves. It was truly a totally fun day.
And I got so busy playing that I forgot to take photos! I promise I'll try to do better tomorrow!
Huge thanks to everyone who came over today - it was great!
Friday, November 21, 2008
Making dichroic glass
Linda and I are just having way too much fun!!! Tonight - a new way to make dichroic glass. No sea glass! All we used was Franklin Opals and Fantasy film. Fabulous stuff!
And then we put silver foil around the edges and wrapped wire around it.
 The wire holds the "stone" in place and also acts as the bale to hang it on a pendant.

And then we put silver foil around the edges and wrapped wire around it.
The wire holds the "stone" in place and also acts as the bale to hang it on a pendant.If this is the beginning of our weekend.....I can hardly wait to play some more.
Now, this is not the only thing we came up with tonight - we got to play for about 3 hours. We stopped at Album Memories this afternoon and did a "little" shopping!!! I'm going to space the photos over the next few blogs so you can take in what we are doing. Eventually, I'll put up a tutorial for this technique - but I have to say, it truly does look like dichroic glass - and you only need Franklin Opals and Fantasy film to create this fabulous piece!!!
You can purchase both thru After Midnight Stamps!
Tuesday, November 18, 2008
Record highs today
it was 83 degrees here......and I believe it!!! A perfect day to work on the back deck experimenting with copper etching.

Tried to photo this so you could see how it etches away and leaves the inked portions the original thickness so they are raised or embossed on the copper

Using Lucy McGoo stamps from After Midnight Stamps:

And Lucy stamps with seashells from Pugnacious

Just so you know, with either method, you are working with extremely dangerous chemicals. Work outside only. Do not do this inside. And wear gloves and a mask at all times. Even when you are sanding. Use only real copper, not copper painted metal. Read all the labels and warnings on the products. Be careful! Don't even try this if there are kids around! You can see here how it will eat the edge of the copper away where I failed to ink the back good enough.

So, the next step is to patina these. I'm loving the colors on this one. We'll see how they turn out tomorrow.

I will be doing a lot more of these as there are so many different possibilities. I'd like to try the watercolor painting technique after etching.....and do an overnight etch and see if I could get the embossed detail thick enough to emboss into paper using the Wizard....endless possibilities.
So, who says you need ferric chloride? Yes, it does a great job, but it was $35.00 for the bottle. Peroxide and Hydrochloric Acid mixed together will do the same thing. I did 3 plates today, 2 were done with FC and 1 with the other mix. See if you can tell the difference!
This first one was done using stamps from A Stamp of Excellence.
Tried to photo this so you could see how it etches away and leaves the inked portions the original thickness so they are raised or embossed on the copper
Using Lucy McGoo stamps from After Midnight Stamps:
And Lucy stamps with seashells from Pugnacious
Just so you know, with either method, you are working with extremely dangerous chemicals. Work outside only. Do not do this inside. And wear gloves and a mask at all times. Even when you are sanding. Use only real copper, not copper painted metal. Read all the labels and warnings on the products. Be careful! Don't even try this if there are kids around! You can see here how it will eat the edge of the copper away where I failed to ink the back good enough.
So, the next step is to patina these. I'm loving the colors on this one. We'll see how they turn out tomorrow.
I will be doing a lot more of these as there are so many different possibilities. I'd like to try the watercolor painting technique after etching.....and do an overnight etch and see if I could get the embossed detail thick enough to emboss into paper using the Wizard....endless possibilities.
Subscribe to:
Posts (Atom)