Showing posts with label B-LIne. Show all posts

Thursday, February 5, 2009

Inspired by B-Line Designs

Sometimes, the size of a stamp just isn't right. Or perhaps you only need elements of the stamp. So, I took the huge flourish stamp from B-Line, turned it upside down, and looked at it as I sketched the flourish onto some watercolor paper around the star of david. I added olive leaves to the flourish. Painted entirely with twinkling H2Os.


and then double matted and framed:


I gave this as a gift to our friends who were here from Ft Lauderdale.....but from the scan, I made prints and cards for mom.

Not too bad for my 4th watercolor painting, huh? And what a great use for stamps....use the design to inspire other art!

Friday, January 23, 2009

Lucy McGoo video tutorials

Well, I just thought you might like to see our introduction video....it's worth a few good laughs!!!


Youtube link

OK, we do tend to have a little too much fun when we get together. Imagine what life was like before she moved to Texas!!! We were always in our labora-torrey experimenting!

And we totally forgot to say our little logo poem:

Lucy McGoo is the child in you...she wants to play every day!!!


I guess we are both really getting old because we didn't even mention our TWO diecut manuals that we have available to download for only $2.00 each!!!

Lucy McGoo's Unofficial Wizard Manual

Lucy McGoo's Technique Academy


You can purchase Wonder Goo and/or our Lucy McGoo stamps direct from me, or at After Midnight stamps. Their link for Wonder Goo is here, and the link for our stamps is here.

And we can't thank Susan enough for helping out with our fun videos this week! Susan is a designer for B-Line Designs!

So sit back and stay tuned as there will be a video a day for the next few days! We hope you enjoy them and that you learn a little as we have been having so much fun putting them together just for you!

PS...if you think this video is funny, you ought to see the parts I cut out!!!

Saturday, January 17, 2009

BLine Designs

BLine Designs have some awesome stamps to be sure.....and I'm still NOT a cardmaker! LOLOL! But I did make up some quick samples for them this week. I used brown paper in my crimper for the background, stamped on dictionary paper, popped the sentiment on top. Cut out a little heart from one of their border stamps and added a brass heart in the corner.


So, take a second look....can you see the word "truly" in the heart?  Just too cute!


And just because a stamp says something....doesn't mean you have to stick with what it says!!!


You can always cut off part of a sentiment and add another one to it!!!


I didn't get all the stamps photographed, but I used this one for the heart on the music paper.  Cut up the sentiments.  And then over on the ribbon (where I cut slits in the paper) I made a slider out of another one of BLine's hearts.


Now take a look at what I've done with that original sentiment.  Totally cut up the word and completely changed the meaning!!!  LOL!  OK, I know that's not the intent of the stamp....but I just wanted to show that you don't always have to follow the rules!


Those 4 ladies are a very nice background stamp from BLine.  I used twinkling H2o's and the flowers are a scrap of diecut paper from Samantha Walker, Creative Imagainations, that I painted with twinking H2o's and then scattered gold embossing paper over parts of it.  When you look at this card, it really has a lot of shimmer to it!

Same thing with this next card.  I used the grunge heart and cut it out and cut the inside out.  Then I used my majic matter on copper gloss cardstock to make the background heart following the inside and outside edges.  This one really shines!


Next up is this adorable little cupid guy:


The white is a diecut piece of glitter paper using one of the Revolution 12" flourishes....I just cut that in parts. Used colored pencils to give my little cupid some color. A totally quick card!!!

and a block of sentiments:


Susan is always going "I love that card" or "this is wonderful!!!"  So I challenged myself to do something she wouldn't like!  LOLOL!!!


OK, that pink is totally HOT pink!  with pale pink, brown and black.  Using the sentiment block above and the 2 stamps below and a little bit of craft knife cutting.


Susan will be blogging the rest of the cards that the other gals made and they will all soon be posted on BLine's gallery.  Be sure to check it out!!!


Feel free to look at their catalogs - you can order their stamps from me!!!

Saturday, November 8, 2008

Alcohol ink - outside the box - final

With the backgrounds already done, it took about 20 minutes to make these 4 quick cards using stamps, markers and scraps of paper.


Mostly simple little cards


Inkadinkadoo, B Line Designs, and this one is just a printed sentiment:


And I have enough backgrounds still left to make up 20 more cards.  Such fun - alcohol inks!!

Thursday, November 6, 2008

Alcohol ink - outside the box - part 2

Continuing the tutorial on alcohol inks.....you can stamp on them:


or like this:


Run them through a cuttlebug folder and add some stickles glitter:


Highlight the embossed detail of a cuttlebug folder with black ink and then white pen work:


Or use white pen without the black ink pad:


Use a gold pen to highlight specific parts like 2, 4, 6, 8......and you know this one is going to get turned into a card that says "who do we appreciate?"


OK, that's just a few more ideas to play with.  Come back tomorrow for even more.  Isn't it amazing what you can do just layering a few products?  And here's another tip, try blowing on the alcohol inks as you apply it.  Will give you a totally different look!  First time I did that, Kerry came running into the room to see what all the huffing and puffing was all about!  He has since learned to just ignore most of the sounds coming from my studio!  LOL!

Sunday, October 19, 2008

B Line Designs

They have a new website design and you really need to go take a look around!

Yep, I'm on an "enabling" kick!!!

They've started a blog!

And you can download ALL of their catalogs (YEAH!)

Shall I just say "Happy shopping!!!!!"???

And do you think the enabling will end here???

I've been enabling ever since I was a little girl - in one way or another!

Monday, May 19, 2008

SBYL! Technique classes

I'm going back to San Diego in July and will be teaching a series of technique classes. So I've decided to post my "teasers" here. I'll share a little...but if you want to learn it all...fly on out and join us for a couple of weeks of sheer fun!!!

Guess I'd best figure out the dates real soon, huh?

Ink and spritz transfer. Stamp the ink pad direct to a craft sheet or wax paper. Spritz water onto the ink. I did this with distress ink first:
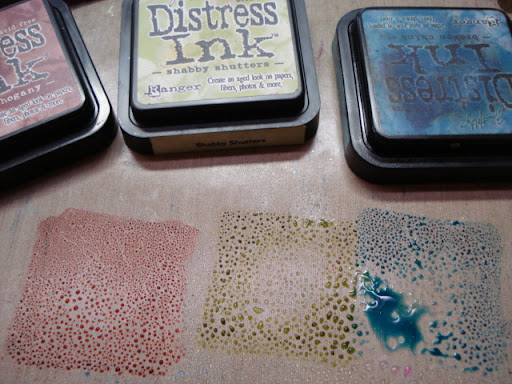


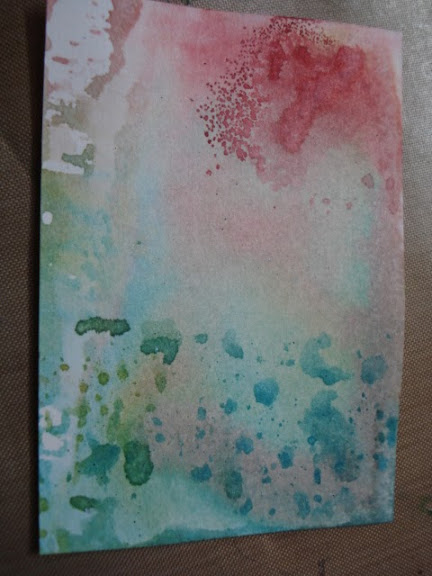
Drag the card through the water/ink mix, dry, drag again or blot. Do this as often as you like to get layers.


I'm using white paper for these. Try different shades of paper for different looks! Here I'm using Marvy inks. You can try this with any ink...just have fun!
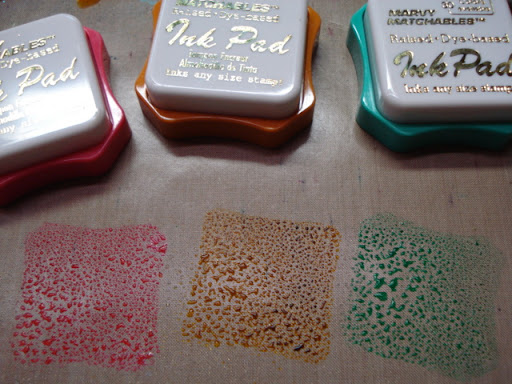


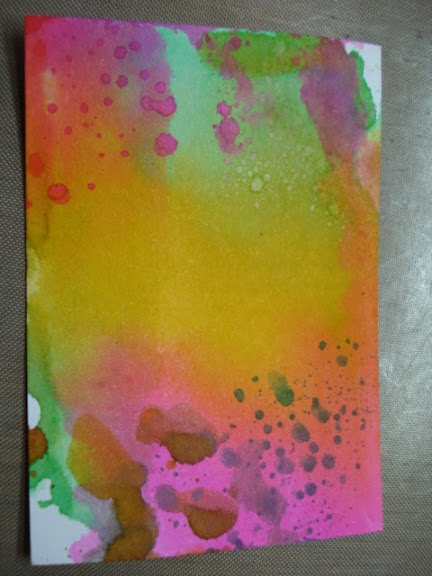
Look at the vibrant colors I got here.


My final card with distress inks:
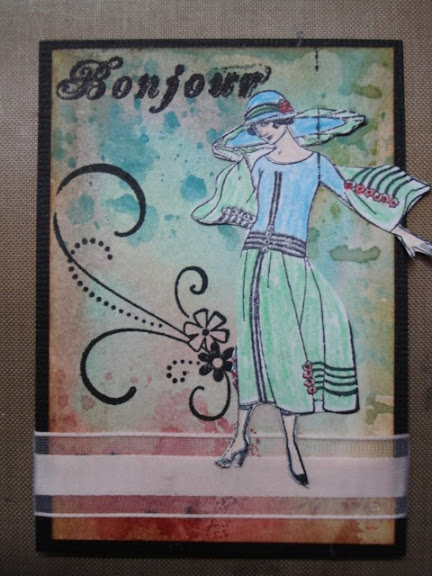


and my final card with Marvy inks:
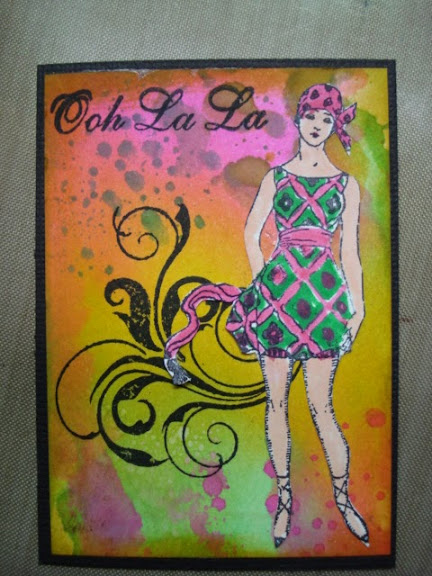


These are ATC sized cards. I used B-Line, MSE and SU stamps on these.

I need to come up with a name for these classes. Here's what I have so far:

TTCs - technique trading cards - but you probably wouldn't want to "trade" these!
CTCs - creative technique cards - but what if some are not so "creative"?
DTCs - designer technique cards - but they really aren't "designer" either!
ITCs - imagineered technique cards
JTCs - JLo's technique cards
LTCs - Linjeneered technique cards - but then I gotta get Lindy Lou to help me out!!!
STCs - scramping technique cards - but I think someone might think they are sexually transmitted! LOLOL!

OK....got any other ideas? What title would lure you into a class? These are all going to be techniques that you can use with backgrounds, cardmaking, rubber stamping, scrapbooking....just ways to help you use the products you already have. Each class will teach several techniques using the same product....and then the we'll move on to different products. I'll use at least 2 brands of each product when I can. I think it's going to be fun!

Tuesday, February 5, 2008

Judi on Judy

Yep, Judi Hodgkin's Scrapperdashey paper on a Judy Stonehouse wood purse!!!


Judi has been here this week from London and we have just been having such a good time playing with her papers....making samples for CHA. This one is going to go to the Colorbox (Clearsnap) booth.


The handle was made with beads and vintage bobbins. I left the thread on, sealed it with Judi*kins Diamond Glaze, and then distressed it with Colorbox Fluid Chalk Queues. Let me tell you, they work great on metal and plastic!


I've used B-Line Designs Ruber stamps....all done with Colorbox Queues. But some of this is Judi's paper, cut out and inked. And I've used a few Oxford Impressions stamps as well.


You can see a close up of an inked bobbin here. For the little wood spools, I cut out strips of stamped paper, inked them, and wrapped them around the spools. And those are new white buttons that I inked with the Colorbox Queues. Great way to get all the colors to coordinate!


You can create a shadow by sketching an outline around the cut out stamped image, and then inking it totally dark. I did this on the dressform and the scissors.


I even inked the snaps.


A view of the back:


And a side view:


Judi on Judy.....a great way to play! And since I happen to love vintage sewing stuff, this paper, these stamps and all this ink...just came together to make this cute little sewing box. If you are attending CHA....check it out at the Clearsnap booth!

Monday, December 3, 2007

Playing with mom!

Well, in less than 10 minutes, this is what her kitchen counter looked like! Sure doesn't take long for me to make a huge mess.....anywhere!


Today, I'm playing with Colorbox Queues. NEW! First, can I say that I love how these stack. I brought 6 sets of 6 inks...36 cat eye ink pads and they took no space at all....so excellent packaging! These are fluid chalks. So you know me...I put them to the test!


For my first card I used Spellbinders new Cali-lillie window die. It cuts a window in the card as it embosses the area around the window. This just has to be my very favorite new die they have! I LOVE this!!! And I should say that I'm working with white Bazzill cardstock. So you can get a feel for how you can make your own paper! And the butterfly and 2 flowers on top are made with Amaco's pewter. Yep, fluid chalks work perfect to color the metal...just zap it with a heat gun and they are permanent!


So, that was made by applying the ink direct to the paper. Next, I decided to see what happened when I mixed the reinkers with water in a spritz bottle. Well, not too bad! I used a Heidi Swapp mask and then spritzed the color over it and stamped on top of all that. Once again, I started with white cardstock.


For this card, I just painted the stamp with the ink. For the dots, another mask. Again...white cardstock turned into a fun card!


And this may be my favorite one! I used 4 queues, one color for each face in each row....so you can get an idea of the color scheme. How fun!!!


I am so blessed! I get to play with mom for 3 days!!! Well, of course, we went out to lunch, did some shopping, I stopped back at "A Stamp of Excellence" and gave them some quick tips in product use and then back here to make a mess! Now you do know that when I was a little girl, if I'd made a mess this big....I would have been in so much trouble! I guess we've either "grown up"....or maybe we just realize the value of playtime...even at our age!!!