Showing posts with label die cuts. Show all posts

Monday, December 3, 2018

The iKross for my Workbox3.0

I just got an iKross and installed it in my Workbox3.0.  I absolutely love it.  It frees up my workspace and holds my iPad at eye level.  I think it's perfect!


It folds up almost flat against the workbox.  I centered it right under the middle drawer.

 This is the slot that the stand goes in.  It came with 2 holders and I bought 2 extra as I plan to mount one next to my bed, one under a kitchen cabinet.....maybe even on beside the bath tub!  LOL!


You can take the stand out of the holder and use it on your table, or desk, or anywhere.


And it will pull out quit aways from the workbox shelves just in case you want to watch a video up close.  I think I can also use this to create youtube videos.....if I ever get enough time.


It's going to be perfect for watching how-to videos or Hallmark movies on youtube while I get crafty.


Here's a link to the one I bought on Amazon....but there are other versions as well.  Just google i-pad 12" wall holder.

I also cut a Joann's self-healing cutting pad to the size of my workspace just for added protection.

To the left, you will see that I've attached a Tonic Studio's Table Tidy with the 2-pocket Tidy and the Tiny Tidy.   Just some more table height storage.....must keep my workspace clear!


Very happy with today's addition to my Workbox3.0.

To see my scrapmabob makeover click here.

To see my new workbox3.0 chair with heating pad pocket and storage saddle, click here.

To see my review of the workbox3.0, click here.

To see my upcycled denim scrapbook caddy, click here.

To see my paint bucket, click here.  These last 2 items are on the floor and hold tools for everything I need.  Altered to go with my denim themed accessories for my workbox.

Hope you've had a crafty day!


Sunday, December 31, 2017

Under the dome....a little "magic"!!!


 What happens when you combine a 3D printer and paper crafts???  A lighted dome!  This little dome is just about 4" tall and maybe 2" across the bottom.


I bought 6 of these at the Scrapbook Expo last September.  Found them in the Melissa Frances booth and they were half off.    They come with a cardboard bottom.


I asked Kerry if he could make a LED lighted base with his 3D printer.  I needed something that had a rechargeable battery in it so that I didn't have to plug it in.  Each of these holes has an LED light shining up through the bottom.


The base is about 3/4" thick so that inside, it can house the lights, the on/off switch and the port for charging.  Amazing how tiny all that can be.


I then die cut a circle of clear acrylic to cover the top of the lights. And that's what I used as a base to hot glue the dies.  You can't see, but everything is cut in white glitter paper.  This is just 1 tree, cut into parts, and then 2 of the 3-piece deer sets.  Rolled the die cuts around a 1/2" diameter dowel to shape them.  Hot glued each piece to the clear acrylic base.  Then put it all up inside the dome and added the base.

Here's closeup of the trees and a deer.  Hope you can get a feel for the glitter paper I used.


When you flip the switch, all that glittered paper just sparkles in the light!


Five more domes, so I asked for 5 more bases!  And because each one will be on a clear acrylic base, I could make multiple designs for each dome!  I'm thinking 2018 is going to be a very good year for creativity!

Wednesday, December 25, 2013

Burlap bling bear

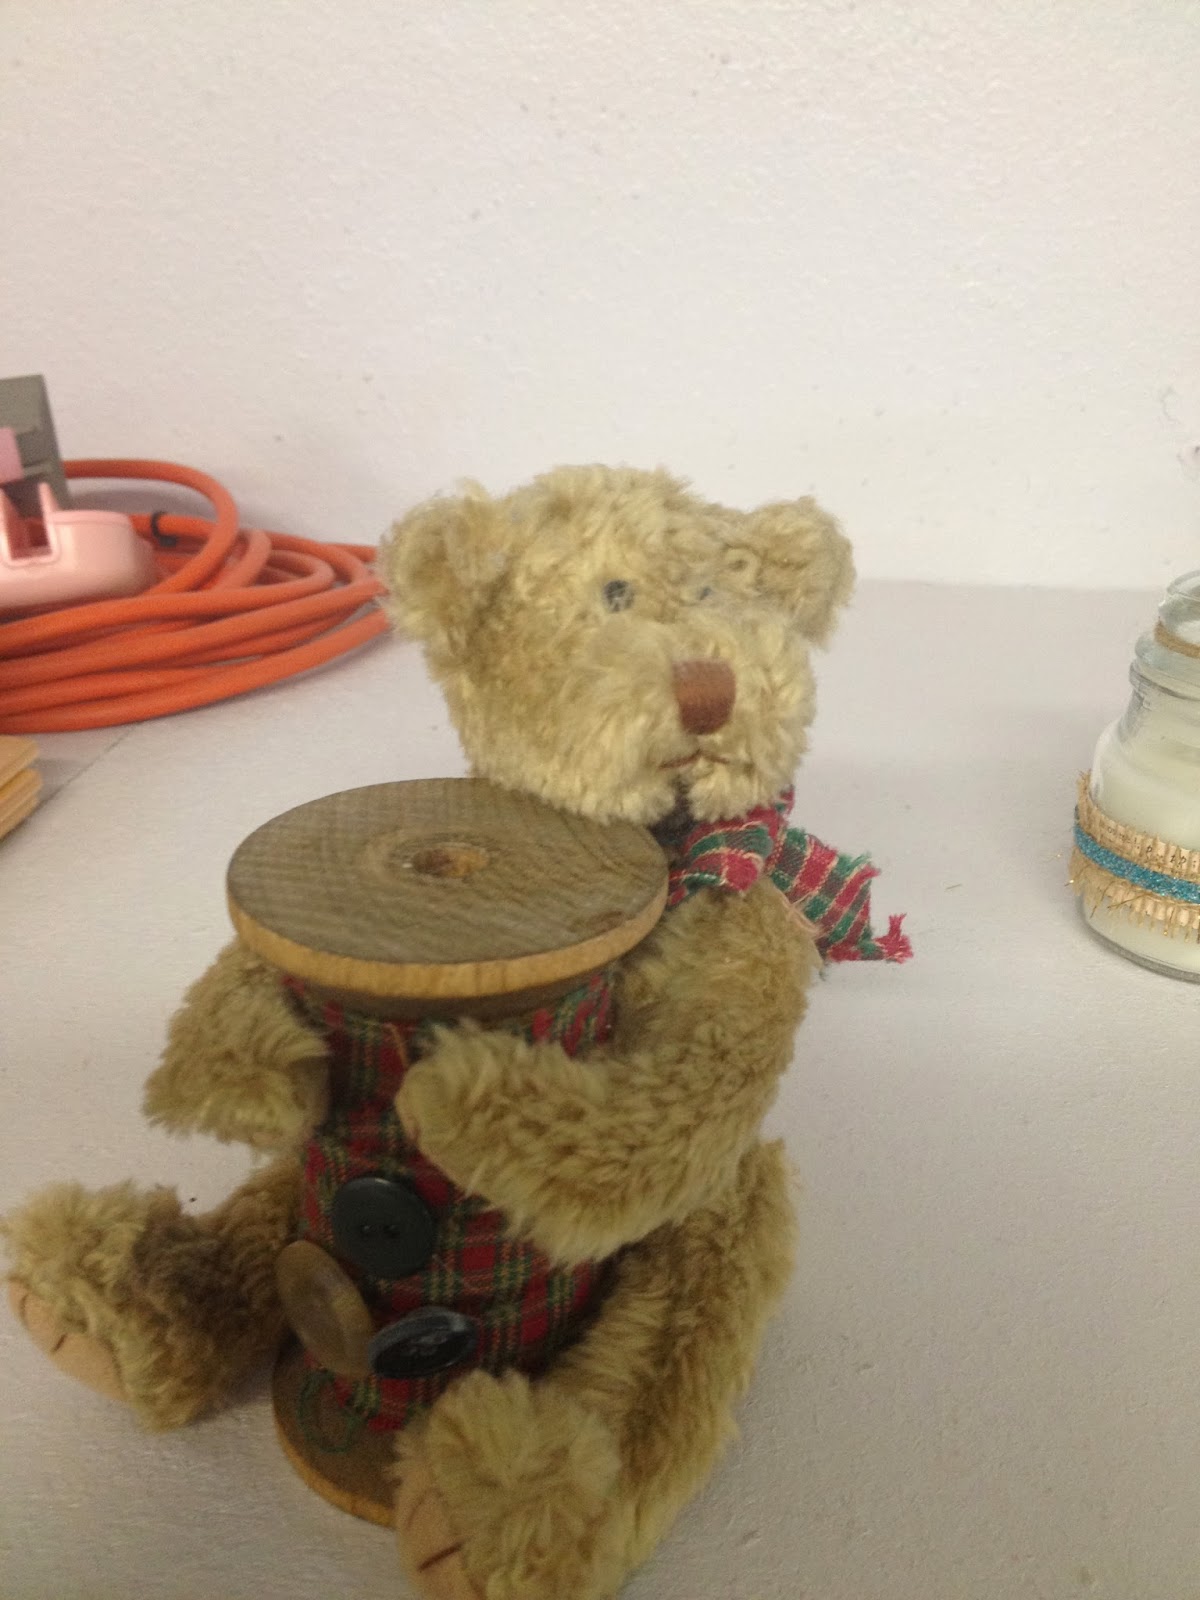
I found this adorable bear at the thrifty store.  No tag, so I don't know who made it.  But it is jointed and can be posed.  I didn't like the red/green fabric and thought it looked a bit drab or worn out.  I used undu to remove the fabric and take the bear away from the spool.  Undu undoes just about anything!


I wanted it to match my jars from yesterday.  I think it looks great!


I wound jute around the spool.  Added a flower to the top - made of paper, burlap, and broken jewelry. Used Tim Holtz dies on this one.  Added the ribbon around the neck with some bling in the center and bling sprays that I picked up in the wedding section at Hobby Lobby.  Used a low temp glue gun to reattach the bear to the spool.


Still thinking about what's next to go with this little "dust catcher" scenario!  Sure is wonderful to have the time and ability to just play!

Saturday, December 14, 2013

Mercury glass and more - 1

Oh what fun it is to play…..


I'm going to spend the next few days sharing how I made these.  So first, you need to go to your local thrifty store and find glass.  Almost anything will do.  Clear glass, colored glass….all sizes and shapes.  Here's an example of a bottle and a candle votive that I found (of course, they were clear glass when I picked them up).  


While you are in the store, stack them together.  Get different heights.  Get some that will use votive size candles, tall tapers, short fat candles….and pick up used candles while you are at it.  I have several youtube tutorials showing you how to repair, restore and reuse old candles.  


In the days to come, I will share a variety of techniques, but for the look above, you will need Krylon's looking glass paint  (Walmart is the cheapest place if you can find it there).  You need a fine mist spray bottle filled with a mix of 1/2 water to 1/2 vinegar.  I don't think it matters what type of vinegar.  

For this particular bottle, I sprayed 1 coat of paint on the outside of the glass, then patted it off with a Viva paper towel (Viva is soft and flat, no embossed design in it).  Let it dry for a couple of seconds, then sprayed another layer, patted it off….did that 3 or 4 times.  

Next, I immediately spritzed the outside of the glass with the mix.  Let that set for 2 minutes.  It might not be dry, but that's ok.  Pat it off with your paper towel.  It will remove a little bit of the paint.  If you want a different look, rub it a little.  If you don't like the results, just soak the glass in 1 cup of vinegar in a sink full of water and rub all the paint right off.  I make several mistakes so always need a useable remedy!


I've made 23 of these in the past couple of weeks, so lots of experiments, loads of failures, and I'll be sharing different shots of the sun reflecting through them all.


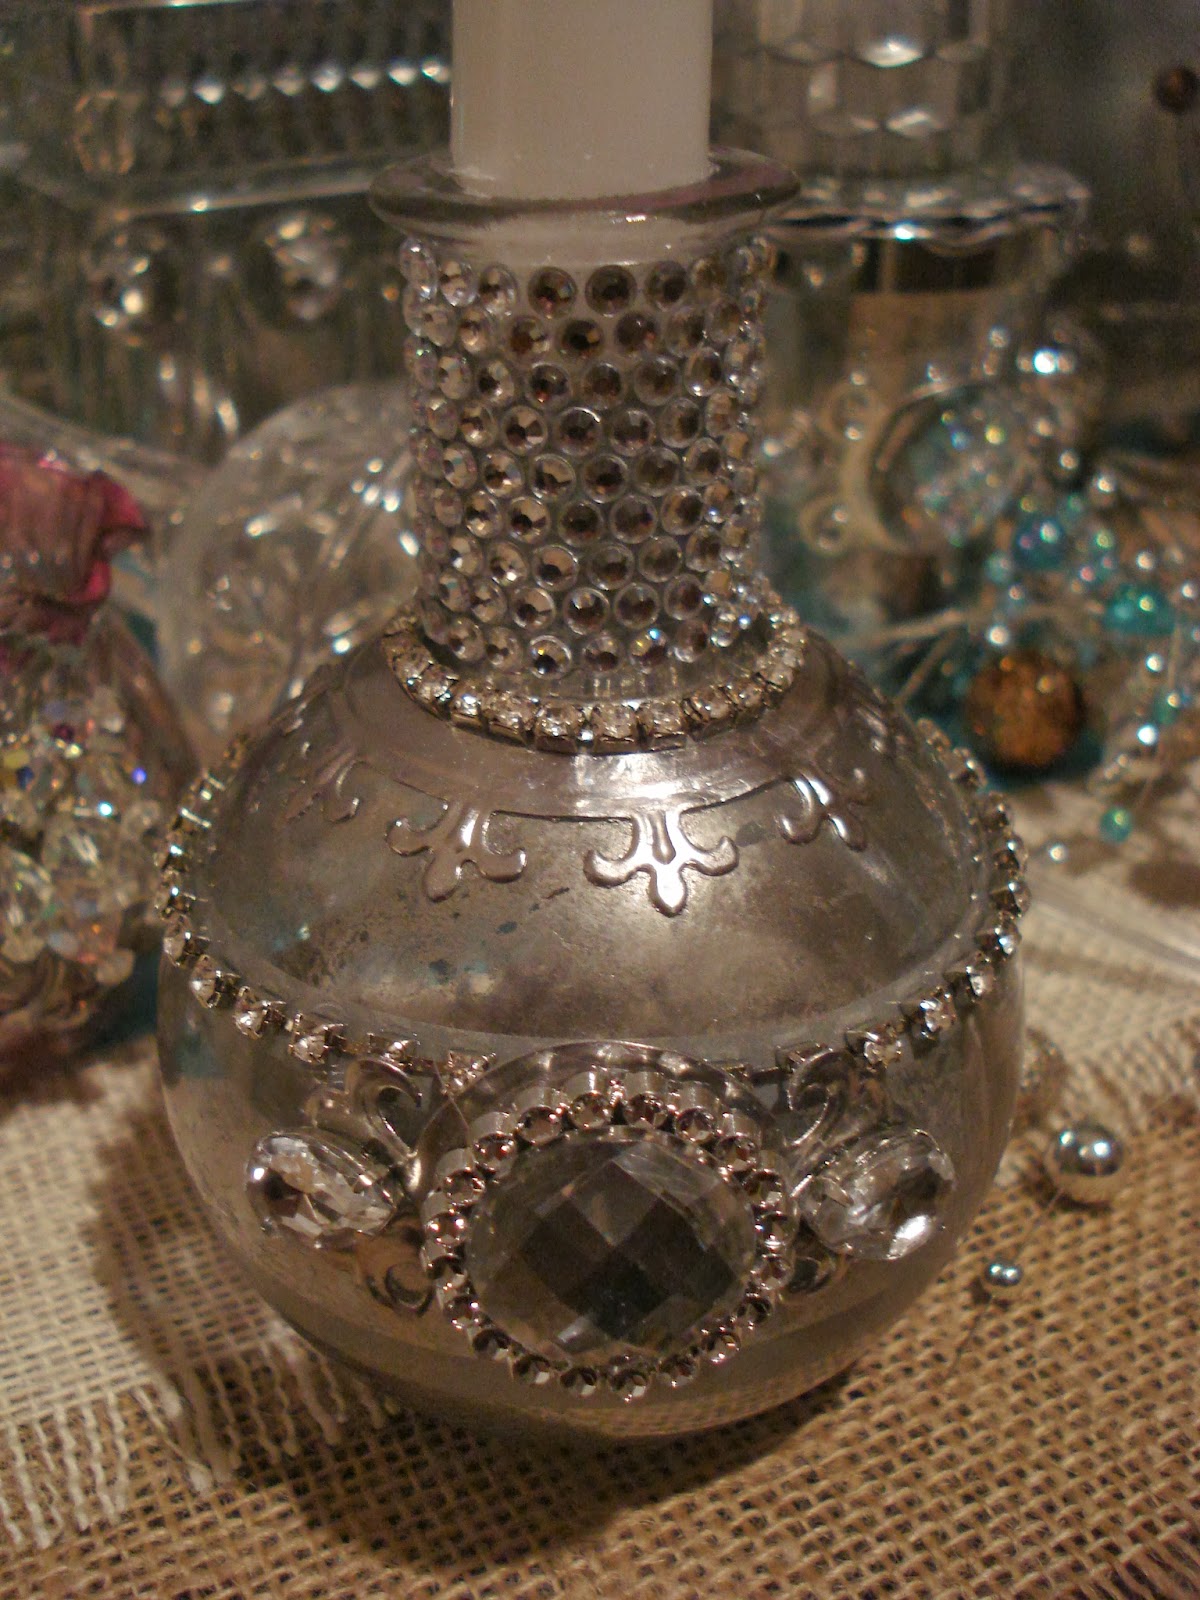
 First up is this little glass bottle.  Remember - it started out clear.  It was someone else's junk.  Now it's my little treasure!  Rows of adhesive crystals around the top and then at the bottom of the top, a row of sequins.  These are the kind that you can buy by the yard in the fabric section at Hobby Lobby.  Note, you can slide them apart, or scrunch them up close together which is what I did here.

Below that is a Spellinder's die.  This is from the Fleur de Lis Motifs and the center was removed using #3 from the Standard Circles Large die set.  Cut using Amaco's pewter - which is very flexible and will bend down around the glass and stretch to fit whatever you need.


In the front center of the glass, I used the medallion from the Fleur de Lis Accents set.  The bling on top of it comes from a half off ornament at Hobby Lobby.  Look at the ornaments carefully as most of them will just pop apart with a little bit of undue.  

Note that I'm using just the paint on these.  Tomorrow, we'll add a bit of color using the Copic Airbrush system!  Can't wait to share!!!

Sunday, November 17, 2013

snowflakes

They have 6 points.  You do know that?  There are some doubles with 12 points, but there are no 8 point or 7 point or 5 point snowflakes!  Isn't that amazing?  That God created so many different designs and they all have 6 points!  

When I was a little girl, we had a snow back in Indiana.  It was so magnificent that dad woke us up and we all bundled up to go outside and watch it.  Pitch black night, but a very bright farm pole light.  The flakes had to have been 4" across!  We were literally chasing after them!  Catching them in our mittened hands.  Admiring them.  Watching them vanish away.  I remember that it seemed to snow forever like that….huge snowflakes softly, slowly, drifting to the ground.  I have never seen a snow like it since then.


I do know that God's art is so much more than anything I can ever put together, but I am having such a good time creating things that bring back fun memories!  And because I'm not home, I'm using mostly white paper.  It's easy to find!  But after cutting all these dies in white, I decided to use my airbrush on them.  What fun!!!  


But then I sort of went crazy.  2 layers of Spellbinders behind the stamped image, then Memory Box on top that are air-brushed and stickled.  But still….I love the results!!!


Layers of dies…..layers of huge, gigantic snowflakes when I was a little girl.  Maybe not too different? Layers of life that Jehovah has blessed me with.  It all seems to fit!

Saturday, November 16, 2013

Mom

She is in my life every single day.  Today, I decided to take a couple of her paintings and turn them into cards.  I think she would smile.  She loved scripture.  I know for a fact that she read the Bible every day of her life.  In the last few days, we read it to her.  So I added Bible phrases to each painting.

I love this painting.  Belgium work horses.  Her dad raised them.  They used to farm the land with them.  I remember mom saying that we had "House" blood in us and we were sturdy, strong stock.  Or that we "had strong bones."  She said we were built like work horses.  I think it was good to let her children know that they were strong.  Both physically, mentally and emotionally.    Nothing else, just the scripture added to this card.


This is a painting mom did years ago of the George House homestead.  It's where she grew up, where I lived until I was 5 when dad built a house on the corner of the farm.  I lived on this land until I was 16 years old.  When I was little, and my legs were short, this lane was forever long!  It flooded, the water froze, we ice skated down the lane.  We ran to catch the bus, we rode our bikes up and down it.  When the house was first built, the road was in the opposite direction, down by the creek, so that lane was even longer!  We used to "hike" back to the creek as kids.  Over the years, God has shown me my path in life.  How blessed am I that He started that path with one this gorgeous!


 Not one to leave things alone (it's really hard!) I added some glitter to the trees and grass.  I love what it did….turned the painting into a card.


Mom loved her flowers.  I loved her Iris paintings.  She once said to me she thought the flowers were praising Jehovah.  Thus the verse I picked for this painting.  You know, she did over 400 paintings and I have photos of all of them.  I could do this for quite some time to come!!!  The legacy she left her children is something I haven't begun to wrap my head around yet.  But the legacy of our faith, our belief, our trust in Jehovah Jesus Messiah is the greatest gift of all.


He doesn't care how I make the noise, just so long as it is noise and it is joyful!!!  Does He "hear" my art?  There are moments when I just want to shout it out.  I know it's in me, I just have to get it out!!!  Not only did I add some glitter, I added some die cuts.  Definitely changes the painting!  


He has given me this path in life, He has kept me strong, and in return, I am making such a joyful noise, praising His name all the day long!!!

Friday, January 4, 2013

What criteria do I use to pick a die?

Dies have never been cheap and it doesn't take much to get a fortune tied up in your collection.  I try to "see" or "imagine" a variety of ways that I can use a single die.  If I can't, then I do not buy it, no matter how much I want it!

Here's a cute tree that is a flourish.  First, I could visualize it in different sizes....just by cutting the bottom off.


But then I saw it as a corner embellishment:


I didn't actually do this, but if you look at the tree as points of a star, you could put 5, 6, 7 or 8 of them together to make a giant star!

What do you see in this tree???

When I do purchase a die, I will cut it out 10 times in plain white card stock.  If its a die that can be embossed, I do not emboss it, I simply cut it out.

Then I can lay all 10 diecuts out on a flat surface and rotate them North, South, East, West, on any angle, mix 2, 3, 4....10 dies together...just to see what I can come up with.  You can make a nice full page sized flourish rick-rack with this die!

It's sort of fun to see what you can "see" when you do this with your dies.   

This adorable tree is 5 pieces and comes in 2 sizes.  I had to have them both.  Take any two layers of the tree and put them together and you will see an "elf" collar!  Cut the tips off and you have snow to drip off any roof!  Put the 2 dies together as one and you'll get a huge tree with 10 layers!

I understand the company is no longer making this die, so call Rhonda at Design U'R Memories as she just placed an order for a ton of these!


She also sells this glitter paper in 12x12 sheets and it works fabulous with copic markers.  Just put a peel off sticker (the snowman) over the paper and color with your copics.  The cut out around the edges.

The title on this card is "Time to play" made but cutting up individual letters on a holiday peel off sheet.    I love the glitter sheet so much that I bought  the glitter and an entire roll of the adhesive so I can make my own!!!

So, stop before you invest in dies and see how many different ways you can use that die before you make your investment!!!

Sunday, November 4, 2012

What to do with all those empty toilet paper rolls?

You are going to want to make one of these for sure!!!  I had so much fun...just giggling every step of the way!!!  Yes....toilet paper rolls.  Start by flattening them with your bone folder, then adhering paper all the way around.  I  used my xyron 910 for this and loved it!  Then use your bind-it-all to punch holes in the end.  Distress ink all the edges, assemble it and start decorating.

That's a dress form shaped paper clip on the left.  With a stamped face on the top.  Graphic 54 paper and stamps.  Lots of die cuts and stickler.


The paper is "Princes Diary" and I just laughed....a diary out of empty TP rolls?  Just perfect!!!
After all, they do call it a "throne", don't they???


Tags fit perfectly inside the rolls, so just cut paper and cover and add embellishments


You can save spots for journaling, or decorate each page with images cut from the paper


The lace on the far right is a paper die cut


I diecut the dressform in clear acrylic, then inked it with alcohol inks


Ah!  IF you are going to use toilet paper rolls, then  you must do something with the toilet paper!!!  So this is just a fun decoupage tag using toilet paper like you'd use tissue paper to make the crinkles.  Again, I just sat  here and laughed!!!  Who on earth would decoupage with toilet paper???  I sort of like the "end" results!  :)


And just to add a little class, this is a fine silver (Art Clay Silver) die cut dragon fly.  Best not toss this into the trash!


Diecuts behind inked flowers.  I buy them all in white so I can color as I want.


Just love these cut-apart flourish die cuts


More tags made from the same line of paper


Of course, when you ink a paper, it can change what it originally looked like into something so much more colorful!


This pocket has a dressform tag


Really, I promise....toilet paper rolls!


Willing to give it a try?  You could make one and put your 12 tags of 2012 in it!  Much smaller tags, of course....but what a great way to display them!

I gave this as a gift to  my dear friend Judy at Stamp of Excellence.  Come visit and look at it in person!!