Oh what fun it is to play…..

I'm going to spend the next few days sharing how I made these. So first, you need to go to your local thrifty store and find glass. Almost anything will do. Clear glass, colored glass….all sizes and shapes. Here's an example of a bottle and a candle votive that I found (of course, they were clear glass when I picked them up).
While you are in the store, stack them together. Get different heights. Get some that will use votive size candles, tall tapers, short fat candles….and pick up used candles while you are at it. I have several youtube tutorials showing you how to repair, restore and reuse old candles.

In the days to come, I will share a variety of techniques, but for the look above, you will need Krylon's looking glass paint (Walmart is the cheapest place if you can find it there). You need a fine mist spray bottle filled with a mix of 1/2 water to 1/2 vinegar. I don't think it matters what type of vinegar.
For this particular bottle, I sprayed 1 coat of paint on the outside of the glass, then patted it off with a Viva paper towel (Viva is soft and flat, no embossed design in it). Let it dry for a couple of seconds, then sprayed another layer, patted it off….did that 3 or 4 times.
Next, I immediately spritzed the outside of the glass with the mix. Let that set for 2 minutes. It might not be dry, but that's ok. Pat it off with your paper towel. It will remove a little bit of the paint. If you want a different look, rub it a little. If you don't like the results, just soak the glass in 1 cup of vinegar in a sink full of water and rub all the paint right off. I make several mistakes so always need a useable remedy!
I've made 23 of these in the past couple of weeks, so lots of experiments, loads of failures, and I'll be sharing different shots of the sun reflecting through them all.
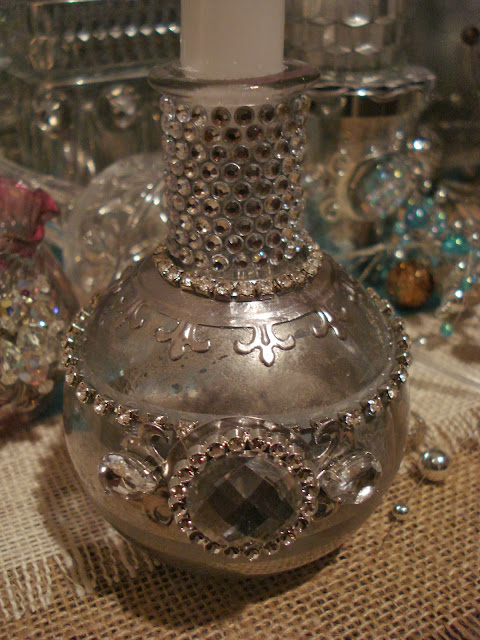
First up is this little glass bottle. Remember - it started out clear. It was someone else's junk. Now it's my little treasure! Rows of adhesive crystals around the top and then at the bottom of the top, a row of sequins. These are the kind that you can buy by the yard in the fabric section at Hobby Lobby. Note, you can slide them apart, or scrunch them up close together which is what I did here.
Below that is a Spellinder's die. This is from the Fleur de Lis Motifs and the center was removed using #3 from the Standard Circles Large die set. Cut using Amaco's pewter - which is very flexible and will bend down around the glass and stretch to fit whatever you need.
In the front center of the glass, I used the medallion from the Fleur de Lis Accents set. The bling on top of it comes from a half off ornament at Hobby Lobby. Look at the ornaments carefully as most of them will just pop apart with a little bit of undue.
Note that I'm using just the paint on these. Tomorrow, we'll add a bit of color using the Copic Airbrush system! Can't wait to share!!!


No comments:
Post a Comment