Showing posts with label copic airbrush. Show all posts

Sunday, December 15, 2013

Mercury glass - day 2

Today, I'm going to share just one of my candlesticks because there is so much detail in this one.  It started out as 2 pieces of clear glass.  The top is a vote and the bottom was a short candlestick.  When I hunt for glass, I will hold it up to a window and pick the pieces that have the most shine to them.  Some cuts of glass are just plain dull.

To add color, I use my copic airbrush system.  For these pieces, I picked my copic sketch marker RV09.  I love that shade of bright pink.  I simply airbrushed the color to the outside of the glass.  Different types of clear glass will give you different results.  The more lead content in the glass, the more shine you will get as well.

Next, I did the same technique as yesterday to get the faux mercury look.  When you blot off the vinegar/water mix, the copic color will show through.  You also need to know that the more layers of Krylon's looking glass paint that you use, the less of the pink copic color you will see.  It's all a matter of balance.

Note - you spray the copic color onto the glass before you add the looking glass paint.  Everything is done on the outside of the glass.

For lots of this, I then sealed the color in with a coat of


I do plan to make a youtube video showing some of these techniques - but I need to get more glass first!

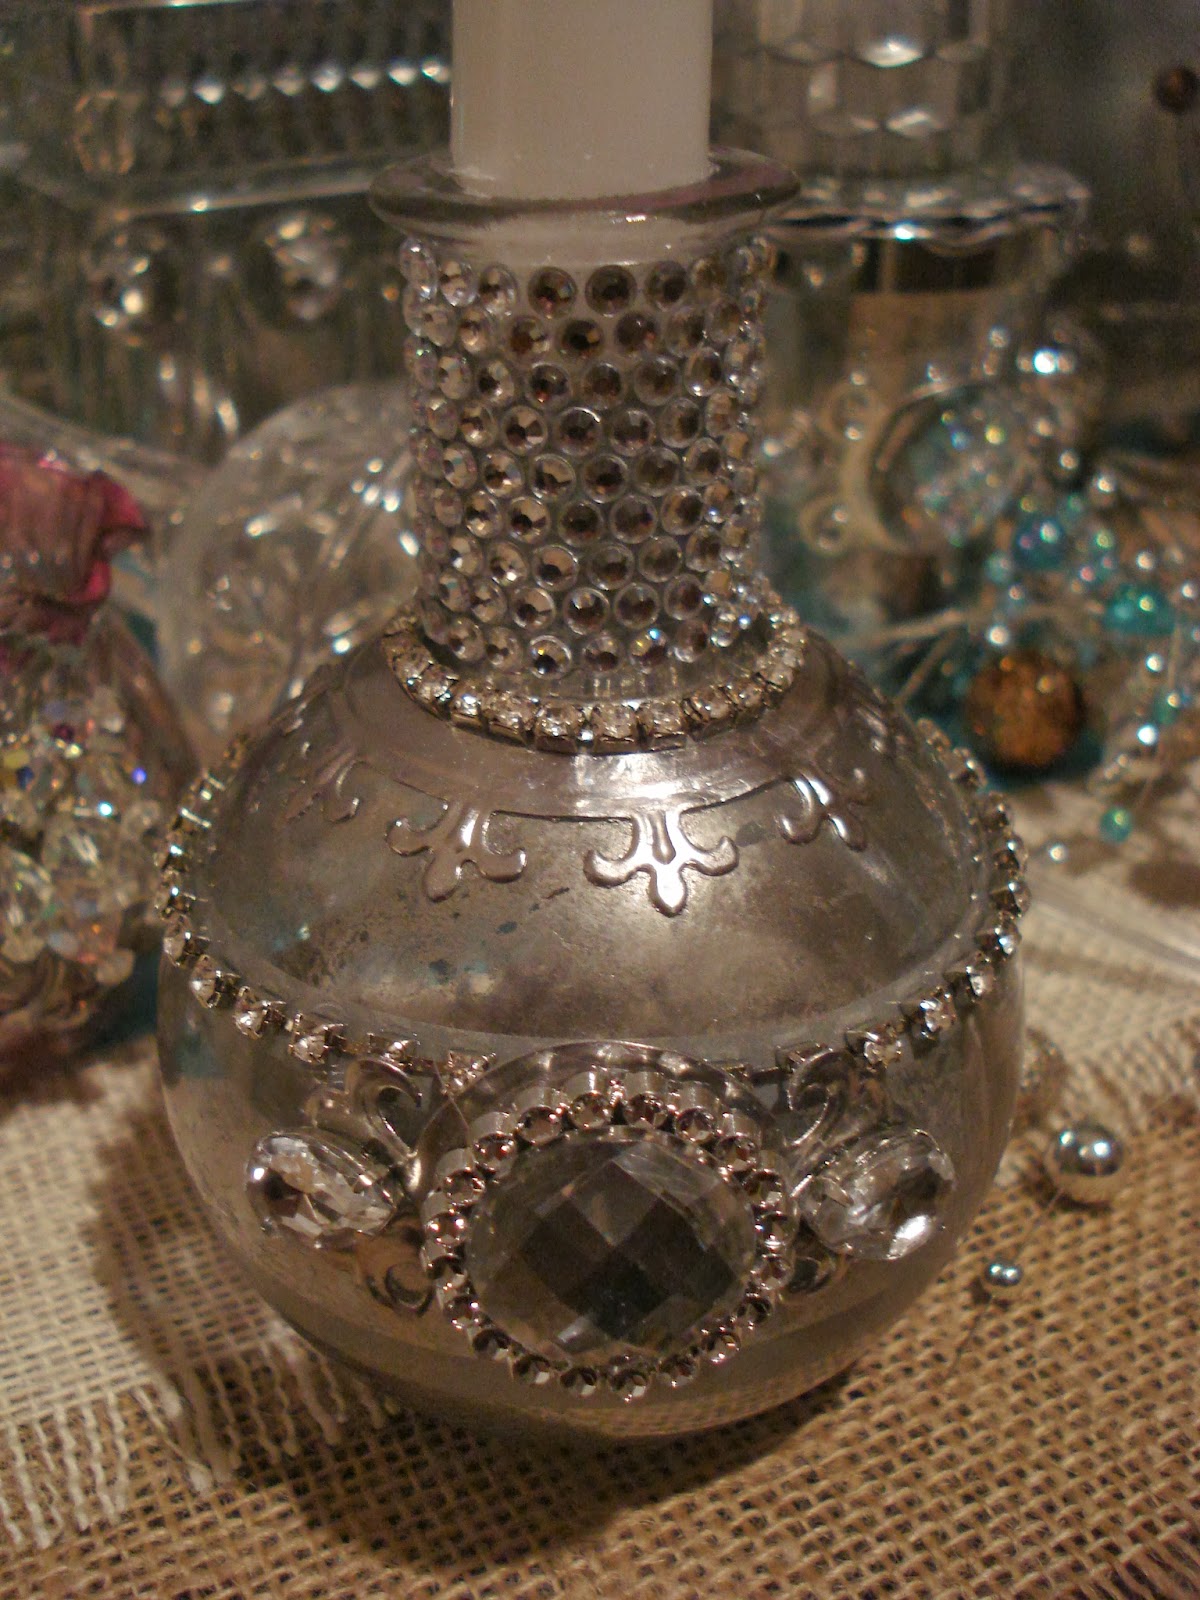
Around the base, I have used Spellbinder's S5-079 Persian Motifs - the large circle.  In order to get it to fit, I simply cut it open in the back.  The center was removed using #3 from The Standard Circles Large Die.  This is cut in Amaco's pewter which can easily be shaped around the glass.

I use either E6000 or 527 adhesive (both at Walmart) when adhering my embellishments to glass.  On occasion, I can get a cool glue gun to stick, but that will usually pull right away from the glass.


around the top of the bottom candlestick, I used #5 from Spellbinder's Parisian Motifs.  The center was removed using #5 from the Standard Circles Large set.  Look at how nicely it wraps around the edges to make a wonderful border.  And this pewter simply shimmers in the sun!


For the center, front, I used the square motif from the Parisian motifs die (see link above) and covered it with another piece of an ornament that I took apart.  I added a broken piece of jewelry in the middle center front.


There is quite a bit of depth to this piece as you can see from this side shot.  See how nicely the pewter will shape to the contour of the glass?


and from the top looking down, you can pick up hints of silver on the rim


remember, this all started with 2 pieces of clear glass from the thrifty store that someone else discarded. I think this is a great example of what you can do with someone else's trash.  :o)


And just think….I haven't even lit a candle yet and there's so much shimmer and shine going on!  Gotta love Spellbinders die cuts in pewter!

Saturday, December 14, 2013

Mercury glass and more - 1

Oh what fun it is to play…..


I'm going to spend the next few days sharing how I made these.  So first, you need to go to your local thrifty store and find glass.  Almost anything will do.  Clear glass, colored glass….all sizes and shapes.  Here's an example of a bottle and a candle votive that I found (of course, they were clear glass when I picked them up).  


While you are in the store, stack them together.  Get different heights.  Get some that will use votive size candles, tall tapers, short fat candles….and pick up used candles while you are at it.  I have several youtube tutorials showing you how to repair, restore and reuse old candles.  


In the days to come, I will share a variety of techniques, but for the look above, you will need Krylon's looking glass paint  (Walmart is the cheapest place if you can find it there).  You need a fine mist spray bottle filled with a mix of 1/2 water to 1/2 vinegar.  I don't think it matters what type of vinegar.  

For this particular bottle, I sprayed 1 coat of paint on the outside of the glass, then patted it off with a Viva paper towel (Viva is soft and flat, no embossed design in it).  Let it dry for a couple of seconds, then sprayed another layer, patted it off….did that 3 or 4 times.  

Next, I immediately spritzed the outside of the glass with the mix.  Let that set for 2 minutes.  It might not be dry, but that's ok.  Pat it off with your paper towel.  It will remove a little bit of the paint.  If you want a different look, rub it a little.  If you don't like the results, just soak the glass in 1 cup of vinegar in a sink full of water and rub all the paint right off.  I make several mistakes so always need a useable remedy!


I've made 23 of these in the past couple of weeks, so lots of experiments, loads of failures, and I'll be sharing different shots of the sun reflecting through them all.


 First up is this little glass bottle.  Remember - it started out clear.  It was someone else's junk.  Now it's my little treasure!  Rows of adhesive crystals around the top and then at the bottom of the top, a row of sequins.  These are the kind that you can buy by the yard in the fabric section at Hobby Lobby.  Note, you can slide them apart, or scrunch them up close together which is what I did here.

Below that is a Spellinder's die.  This is from the Fleur de Lis Motifs and the center was removed using #3 from the Standard Circles Large die set.  Cut using Amaco's pewter - which is very flexible and will bend down around the glass and stretch to fit whatever you need.


In the front center of the glass, I used the medallion from the Fleur de Lis Accents set.  The bling on top of it comes from a half off ornament at Hobby Lobby.  Look at the ornaments carefully as most of them will just pop apart with a little bit of undue.  

Note that I'm using just the paint on these.  Tomorrow, we'll add a bit of color using the Copic Airbrush system!  Can't wait to share!!!