Showing posts with label altered art. Show all posts

Friday, November 30, 2018

The chair for the workbox3.0


It has been quite some time since I've been office chair shopping.  I decided on this one as it was half off and the arms will lift up.  Bonus - it rocks!  LOL!


But get a load of the back of it!  That is just beyond wierd!


Brand new....but I recovered the arms and seat in denim and made a slip cover to go over the back.  Look closely and you will see a cord coming out the right hand side.  That huge pocket across the front has a heating pad stuck down in it!  There are slits on either side, so I can use an outlet no matter which side it's on.   Added bonus, the heating is in the perfect spot for my back.  Second bonus - the arms flip up so it fits under any height table.


The back side has 2 pockets that hold the controller and the rest of the cord.  It tucks down behind that weird back frame.  I've been trying it out and I really like it.  Comfy enough to work from.....reclines enough to make it great for watching TV.


I also have a couple Walmart student chairs that I recovered in denim.   My sisters need chairs when they come to play.


One of them has it's own heating pad cover just like the top one.  But it also  a "saddle bag" on the seat and I can keep a tape runner down in one of the gigantic pockets and my ATG gun on the other side.


It is so much fun customizing things to make them work better for what you need!  What have you altered lately to meet your needs?


Thursday, November 29, 2018

The Scrapmabob Plus

While I'm on the topic of theoriginalscrapbox.com's workbox3.0, let's talk about their Scrapmabob Plus.


It's cute, it's clever, it works great.....but it's NOT denim!  LOL!!!  So, of course, I made my own!

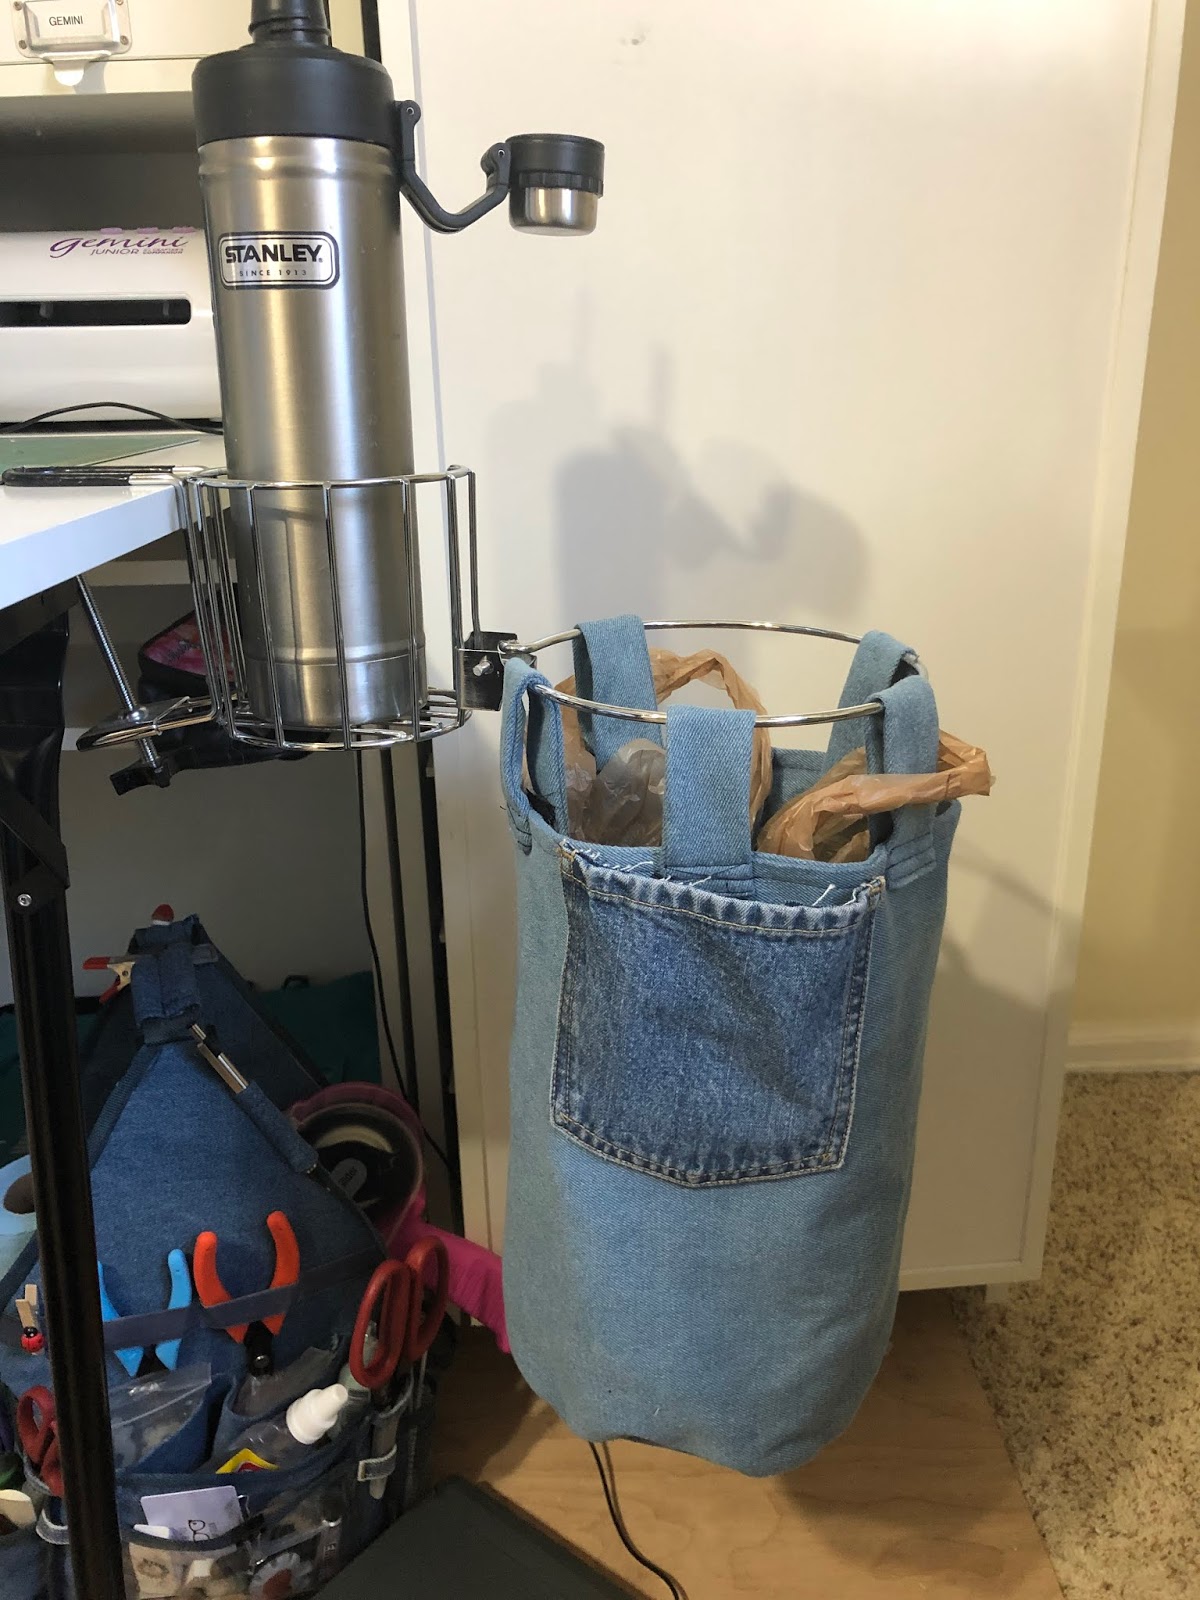
Out of the leg of a pair of jeans.  And used the rear pocket to store all my goodies.  Made it a bit longer than theirs.  But I did use theirs as a pattern.


It will velcro on and off very easily so I can wash it whenever it gets dirty.


 I can rotate it so the pocket shows, or so it's plain:


For a liner, I slip a trash bag over the velcro strips:


I like it because it keeps my glass securely off my workspace and makes the trash at my fingertips.  And - bonus....flip it up and the door behind opens easily!  I just closed it so the photos would look better.


Next up - the matching chair!


Wednesday, December 25, 2013

Burlap bling bear

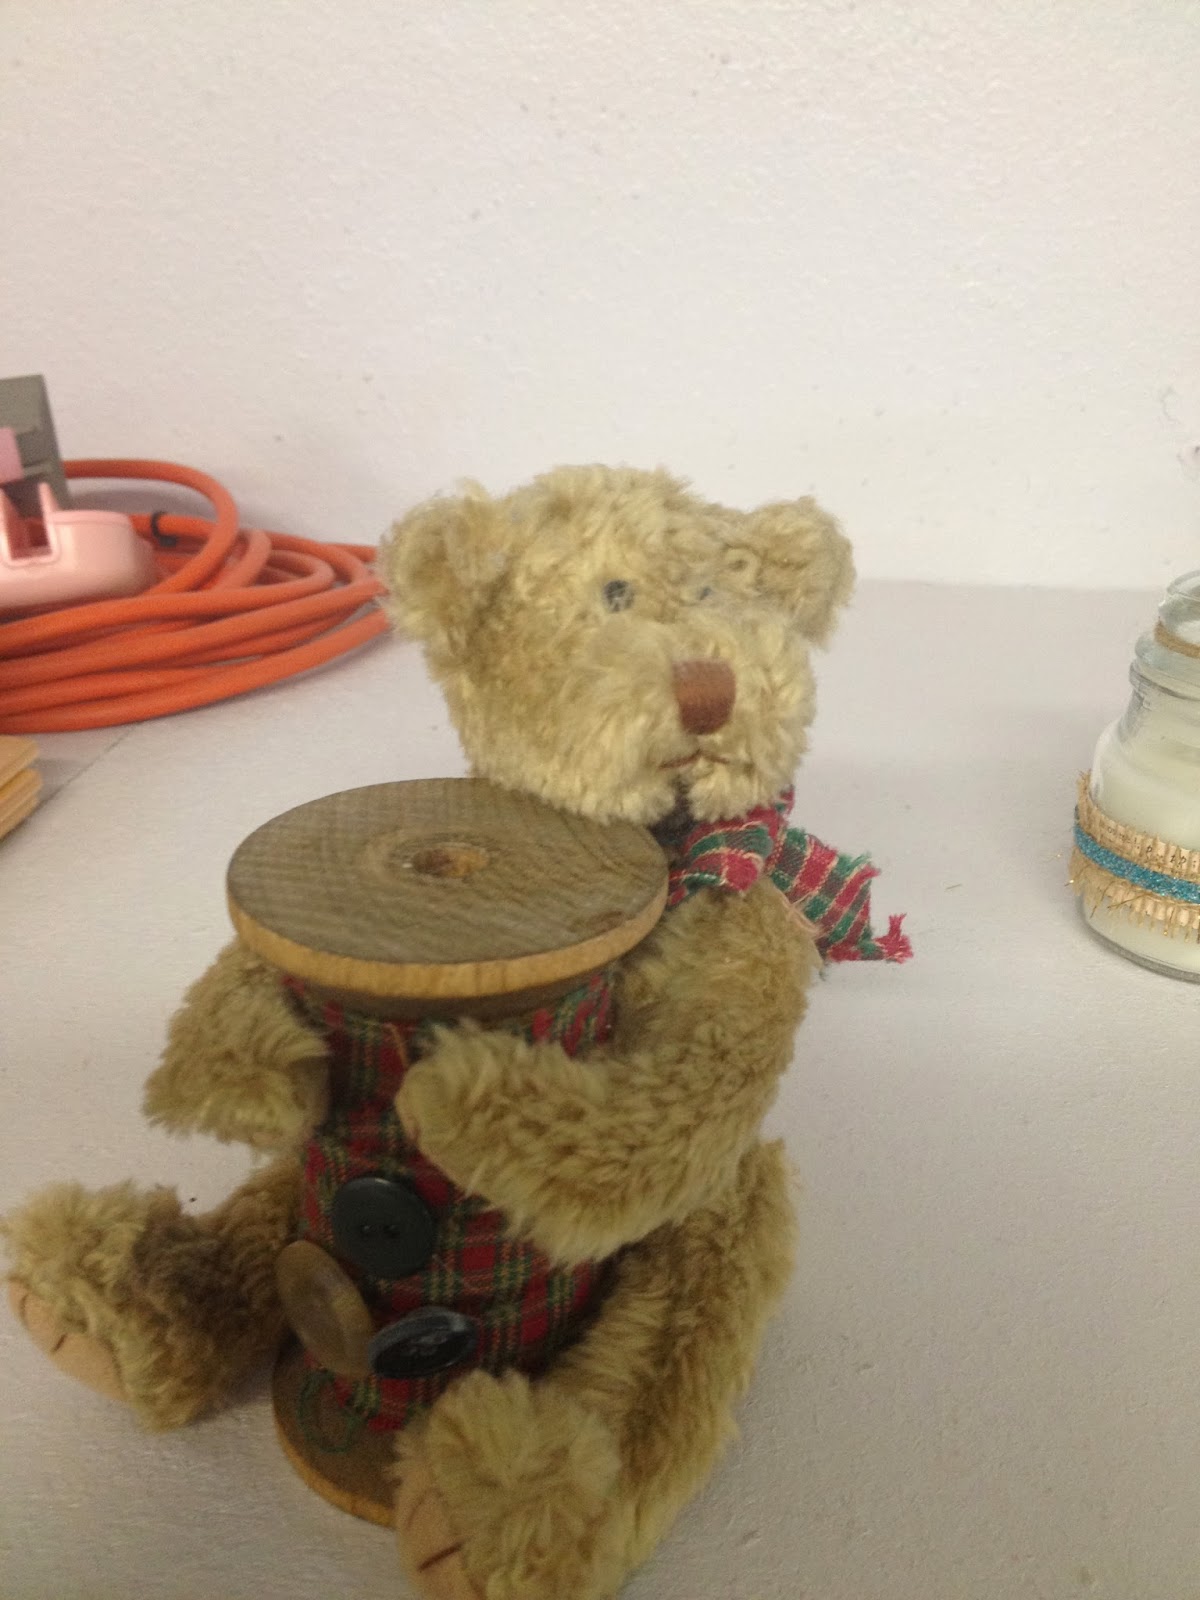
I found this adorable bear at the thrifty store.  No tag, so I don't know who made it.  But it is jointed and can be posed.  I didn't like the red/green fabric and thought it looked a bit drab or worn out.  I used undu to remove the fabric and take the bear away from the spool.  Undu undoes just about anything!


I wanted it to match my jars from yesterday.  I think it looks great!


I wound jute around the spool.  Added a flower to the top - made of paper, burlap, and broken jewelry. Used Tim Holtz dies on this one.  Added the ribbon around the neck with some bling in the center and bling sprays that I picked up in the wedding section at Hobby Lobby.  Used a low temp glue gun to reattach the bear to the spool.


Still thinking about what's next to go with this little "dust catcher" scenario!  Sure is wonderful to have the time and ability to just play!

Tuesday, June 26, 2012

How do you meet local artists?

Take a class!!!  Which is exactly what I've decided to do and there is no place to start but the Stamp House.    Judi is just a hoot to be around and I've signed up for 4 more classes....and may add more to that.

In this class we simply took an ink pen and covered it with green glitter and stuck a flower on the end of it.


Then we tied tons of ribbon, fabric and lace to the edge of a journal.  I also used my distress inks to tone down the peach and bring up the pink in the rose.


Then I stippled on stickles glitter with my finger


and the finished product with the pen down inside the o-rings, quite fun!  Easy, quick, simple.


Maybe I'll donate this as a prize or something at mom's retirement center.  And I did meet some very nice ladies.  I'm looking forward to my next classes at the stamp house!

But I'm not just a stamper, so I'm heading down to the local scrapbook store tomorrow to sign up for a class over there!  Well, after I help Colleen move into her new duplex apartment.  You know, as long as that thermometer is upside down on the ground....I don't notice the heat near as much!!!

Taking a class is really a great thing to do when it's this hot!  I'm thinking I need to go to the thrift store and find more cheap journals I can embellish!  If you give it a try, send me pics and I'll post them here.

As an update to the Colorado fires - I just read online that the Flying W Ranch in Colorado Springs has burnt to the ground and that the Air Force Academy is being evacuated.  This is truly sad.  I remember going to the Flying W back in the 70s.  Such a beautiful place and it had been in business since 1953.  May Jehovah Jesus Messiah be gracious and spare this state from any more losses.  


Saturday, January 29, 2011

Come Dress Yourself in Love - Day 6 - It's done!

I have had this sterling silver charm for years.  I always loved the chai symbol below the doves.....but it just was a bit too big for a necklace.  It's perfect in the center of the bodice with the smaller Star of David just below it.


Positioned above the "title" of the project - it's perfect!


They didn't have swarovski crystals 33 years ago.   It they had - this gown would have cost me a fortune.  As it is, I hand set over 100 crystals throughout the collage.


I embedded tiny crystals in the leaves - 3 per leaf.  The lt blue pearls were on the original dress.


The buttons that were on the sleeve cuffs - across the top of the bodice. I think you can follow where the bodice was...and where the filler is now.


I made several silk roses.....just to get the right size for the bottom corners.  Had forgotten how beautiful silk roses are.


And then I remembered the pattern to make these roses and put them on the top corners, to anchor the 5 strands of silk ribbons coming down each side.  Of course, there's a wooden dowel stitched into the top back to keep the center top from sagging.  Part of "engineering" a piece like this.


When you put all the pieces together, it looks like this hanging on the wall.  I do think I will have it framed in a shadow box.....but for now, my wedding collage is done.  Click on any of the images to enlarge them.


Original gown took 3 months to create at the cost of about $200.00
Today's wedding collage took parts of 6 days and an additional $150.00
Preserving memories in a creative way.......PRICELESS!!!


Friday, January 28, 2011

Come dress yourself in love - Day 5

It is amazing to me how much the journey of this dress is parallel to life.  Today was not a good day for progress on this project!  I started out at 8 am with my image transferred to batiste and fringed.  Got this idea that I would iron on fusible backing, then iron it to the collage.  Hmmm....when you reapply heat to the image...it transfers to whatever is under it - like the ironing board cover!!!


For my studio, I have this smaller board hanging on the back of the utility room door.  Now it has my image on it!  Of course, it's an odd size....and well, more on that later!


And the image was ruined because half of it transferred off to the ironing board cover!


So I went to print out another transfer, and my printer jammed.  Then the paper would only go in crooked.  I spent an hour online researching how to take it apart to clean the rollers.  Finally had success....but by then, I had used up so much ink test printing....that it printed blue!


Got new ink and finally got it printed.  Went in to iron it onto the fabric and since I was in a hurry by now, trying to make up for time, I used my big iron.....with steam.  Totally forgot that transfers need to be done with dry heat.  What happens if you use steam?  Even the backing transfers off.....see the "Avery" label?


By now, the steam iron is clogging up and it's dirty, so I run to Boulder to McGuckins to get whink steam iron cleaner.  Let me tell you - it works!  I even cleaned out my big Euro-pro steam press!  But in looking for a new ironing board cover - not even McGuckins had the right size.....and they have everything!

Came back home and finally got an image transferred perfectly back to fabric (but not fringed.)  It was now 3 pm and I wasn't even where I started at 8 am this morning!  A whole day and not a step forward!


And it's not like I don't have anything else on my mind!  Kerry's spinal fusion surgery starts on Monday.  Am I working on this to avoid thinking about that?  Am I making mistakes (I KNOW you can't use steam on image transfers) because I'm not thinking about what I'm doing - I'm thinking about Monday?

But isn't that just like life.  Sometimes we get to a point where we just spin our wheels.  Or nothing is right.  Or we make no progress.  But we just keep trying.  We repeat our mistakes.  We do it all over.  We try our best to make it right.

And by the end of the day, I had the photo stitched onto the collage.  I used a pale blue silk ribbon, 1/4" wide to make the stitch around the photo.  There's a tiny edge of fringe on the outside of this.  It's coming together, it's starting to take shape!


Part of the creative process is to experiment, make mistakes, try it with something else, change it up, do it differently.  I think it's what I love the most about being creative.

As for Monday, Millie reminded me of this verse:

"Be anxious for nothing, but in everything by prayer and supplication, with thanksgiving, make your request known to Jehovah". 


Thanks Millie for that reminder!


Tuesday, January 25, 2011

Come Dress Yourself in Love....Day 4

Why do I think I can match rayon that I used 33 years ago?  LOL!!!  The Blue pen didn't work.  Embroidery floss didn't work.  


So off to JoAnns and I decided to try some polyester fiber....and it came out just fine.  Colors change over time, fabric and fibers change......as does life. Nothing remains the same, and perhaps that's a good thing.  


I think it's going to take me as long to make this collage as it did to make the dress.  Everything has to be hand stitched and hand-quilted. It's too thick to use a machine.  I decided to go with 4 layers of batting as I wanted this to look really "soft".  In other words - padded like me! LOL!!!

The little birds were stitched to the original veil in a random pattern.  


The sprays of pearls and crystals were on the back of the hat.  The little blue flowers are new.


I quilted it onto the gown, just under the center of the bodice, outlined in metallic wrapped fiber....


You can click to enlarge, but it's exactly what I had envisioned.  


Fringe - to represent the times I've lived my life on nothing but fringe.
Metallic wrapped fibers - for the moments that shine
2 little birds - to remind me of my life verse:  Isaiah 40:30 "but they that wait for Jehovah shall renew their strength; they shall mount up with wings as eagles; they shall run, and not be weary; they shall walk, and not faint."
Pearls - for the wisdom I hope I have gained in the last 33 years.
Crystals - to remind me that you have to turn over a lot of rocks to find just one small gem
Tiny stitches with silk thread - to remind me of Ecclesiastes 9:10 "whatever your hand finds to do, do it with all your might"


Who knew a simple fabric collage could have so much meaning stitched into it?

Wednesday, January 19, 2011

Come dress yourself in love - day 3

Come dress yourself in love....let the journey begin! Hannah reminded me that there is a spiritual hint in this as well.  I believe that she is referring to a Christian, who dresses in the love of Christ when they accept Him, and their journey in Him begins.  But I'd like to take that one step farther. I believe that the Messiah is the bride of Israel and that she, Israel, is "dressing" herself for the time when He will enter through the walled Golden gate....


Yesterday, I was talking about layering lace. Today, we're going to alter old lace by adding new lace/trim to it.  Here's the lace that came off the bottom of the gown:


Here it is biz-bleached:


This is some silk ribbon ruffled into rosettes that I picked up at the Berry Patch


and the 1/2 yard of flowers:


layered together.........completely alters the look of that original piece of lace!  I didn't need to put them all the way up the piece as I'm saving room for the image transfer.


I ran some quilt backing behind it and then sticthed down the scallops using silver metallic thread.  Not sure if you can see the thread....but it adds just a first hint of bling.


That silk trim went down one side.  On the other side, I'll be putting this georgeous piece of "fluff". But I have to wait til the very last thing to add it.


That's actually on elastic and we decided it's meant for cute little girl headbands.....but I'm using it to give "balance" to the other side of what I'm doing.  Got your curiosity going yet???

Of course, after this is the "word" piece. And this is my prototype.  I know what it's going to say, but will embroider it onto a better piece of fabric from the dress.  The little doves were on the veil of the hat.  It will be a fringed, quilted piece.....so there's still much to do!


But just as in scrapbooking - where we sketch out an idea, with fabric, I sketched my phrase right on the fabric in about the size I think I want it to do and this will serve as the pattern for the real thing.

There are some of us who even sketch out our ideas for our lives, write down what our plans are, and then work towards those thoughts and ideas.  Who knew the journey of a wedding dress is much like the journey of one's life?