Showing posts with label Crafty Secrets. Show all posts

Monday, June 22, 2009

Fairy-less fairy box

I've had my head buried in metal clay, so Susan invited me over for a play day today. I was supposed to make a Fairy Box. I think I flunked! I didn't put a single fairy anywhere! LOL!!! I started out with a micro cigar box. It's about 4" x 5" and under 1" thick.


Found 2 of these at a thrift store a few years back and had never used them.


I totally love the end results - even if there are no fairies - it has a "fairy" quality about it.

The top says "As I remember a little girl"

And you open it up and there are women of all ages in the bathroom. "The secret of staying young is to live honestly, eat slowly, and lie about your age!"


Here's a closeup of the right side, which is the base of the box. Vintage lace on the top, net down the side.


My favorite scene - she's dressed - and in the bathtub. Note the bubble bath behind her? And the rug and towel made out of bits of felt. The bathroom fixtures are micro mini doll house furniture that I inked to distress. That stool beside the bathtub is not even 1/2" tall. The bathtub is 1" tall. Sort of gives you an idea of the scale of all of this!


I think she's thinking, "It's glorious to have time to just sit down - even if it's on the toilet!" See the toilet paper to the left?

The little old ladies were black and white - color added with chalk.


Truly love the effect of netting!


tiny little paper flowers about 1/4" across. Yes, I nearly went blind today and I forgot my magnifiers!

I do like this little scene. The swam is about 3/4" tall. Just so tiny and delicate.

They're trying on new corsets. Love it!

And I think these 2 are just waiting until they can grow up and join in the fun!


What an absolute fun day! Most of what I used is from Crafty Secrets - they have wonderful stuff! I could go back and add wings.....but I think I like it just like it is!!!

Tuesday, January 20, 2009

Paper dolls

Why do I just love paper dolls? And these....just too much fun!!!


The little chipboard flip cards and hangers are from Crafty Secrets.


And the paper and embellishments are from Melissa Francis. It's supposed to be a girl and a boy outfit....but I decided to make them both girls.


I supplied the buttons, flowers and adhesive. Oh, and more than enough left over to cover this little journal!


You just can't get any easier or simpler than this!!! So I put up a curtain rod over the blinds on the french doors behind me and I'll be hanging cute little things like these chipboard outfits as I make them.

How long since you played with paper dolls???

Sunday, July 13, 2008

Coin bezel Art - fine silver jewelry and more!

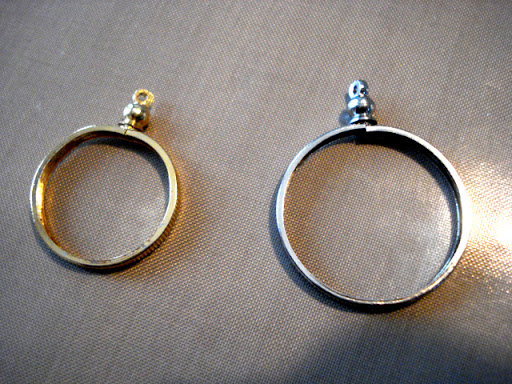
My friend, Cindy, came over and brought a bunch of coin bezels and said, "what can we do with these?" And she tossed out a handful of coin bezels on the table.


You know me, my brain just jumped into high gear! LOL! You unscrew the knob on top and pull open the bezel like this:


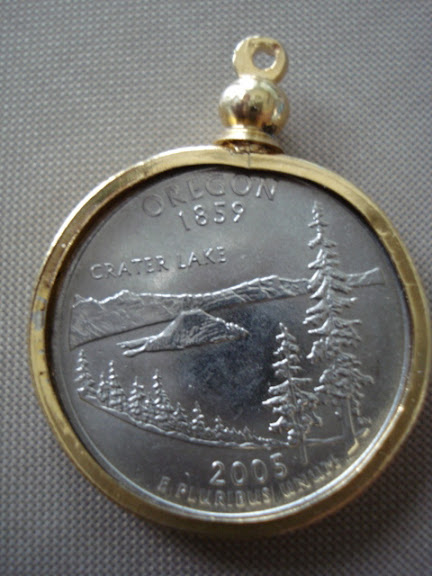
and insert a coin, screw the top back on, and it's an automatic pendant.


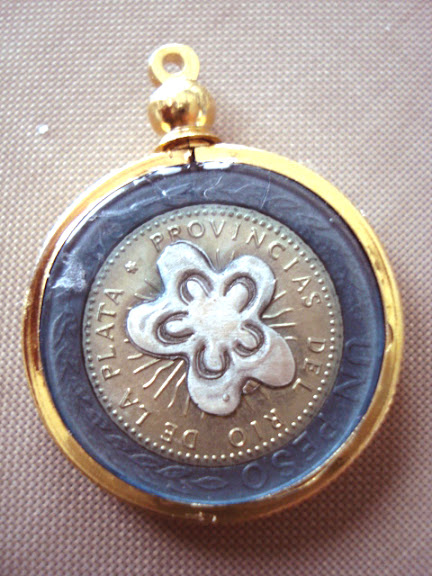
Kerry has traveled all over the world, so I ran upstairs to the desk and pulled out all the foreign coins we have. I found this one from Argentina that fit in the quarter bezel. I layered a piece of Art Clay Silver paper type (that I had already diecut and fired) in the center of the coin. Then covered it all with Glossy Accents and let it dry. Not bad, huh? Just another method of showcasing fine silver in a piece of jewelry!


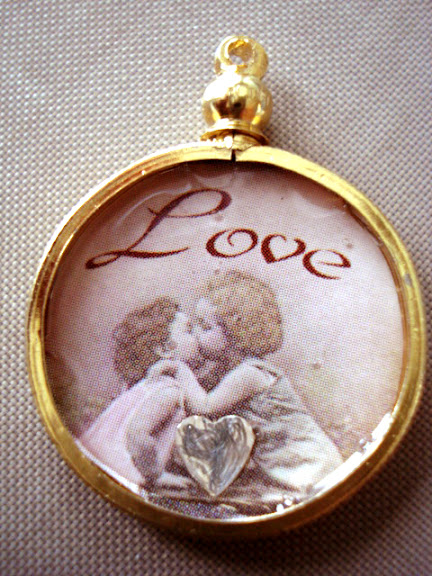
There is a little depth to these bezels - enough to encase a quarter, so I thought......paper? For this next one, I simply cut out a circle from a Crafty Secrets sticker and placed it on a piece of poster board inside the circle. Then I added a fine silver heart on top. Hey! I think we are on to something!


So, Cindy and I started thinking up names and of course, Coin Bezel Art - CBAs came to mind and just stuck! She's off preparing a website to showcase our new line of jewelry and will be selling the bezels. So if you want bezels, just click here to email her!

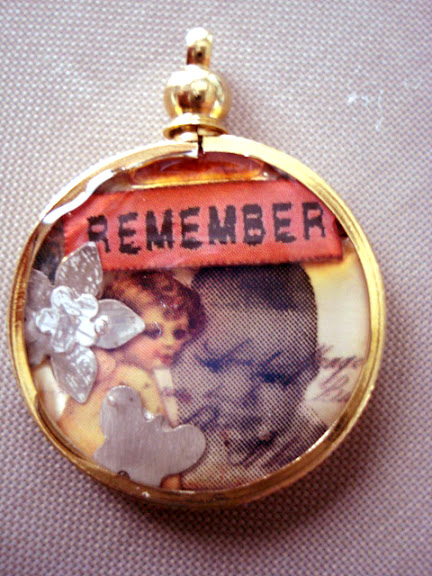
For the next one, I decided to go full blown mini collage. Just cut up tiny little pieces. Now, that's my baby photo printed on vellum with a postcard behind it, a little cherub to the left, the word "Remember" on top. and 3 pieces of Art Clay Silver paper type (punched and fired) over on the left. So that I will "remember that angels have watched over me my entire life!"


Of course, you don't have to put fine silver in yours - you can do anything you want! And you could just punch a circle of clear acrylic to put over the top (hey! I forgot, Lucy's little store has inkjet and laser sheets for just $.50 each!)

And Cindy's already working on a Coin Bezel Art website! That girl is FAST!!!

Coin Bezel Art! I think we should have a CBA swap! Anyone want to trade art? I also want to get the bezels in dime or nickel size and make a bracelet - oh dear! I just need more play time! Hmm....Kerry, can we just skip lunch today? LOLOL!!!

Tuesday, June 24, 2008

My beach bag book

Made from brown paper bags - but you'd never know it! The cover is a true collage of beach stuff....take a moment to look around!


Notice the diecut palm tree in the back? Crafty Secrets stickers over Design Original paper.


I love putting things in bottles. Like little seashells here, but the 2 shells to the right of the bottle are polymer clay covered with perfect pearls. The sandals - coated with alcohol ink to alter the color. See the glass bead fish to the right of them? And the bead below the botttle to the left, petrified reed from Sugar Creek in Indiana.


Drop swarovsky flat-backed crystals along the rim of a flattened bottlecap and cover the whole thing with glossy accents. Such a fun embellishment!


These were brown sandals on the end of a keychain I bought in Ensenada, Mexico. Used rainbow inks to color them.


Did you see that instead of a cork stopper, I used a seashell for the stopper in the bottle?


And then under all of this, note the big (giant) jute fish net?


The windows on the right open up. Seashore paper behind an acrylic window, all raised with mounted foam tape to make a shaker box filled with real sand and tiny seashells:


At the seashore we listen to the waves
stick our toes in the sand....as a starfish misbehaves!

The photo frame in the top left is spellbinders tag die folded in half and cut. The feet at the bottom is one mystery die, using the mirror embossing technique.


at the seashore- sand dollars in our hand
buckets and shovels, too, We'll build castles in the sand.

A real sand dollar chalked (great technique!), and more spellbinders dies. Love this Design Originals paper with Crafty Secrets stickers.


At the sea shore, we write down what we do.
We sit and rest and chat...and take photos of us, too.

More diecuts, ready for you to add a photo. There's a pocket and in it is an accordian "photo album" ready for you to embellish.


Most people just do flat pages in a paper bag book, but depending on how you cut and fold the bag, you can get fold out pages and more. This is folded shut.....


And here it is open. I even put a shaker box filled with sand, shells and trinkets inside this page:

At the seashore, it's so much fun to play...
Time is of no essence, we are only here today!


I cut out little kids and they are looking at the treasures -


And there is even a secret pocket on this page!


And then there are fold-down pages! The page on the right folds down. But yes, that is a real seahorse over on the left!


And here it is folded open.


A huge piece of mica covering travel stickers. Room to write, put photos or souveniers:


I like to cut the starfish die, bend the "legs" and put a pop dot under the center. Makes them look more real! I also put burlap pages in my beach bag books. Why? Because when you stitch this between paper, it makes it stronger and less likely the paper will tear.


Another great tip - use safety pens to attach charms to Amaco's mesh wire. Just for fun!


And while you have pockets between the pages, I decided to put pockets "in" the pages!


And finally, a lot of tags stuck down in the pockets in the bag:


I really tried to get this on published in a magazine or book, but I think it was just too "over-the-top" so I'm just going to self-publish it in my blog for you to enjoy! I know - not everyone would do a brown paper bag like this, but it sure was fun!!! Hmmm....I might just put this one up for sale on ebay one of these days!

Thursday, May 22, 2008

Fun cards

I did these cards for the book "Flip, Spin & Play" which is out on the shelves now. It truly is a fun little book and I thought I'd share a bit more about the techniques on these cards:

This is a flip card. The part with the school kids is the "top" and it flips down. "....and what was she really thinking?


when you flip it down, you see the nurse sitting on a book and it says "All that education...."

On the lower half, it reads "And I still can't heal a man!!!"


So easy to do, just tear the photos, images and adhere them to a torn card. Take any pre-made card and flip it up and down.

These are my actual relatives! That I embellished! LOL! And on this one...just torn strips of paper. The saying is from Crafty Secrets, "There's a wild little woman somewhere in each of us" I inked the black & white photo using Ranger's Distress ink with their foam nibs. Quite a fun technique!


Here's Aunt Nellie and Uncle Bud (Nelson) - twins.

"Men! You can't live with them and you can't live without them...." (I used a craft knife to cut the window in order to cut around the images on the paper.)


"but a twin brother? Oh good grief! I'm stuck for life with him!"

And on the bottom flip: "who needs "borrowed relatives" when you have real ones like these?"

I decided I don't need to buy photos of other people...I have plenty of my own!


Kerry says the whole state of Indiana is related to me. I wonder why he thinks that?

"The Brandon Women, famous for their Raisen cream pies....."


"It never failed to get them out of the kitchen in a hurry!"

"If you think raisen cream pie is bad, you should try their gooseberry pie....makes you wonder where goose berries came from?"


All of these flip cards were then assembled in a flip-flop card that you can see in the book. I think I should do a whole line of funny family cards....think they will forgive me?