Showing posts with label Creative Impressions. Show all posts

Tuesday, December 26, 2017

Enjoy the little things.....like cheesecake!

This journal is 4" thick and only 4 pages.  It was so much fun to make.  All Graphic 45 paper.  It's a gift for a very dear friend who happens to own Creative Impressions.  See if you can find her product!

I'll help you get started....on the cover I've used her buttons, flowers, ribbon and twine.  A total of 10 items....can you find all of them??  The ribbons were "dyed" to match the project.  


Here's a view of it standing up.  Loads of pockets, tags, flip-outs.  You could spend an hour or so exploring this!  My kind of journal!


 And this is what it looks like opened up.  Yep, lots of blank pages.  I'll let her decide what goes where!


Here's the first page with the flap folded in.  As you can see, she could add photos, recipes, or just write about what she's baking today!  Be sure to click on each photo if you want to see a larger view!


This is the same page, but with the flap opened out.


Page 2....each page has a flip-out, but each one is slightly different.  I do love this paper filled with cupcakes, donuts, roses and forget-me-nots.  And I happen to love the peach and turquoise colors.


On this flip-out, I used a glassine envelope - you can almost see through it.


Page 3 - the left square with writing - that will also flip out to the left, so a double flip-out page!


Here it is with the right flip opened out.  Another pocket for a recipe.  Yum!


Page 4 - I like the idea of a 4-cube page so you could add 4 recipes, 4 notes, 4 photos.


This flip out has a recipe holder on both the front and the back.


And the back page....2 flip-up recipe card holders on the left and a large pocket on the right with tags as inserts.


A quick view of all the tags.


This didn't get created overnight, but it's definitely been a fun project to work on.  I dearly love the papers, the colors,  the flips, folds, and the fun!  And I just decided that I need to include mom's cheesecake recipe so must run jot that down!  This gets delivered tomorrow!!!


Tuesday, April 23, 2013

What a wonderful find!

A few days ago, I posted this little scene that I put together using a vintage gown and Grandma Mae's baby shoes.  The wood frame that the dress is on is from a baby shop in Kingman.  It was what I had at that time.


So then I bought all these dolls, and this one just happened to fit into the dress as though it was made for her!


She's a turn of the century Armand Marseille doll  390, 26" tall - porcelain, with rocker eyes.  She did not have any hair, so I cleaned up and curled this vintage human hair wig.  She has a very old wood composition jointed body is pretty good shape for it's age.


I added some silk ribbon around a new hat - from Creative Impressions.  Used vintage flowers.  Draped some tiny pendants around her neck.


There are a lot of things I need to do to really fix her up and get her in mint condition, but for now, she can just sit on the dresser.  What a cutie!  And she just happened to have red eyebrows that match the red wig perfectly!

I don't know the history on her, but I have to wonder who owned her, and how on earth could anyone part with a doll this sweet?  Of course, she wasn't quite this sweet when she came to me.  I will have to start taking some "before" photos.  I paid $40 for her....so you can imagine how terrible she looked!

She's found a new home with me.  Now to figure out a name for her.  Why do I think she looks like a "Lindy"?  Could it be because I had a grade school chum named Linda who had red hair?   Or does she look more like a "Maggie"?   Going to have such fun naming all my "new" children!

Monday, April 22, 2013

doll repair

From about 1990 to 1997, I did doll repair while living and working in San Diego.  I studied under a master - Georgia Millan.  When I moved back to Colorado, I sold almost all the dolls I had.  But I did keep all my tools!  About 3 months ago, a dear friend gave me 3 of her dolls to repair.  I just had a blast working on these little cuties!

This is a Patsy doll from the 40s.  She is made of composition and here hair was cracked and coming off in huge chunks.  I filled it up, sculpted "new" waves, then used my copic airbrush to add color back.  You can hardly tell that her hair was repaired!  Gotta love the creative genius and multitude of colors that copic has....that allows me to create a variegated color in the hair from pale to deep reds and browns!  Worth around $200 even in her restored condition.  I'd guess she's dated from 1925 - 1930.  For her age, she's in very good shape.  She has sleep eyes.


I completely fell in love with this little cutie.  When I first got her, her dress was on another doll and quite stained. Her wig was nearly hopeless and she had no left cheek.  Once again, I was able to identically match the cheek color using Copic markers.  Her wig came off and was washed and reset.  I just think she has the sweetest little face ever!  I've also used Creative Impressions silk ribbon in her hair (helped keep some of the curls in place!)

She is c1928,  E.I.H. Co. Inc Rosebud doll - books around $250!


This little porcelain bye-lo baby had a chip in the porcelain under her left eye.  Again....copic to the rescue!  Silk ribbons in her hair and I literally took a baby sized christening gown and tied it to this doll's body.  You know - a temporary fix until I have time to resize the dress.  But for now, she has turned into a complete cutie!  She's a tiny 1920's doll with blue sleep eyes, so her value is $200 and up - even in her restored state.


When I started working on these little treasures (my friend is 72 and these belonged to her mom), I wondered why on earth I ever quit working on dolls.  I love taking something that is "trashed" and bringing it back to life....why wouldn't I just continue to do something that gives me so much pleasure?

So I checked on craigslist just to see if there were any old dolls.  Imagine my surprise when I saw that there was a doll estate up for sale!  As it turned out, I missed the first 3 sales the gal had.  I can't begin to fathom what she sold!  But I emailed her and asked if she had anything left and she said "a house full!"  So we arranged to meet and I sort of went nuts picking out terribly distressed, broken down old dolls.

Well, hang on, as in the next few days, I will start sharing some of the repairs I've made.  The estate was from a woman who had done doll repair for years in Colorado Springs and had passed away.  Her daughter started setting aside items, tools, wigs, eyes, parts, that her mom had used to repair dolls.  I made a second trip and purchased boxes of product to repair dolls with.  And then, she told me that they had taken everything left to an auction house in Pueblo....and the auction was that Saturday.  Dare I share that I filled my car up at the auction as well???

I think we can safely say that I am now officially back into the doll repair business!  I really love working on dolls from the 40s to 70s, composition or hard plastic dolls.  I love restringing dolls that have fallen apart.  I enjoy cleaning and repairing clothes.  When I was in San Diego, I could take a photo of a dress and make it for the doll - no pattern needed!  Well, that's been a few years now, but I'm going to give that a try as well!

Isn't it amazing how many craft supplies that I didn't have years ago - I can put to use today to make doll repair even more fun!!!

Thursday, September 13, 2012

Jubilation!!!

A week ago, I had a lumpectomy done.  I've known about the lump since March.  But with the move, Kerry's health, Mom's health.....and just life....I guess I didn't know how much I was worried about this until the surgeon called and said the all the cells were benign.

Who knew one could feel such jubilation??  Such praise to God for His grace and glory!  Kerry and I celebrated most of the day.

How?  By driving 9 miles to a neighboring village and having lunch at a BBQ place we had seen.  And then I spent 2 hours wondering through the antique stores this little place is known for.  More about all that later.

I came home inspired to play.  I'd seen this done in one of the cute little shops.

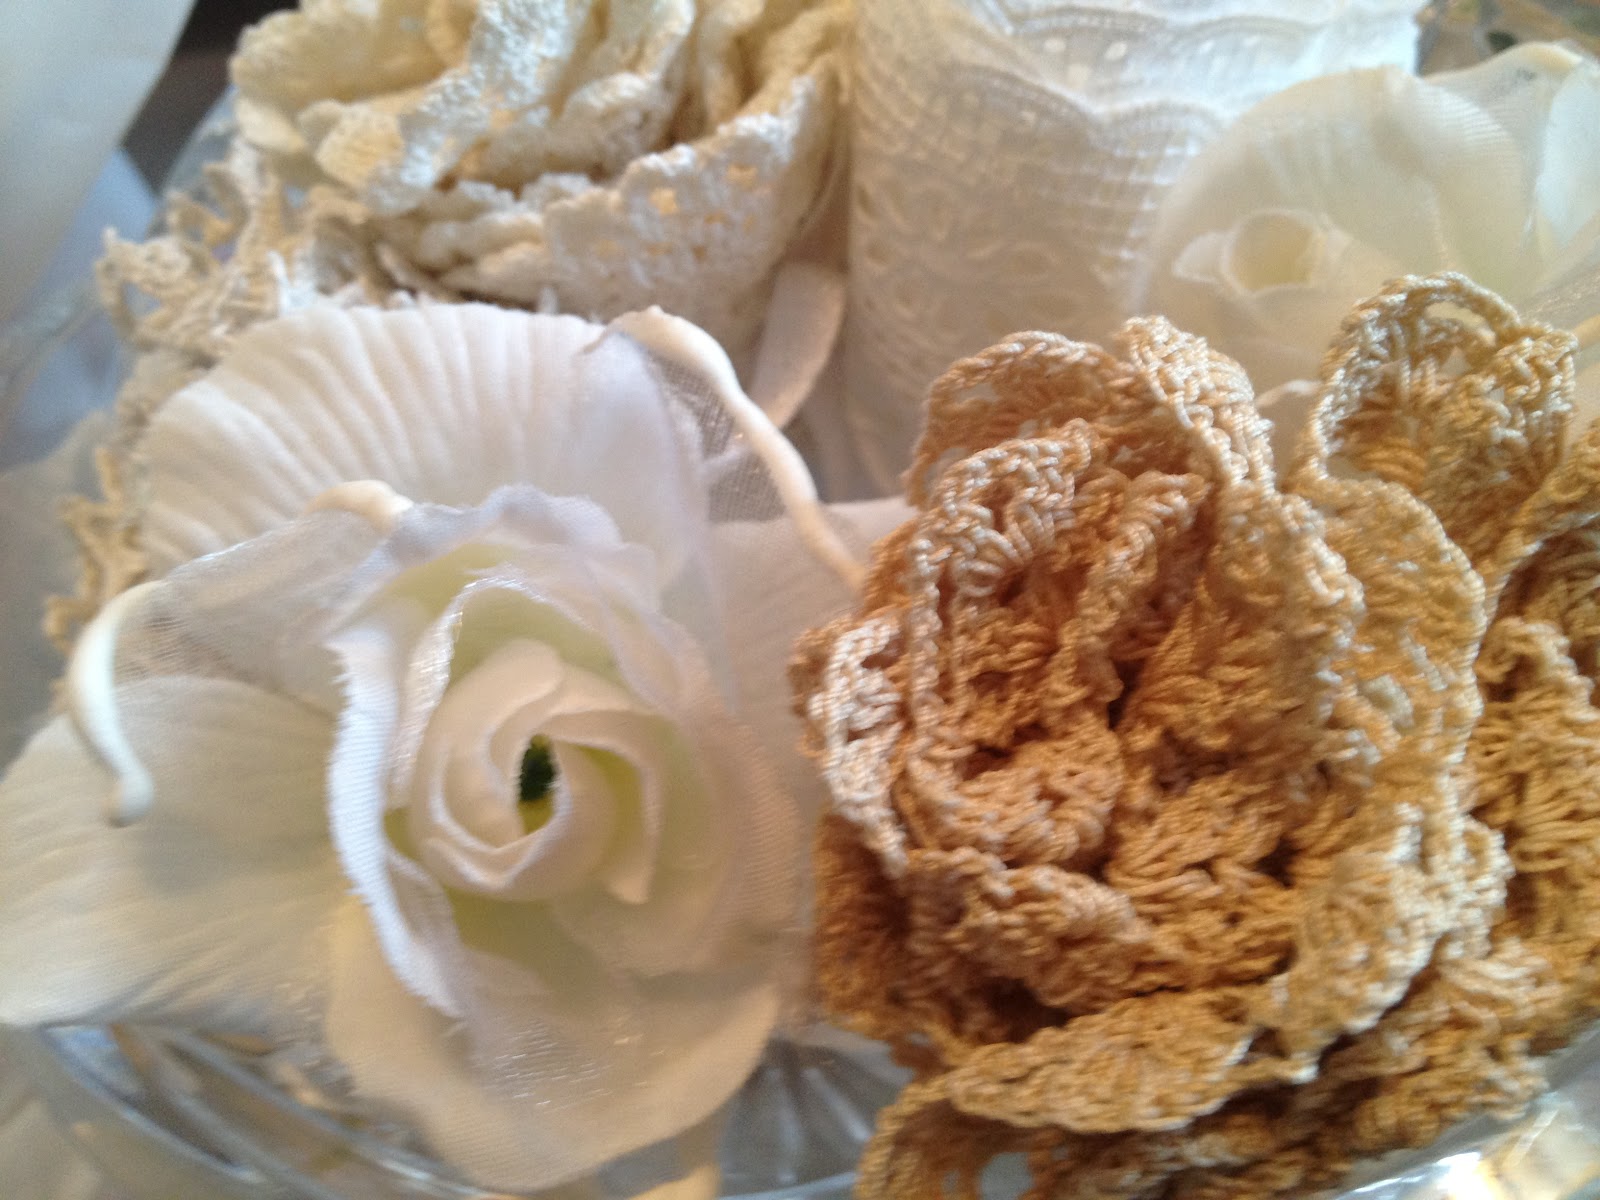
Take old lace that you have and wind it up loosely, then pinch one end and tie a ribbon around it real tight.  Fluff open the other end and it sort of looks like a flower!  I did it with some old doilies first:


used 2 doilies for each little flower


And I took apart some silk flowers to add to the mix


Thinner lace looks a little like rose buds


And I made a rose from silk - you can buy it by the yard from Creative Impressions


and then I stuck it all in a cut glass bowl I picked up at the thrift store ($.99)


It's great to go antiquing if you want to get inspired!  And what a great way to store my unused lace.  Now, if I look at it every day, how long until I decide to use it?  One must live in creative surroundings in order to live a creative life!!!

Wednesday, December 9, 2009

It's soooooooo cold outside!!!

This morning, it was MINUS 27 degrees with the windchill factor. But even without the chill....it was still MINUS FIVE degrees!!! Nothing should get that cold! A truly perfect day for me to stay inside and play! Oh - I do have fun!!!

These are snowflakes from Creative Impressions. One of my favorite Colorado companies. I just love them to pieces! And I love their products. So, I took 2 snowflakes and layered them inside glass, then soldered around the edges. Nope, no faux soldering here, this is the real thing.....and my first attempt, so not so bad!


And I don't think I did so bad adding jump rings either. Remember - this was my second one here!

and then I got really brave and used 3 snowflakes. A bit harder getting the copper tape to stick with that much space between the glass....but we did it!

So I'm thinking this might be a good technique to video, huh? But then I thought.....I have 7 of my 8 nights planned out....maybe I will leave night 8 up to you. What would you like a video of? Just post your thoughts in the comments to this blog. Look back at all the things I've done the past 2 years and let me know if there's something you'd like to see as a video. It might already be one of the 7 that I've picked.....but if it's not, I'll add the one I like the best!


And are you starting to see the Star of David in every snowflake there is? Just remember - snowflakes only have 6 points or 12 points. No 5, 7 or 8 points....they just aren't real!


Wednesday, December 2, 2009

1963

In 1963, in Indiana, we had a blizzard. It must have been a good one because they took pictures of just the snow! I do remember it - the snow covered the truck! And I remember it was cold! We lived in a little house - maybe 1000 square feet. All 7 of us - and just one bathroom! But I know we had fun!

Hard to imagine it's been 46 years since these photos were taken! Where did my life go?


Someone asked if I was ever going to do paper crafts again. Well, here you go! I love the snowflakes - they are from Creative Impressions. Just so much fun! Build them any way you want!

Tuesday, October 13, 2009

Yep, just let it snow! LOL!!!

Of all weekends....it snowed the night the Starving Artists Playground started! Last year...we had it the second weekend in October and we were eating on the back deck. NOT this year!!! And the temp dropped soooooo cold! The high for the weekend was 48 degrees!!!


We simply moved our meals to my garage. Yep, still pretty cold, so I fired up the kerosun and made a "campfire" circle around the heater!


Everyone brought their lawn chairs and folding chairs to help out. And that table is just loaded with all the gift bags and door prizes for the whole weekend - how fun is that?
But I decided that our snow was going to work to our advantage and actually came up with a new "technique" making snowflakes using our snow! Are you ready for this?

And may I point out - this is the advantage of the whole concept of a playshop. You don't really know what the "professor" is going to do until you walk into class as they have the "right" to change their final project right up to the last minute. So, I literally came up with this idea the day of my playshop....all due to the snow outside all over the back deck!

Here's a look at one of the snowflakes. I used Friendly Plastic and felt and mylar blossoms from Creative Impressions.


I simply laid 1/16" strips of rainbow Friendly Plastic in patterns on top of and underneath of the felt and mylar blossoms, used a heat gun to melt them together. (Note: you have to do this in layers as you cannot apply heat to mylar - it will melt!)

I also cut a tiny square of Friendly Plastic and softened it using the skillet method and draped it over a Creative Impressions brad, then used my needle tool to shape it to the brad to make the center flower for this flake:

Here's another flake that I put together:

Because we were using felt flowers....you can't really dip it into cold water to cool the plastic. So we took our snowflakes on our silpat sheets and laid them on top of the snow to cool.

Here's Rose, who flew in all the way from Wales just to play.....cooling down her snowflake. (I know - what on earth is she doing in a sleeveless shirt??? Does she not understand the concept of freezing weather? LOL!)


and here's one where we shaped spirals of Friendly Plastic around our needle tools and attached them using the water method.....this flake is about 6" across so it's quite large!

Now I suppose that you could dip your felt into cold water and allow it to dry....but we opted to take advantage of our snow and I think everyone enjoyed the idea that we made good use of the snow for a "new" way of cooling Friendly Plastic!

Yep - bring on that snow! Let the temps drop to below freezing. If nothing else, the weekend was filled with adaptive, creative artists who played for more than 48 hours straight!

Yesterday, I took Jana, Liz and Linda up to Estes Park to "hunt" for Elk. Just wait til you see how close Linda got to a 14 or 16 point buck! Closer than I cared to go! And yes, Rose, "hunt for Elk" is NOT a new term for "shopping" - although we did stop by to see Cheryl's new store!

Quite sadly we then took Liz back to DIA for her flight home to the UK. Liz, you were sorely missed last night - I wish you could have stayed forever. OK - just move in with me and we will play all day long! I'm qute certain your hubby can find work in Denver! LOL!!!

Today - another very small playgroup coming over to experiment with Jana, Linda and myself. I have declared this to be a jammie day - as in sweats and thick socks - no makeup.....we are just going to have fun!

Ah! Life is good!!!

Stay tuned for more photos and tales from our Starving Artist's Playground!!!

Tuesday, September 22, 2009

Snowflake blossoms

Today, I brought my friend Shelly, down to Canon City on a "shopping" trip. We stopped at Creative Impressions in Colorado springs and I got a ton of white felt flowers. These come individually and you stack them up and put a brad in the center and can make countless "flower" arrangments. Ok....there are some snowflakes in there as well!


My niece and nephew came to mom's for a visit. And I gave them both a bunch of flowers and they got out their markers and started coloring them.

Very creative coloring, I must say!!!

OK.....extremely creative coloring!

This one happens to be my very favorite....not sure why, but I really love it!


It kept them busy for about 2 hours while my brother and I went over genealogy notes. So if you are looking for something to entertain the kids with.....I'd have to suggest that you check out Creative Impressions and buy them all in white!

Now, I can hardly wait to get back home in a couple of days and see what happens when I apply alcohol inks, acrylic paints...you name it....to these! I think it's going to be great fun! But mostly I'm wondering what Friendly Plastic bits and pieces are going to look like if melted on top of the felt! LOL!!!


Friday, August 28, 2009

Lollipop - Lollipop.....

These are totally fun for the kids to do - and so quick and easy! Just diecut out the shape and insert the lollipop.


At the show, these were the aperture cuts inside our cards and we put them on the front of the cards.


Well, my friend Terry wore one in his glasses!!! I think he would do anything to have fun! He's here with his wonderful wife Leesa - who is one of the most fun crafters I know.


And the bird is fun as well.


I also wanted to show that you can do big fluffy bows like this with the bow maker on the Ultimate Crafter's Companion. It just makes making bows way too easy!!!

Well, I think I'm caught up on photos from last weekend! Hope you've enjoyed them all. I've had a great week. Kerry's been gone on a business trip and I have been resting. Watching movies. Doing some cleaning. Out with girlfriends - it's been such a fun week! Saw Julie & Julia today - if you haven't been - go see it. But eat first! LOL!!!