Showing posts with label greencraft recycling. Show all posts

Wednesday, December 11, 2013

Recycled snowmen

Went to the thrifty shops after the dentist yesterday and had so much fun.  I would just stand and stare at things. Finally settled on bringing home a bunch of snowmen.  My brother and his family came today and brought pizza for lunch.  He and his son fixed my KeroSun space heater so I could warm up the garage.  I needed a large place to play today.  :o)

Everything at the thrifty store was half off so this little gem was $2.99.  I unassembled it and tossed the words.  Gave me 7 snowmen to play with!


The hat on this little Santa got saved - the rest got boxed up for another idea later on.  :o)


The little hat went on this guy.  A snowman in a tuxedo?  Just too cute for words!!!  He has "tails" in the back of the jacket!


I think this was a quarter….


This one was 47 cents….


another quarter for this….when they are so cheap, I just have to bring them home!!!


The sleigh is pretty well chewed up.  wood showing through the paint.  I thought about stripping it, but decided I'd just be lazy!  Only $4 for this.


After taking everything apart, I used my low temp glue gun to reassemble all the little snowmen on top of the sleigh.


And then I put it outside on my patio table.  I counted up and I have a total of $8.00 in this entire thing and it is just too cute!  Someone else's trash is definitely my treasures!  Hope it puts a smile on your face!


But oops!  I realized you could see the sleigh where the paint had worn off.  NOT good!  I had parts of an old wreath that I took apart even more and then glued it around the base.  Well, I do think it's complete now!  Will wait and put it back outside on the table in the morning.  Going to enjoy it inside tonight!  :o)


I just get the biggest kick out of recycling stuff!  I hope you all will continue to take what you don't want to the thrifty store so I can continue to have this much fun!!!

Tuesday, March 10, 2009

Friendly Plastic Melt 'n Foil

So, a few nights ago, I shared how to diecut Friendly Plastic pellets. Now I'm going to show how to recycle those leftover pieces and turn them into even more pieces of Friendly Plastic that you can reuse. After all, in today's economy, it's all about using every little bit that you can!!!

Here's the scrap that I'm starting with.  You might recognize it as a sizzix diecut shape:

Dump it down in your heated skillet and let it soften.  Just about 10 - 20 seconds

Use your Needle tool to pull it out of the water and shape it into a ball (well just shape it!)

And then roll it out on top of your silpat or non-stick craft sheet:

It will start to harden, and when it does, leave it on the sheet and dip it back into the hot water (about 180 degrees) to the count of 10:


You can use the griddle method...but it will take quite a bit longer to re-soften:

Continue this until you get it as thin as you want it.  Note the lump in the background....I cut this piece in half and kept rolling it out thinner and thinner

The next step is to refoil it.  Here's the "sandwich":

Silpat
Friendly Plastic
foil
Non-stick Craft sheet (you can't use the silpat for the top because of it's textured side

And then iron (iron set at hottest setting)  The foil will transfer to the plastic

Here's the foiled piece.  I dipped my whole "sandwich" in cold water and it peeled right off.  If you try to take the sandwich apart while the Friendly Plastic is too hot...it will stick.

Check it out....thinner than a dime!


So, you can diecut with your Sizzix, or in the Cricut.  And you can use any other dies to get a really great cut line.  Now, some have told me that they just warm it back up and get good cuts with other dies...I just haven't tried to diecut when it's warm....I'm stuck with cold cuts!  LOL!!!


Here's the negative space left over from the above diecuts

Simply cut that up into small pieces and layer it on top of itself on your silpat on the griddle and melt it down  It will work just like the inlaid technique....pieces will melt into each other and it will all go flat

I slathered my fingers in vasoline and rubbed it all out smooth. You can do the same with a roller or you can flatten it with a greased clear stamp block.

And now I'm ready to diecut again.  You can also use your cutters with this method.  But I think you can start to see how you can continue to repeat this process and use up every single piece of Friendly Plastic scrap that you have.  Talk about "Green Craft" - I think we have a winner with this product!!!

Thursday, June 5, 2008

A call for tubes

or "will I ever learn?" LOLOL! Oh me! Why on earth do I throw anything away? Because it's always the day after they pick up the trash that I get my "brilliant" idea!!! I get my metal from Amaco and it comes in clear plastic tubes. Michaels carries it around here:


and yesterday, I threw out 15 of these tubes! I have always stored my twinkling H2o pots in them....and today, I thought, oh! why not store my perfect pearls in them?


and once that cell in my brain kicked in....it was like...oh! I could store my glitter in them, too!!!


But alas, I have used up all my tubes storing my twinkling H2o pots. See how wonderful? They just fit perfectly down into my storage drawers, I pull them out and I can easily see what I have!


Dare I email my good friends Dawn and Elaine at Amaco and ask them for empty tubes? Hmmm.....what else can we put in them? A really good way to market a product...maybe they could just start selling empty tubes? With the tops on these, you can also hang them on pegs on a pegboard wall. I used to do that....until I decided it was just something else to dust!

Got tubes? I need them! LOL!!!

Wednesday, April 9, 2008

Rainbow cable art

Well, what were you expecting? LOL! I shared resistor art last week and thought it appropriate to share cable art as well. Mom and I used to drive down to Santa Fe and Taos and explore old alleys, take photos of doors and visit galleries and craft stores. On one such trip, the Georgia O'Keefe center was offering a free class in how to make art using computer parts and we signed up. Now this was before I ever did scrapbooking or stamping and I still think it's one of the most fun classes I ever took!

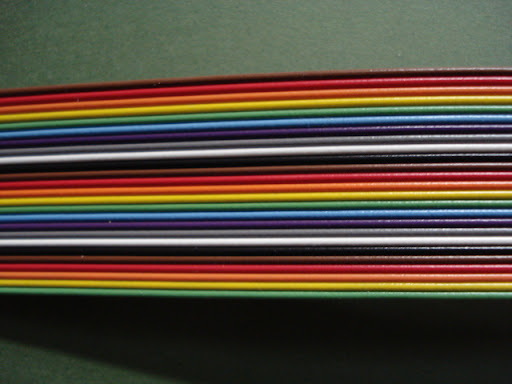
This is what the rainbow cable looks like.


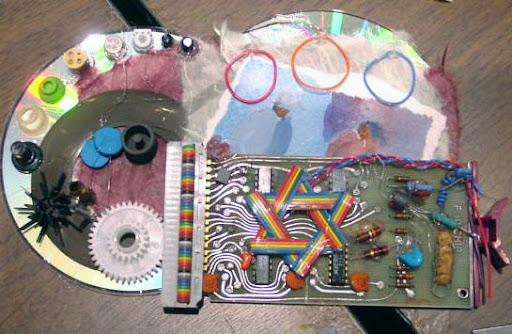
I do not have any photos and borrowed these from mom. This was what I ended up with and it's called the Circle of Life. Well, of course, one must name their art!

There are 2 CDs as the bse. Lots of round things from the hundreds of computer parts that were available to design with. Circles inside of circles. A scrap of a watercolor painting that mom did with her and dad in it.

I used the rainbow cable on the motherboard to form the star, but also it is braided across the top and down the side. and pieces of it wrapped around a metal post on the left.

Barbra Striesand wrote a song that I love. The words go "this circle just goes on and on. It began before us it will be here when we're gone and this circle just goes on and on, connecting our humanity, joining me to you and you to me, love and learn and change and gro, this circle touches everyone....." It was what I was thinking as I put these computer parts together.


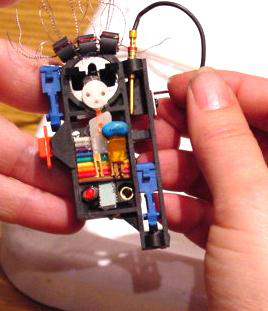
Mom made this one. Looks like a little girl. Notice the rianbow cable in the center? And then stripped cable wires for her hair.


There were at least 40 women creating in the room that night and the energy was beyond description! One of the most inspiring evenings of my life.

If you want some cable to play with...look in my little store. When it's gone...it's all gone. Pretty hard to find as I don't think they use it much any more. The wires are attached to each other...but they pull apart pretty easily. I'll have to play some more with it one of these days!

Wednesday, April 2, 2008

Resistor Art!

Yep, tiny little resistors that come attached to metal wires. They look like this:


The are great to wrap around modern keys....so you don't have to hunt for vintage keys for emebllishments:


Or wrap around metal stencil letters. I think I found these at JoAnns for $2.00 per set


Curl the ends up in a swirl and stick them down into a tiny glass amulet with other found object like watch parts:


E6000 them to the top of a bottlecap. Use your cropadile to punch a hole in the cap and add more wire and you have a pendant!


Or simply loop different colored resisters together to form a "chain".


Wrapped around another key:


And another key:


I'm thinking about making a necklace out of these! Could be fun!


So, I'm recycling keys and recycling unused resistors. More GreenCraft!!! So rather than creating and designing, does this mean I'm recreating and redesigning? Resistor Art. Who would have thought? Hmmm....maybe tomorrow I'll have to do computer wire art!

If you can't find resistors, email me....I've added some to our Lucy McGoo's Little Store.

Wednesday, March 19, 2008

Recycling those old stickers

If you are like me, you have boxes and bins filled with old stickers, partially used sheets of stickers....things from your recent past that area already so far out of style you may never use them! I blogged a couple of cigar boxes that I covered with altered/distressed stickers (you can search "cigar boxes" on this blog to find them) and now, I'm going to show my next way of reviving old stickers.

What can I say? Yuck to these stickers!


All I did was add some Art Institute glitter and I think I'll keep these now!


My whole kitchen is decorated in chili peppers. I have no idea why....because I'd like to be a "red hot mama"????? NOT! But I do have a thing for chili peppers. But not getting much out of this sheet of stickers:


Until I covered them in Art Institute glitter.


I attached that front sticker to black card stock, cut it out, then used a pop dot to give it some depth.


A bit too cutesy for me:


But I stuck a row of flowers on some cardstock


Added some glitter and a bottom row of flowers. Well, still a bit cutesy, but a little better. Maybe I'll take off that bottom row...must be the faces that I don't like!


Are you starting to get a trend here? 2008 is the year to recycle and reuse. Time to drag out all those old stickers and see what you can do with them. After all....Grandma and Aunt Mae would just love to get a card from you and how are they going to know how old your stickers are? And playing with glitter? I went into Kentucky Fried Chicken after my play day in glitter. The girl behind the counter absolutely cracked up laughing at me. I guess I didn't realize just how much I had gotten all over my face and my clothes!

But I figure life can't get any better than when you can give someone else a reason to laugh!

Tuesday, March 18, 2008

Recycle that old suede jacket!!!

The other day I blogged about diecutting suede and I used a sixxix doll clothes die to dress Lucy McGoo.

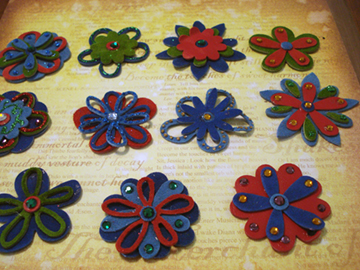
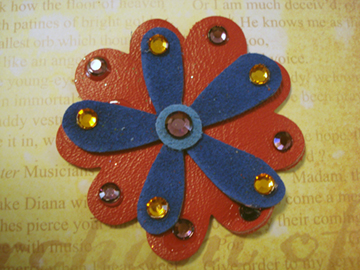
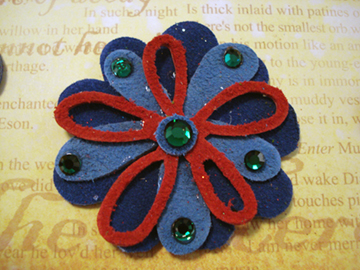
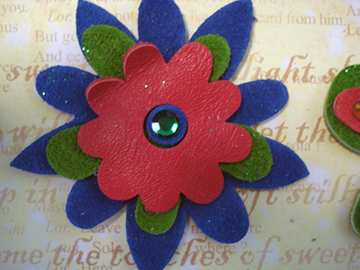
Today, I decided to use 3 different sizzix dies in my Wizard to make a wonderful array of suede flowers. Sad to say the photos do not do these justice!


You can mix and match these in a nearly endless ways. For this one, I put the leather side up on the red, the suede side up on the blue and added Swarovsky crystals.


All 3 layers are suede side up for both of these:


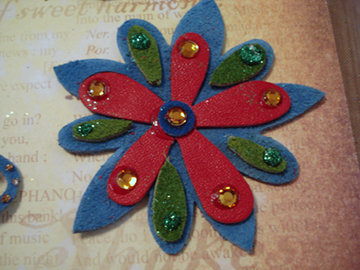
Then I decided to try Art Institute glitter on them. These are tiny little dots of glue covered with glitter:


The green is free form Art Insitute Glitter. The red is Ranger's stickles covered with Art Insitute Glitter. Goes on a lot thicker.


Th gold dots are Art Institute Glitter. I just love all the different combinations you can get out of these 3 flowers:


Gold Swarovsky crystals, green Art Institute Glitter


Back to simple and plain. The sandwich for these in the Wizard is:

Sizzix die
Suede/Leather
Universal adapter mat


Another thread of Art Institute Glitter


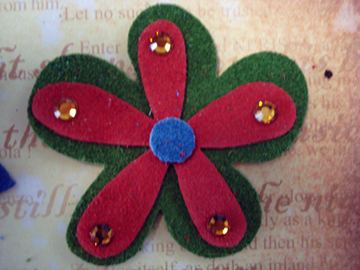
The red is leather side up. I really like this one!


Four layers of suede on this one, but what can I say...it's stunning!


Never toss out anything! Just cut it up and run it through your Wizard or other diecutting system! Recycle, Re-use, Re-purpose, Re-generate. And just look at what incredibly wonderful embellishments for some future project.

Got any blue suede shoes? They would work just fine!