Showing posts with label Judy Stonehouse. Show all posts

Friday, February 27, 2009

Cricut and pewter

Yep, you read that right!!! You can diecut PEWTER and METAL in the Cricut!!! WOW!! I figured if you could cut chipboard, you could do metal. And I was right! Here's the settings:

Slowest speed
Highest pressure
Thick cut blade set to # 6.

One pass through is all you need!!! I did the word SOUL in Amaco's Art Emboss Light Weight metal:


Pulled it off and ran each letter through a cuttlebug embossing folder to give it texture:


I'm actually using the reverse of the purple side.....because I didn't have the shade of metal that I wanted. Here's the back of the "S":


To get my correct shade, I simply used my copic markers in the airbrush and applied smooth color that dried in 2 seconds!


OK - it really was so fast and easy!!! Next I started diecutting in pewter - Amaco's Art Emboss Pewter. Same settings. Equally excellent results! No, I'm not sharing just yet. I have a project brewing that is going to incorporate almost every single technique that Linda and I come up with this week. I think you are going to love it.....it has inspired me to just keep experimenting and trying new things!

We sort of took most of today "off". We ran up to Loveland to visit our friend Judy Caulkins who owns Judy's Stone House Designs. Remember the heart shaped purse that I turned into a birdhouse? I'm thinking we might just have to decorate a purse in Friendly Plastic!!!

Stay tuned for more fun coming up soon!!! I'm exhausted! But when you are having this much fun...who cares about sleep? Oh, and I have to report....a little Chambord with your Diet Coke sure helps the creativity flow! LOL!!!

Friday, February 13, 2009

Mobile home, part 2

I just loved your guesses as to what this was going to be and why I call it "mobile home". My friend, Kelly, gave me a Judy's Stone House heart shaped wood purse and asked if I would decorate it for her. You can see the original box purse here

And I happen to know that Kelly collect's bird houses. So I thought - what a cute idea....turn this purse into a bird house.


So, the purse is "mobile" as you can take it with you....and it's a home for birds....a bird house.....so, it's a "mobile home" for birds!

Now you know why Kerry was laughing! LOLOL!!!! We do have fun around here!!!

So, taking a closer look - I drilled a hole in the middle and outlined it with layers of nestabilities cut dies. Once I added the brown, I knew I had to go back and add some brown penwork and distress the edges. It didn't look right as pale as it was.


The little bird is just a cheap (3 for $1.99) white feathered bird from the craft store. BUT.....I watercolor painted the thing. How cute is that? Added a doo-dad tape measure (Design Originals) and wire to the top of the wing. A ring thru the nose (did you know bird's have nose rings?) and a key hanging from that.


On the head is a watch part and on the back, a bead, a watch part and a Tim Holtz spinner. Beyond words cute!


I covered the wood beads on the handle with paper.


Bought a grapevine wreath, soaked it in water (underwater basket weaving 102) straightened it out and hot-glued it to the box along with moss and fern.


Literally went out into the back yard and broke off a tree limb then cut it for the bird perch.  You can see from this angle that the's plenty of depth - but I think it will look just fine as a birdhouse.


Fine detail of wire wrapped around a do-dad ruler.  About time I started using up some of my really old stock.  "Borrowed" the concept for this idea from Nancy - one of the members of my yahoo group.  Thanks for the inspiration Nancy, but I still like what you did a whole lot better....I just don't do birds!  LOL!!!


From this view, you can see how I used the brown pieces of scrap for the inside edges of the house.  I did a colorwash using turquoise acrylic paint on the wood before I started.


I still just crack up when I think "mobile home"!  LOL!  But I am totally in love with the cricut and what you can do with it.  And remember, I made all this on my 2nd time using the machine... it sure is easy and not much of a learning curve at all!


So, with all the cricut diecuts, ink, penwork, and embellishments....I think I did a pretty good job of turning this heart shaped purse into a "mobile home" for birds. Oh me! I hope Kelly loves it! It's certainly brought a lot of laughter to our house this week!!! Maybe sometime I'll share the story about the 5 drills that got reduced to 2 drills yesterday!!!  But hey! I can now drill a hole in anything!!!  LOL!!!

Thursday, January 17, 2008

Let's Play Monopoly

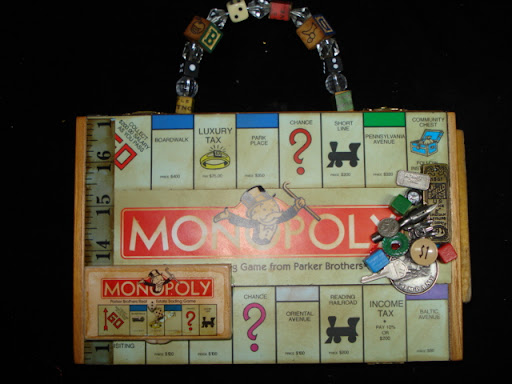
As a child, I loved to play monopoly. It was the game that lasted forever....and ever! Today was my "Third Thursday" play group. There were 10 today....we call ourselves the "Basement Babes" and everyone comes to my house to play. Some of the most incredible artists in the industry (in my opinion) and they all gather in my basement studio to play. Today...we altered cigar boxes. I decided to make mine a Monopoly purse. It really is all about playing the game of art!


Well, I got a glare, turned the flash off, and this one came out too blue...I just can't win with my camera! The papers are all EK Success game papers inked with Ranger's Vintage Photo distress ink.


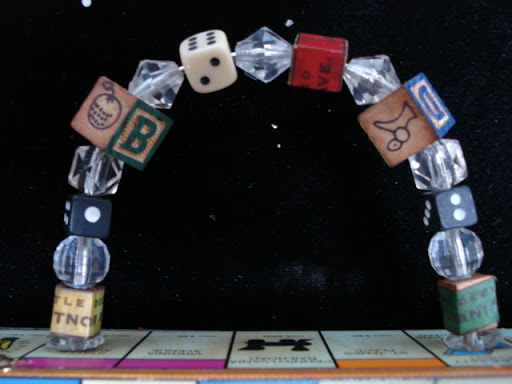
But you get the idea! I borrowed a handle from a Judy Stonhouse purse...and then altered it by drilling holes through dice, adding monopoly card tops to wood blocks and adding a couple of alphabet beads. Love how this handle came out!


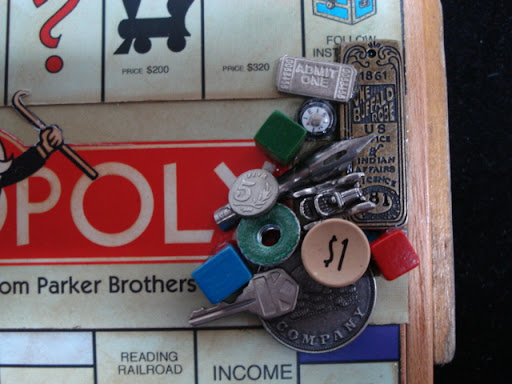
And do I ever do anything without collage? Sometimes I wonder...but just a little corner of game pieces, brads, odds and ends:


This is actually a key chain. I cut the chain part off and inked it with alcohol inks and then used E6000 to adhere it to the front of the box:


It flips open, a drawer slides out and you can actually play this miniature game!!!


Stuck a piece from a wood yardstick on one end:


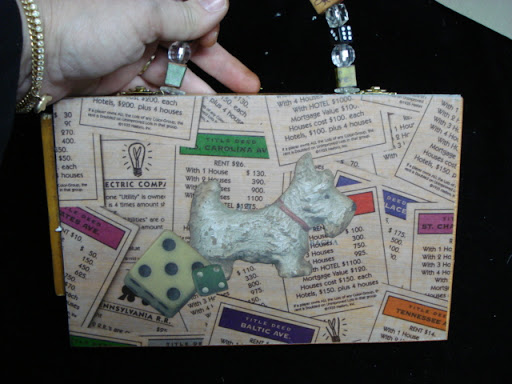
And this is the back:


I hope to do a whole series of game boxes....and then find the game in the size that will fit inside the box. Don't you think this would be a cute way to store and display games? I can just see a whole row of these on the shelf. Now, who wants to come over and play monopoly with me!!!

I just love the Basement Babes....they keep my creative juices flowing and it's fast becoming my favorite day of each month! You know, we had play groups in Kindergarten.....I think it's great to have play groups as adults! The bonus part is that it forces me to clean my studio at least once a month!!!

Monopoly. Just another way to play the game of art!