Showing posts sorted by relevance for query opals. Sort by date Show all posts

Wednesday, November 26, 2008

Opals on copper and transparencies

I'm starting to think you can just put opals on everything!!! First up - on transparency. Laserjet or inkjet, doesn't matter. Just lay it flat, rub a versamark pad over it, sprinkle on the opals, heat it with your heat tool. Them immediately, while still warm, run it thru your cuttlebug with an embossing folder. I put some fantasy film behind these just for fun - but excellent backgrounds!!!


That one was green and blue opals. The next one is blue and pearl (new) - love this combination!


Next experiment was copper. We ran a piece of copper thru a cuttlebug folder. Then ran the versamark over it and dusted on a pale mint green shade of opals. When you heat set that, it looks like an instant patina! Next, we ran a green stazon pad over it and heat set that, then fingerpainted stickles on top of all that. Pretty fun!


Do you have the latest cuttlebug embossing strips? For borders and envelopes, but we put one on copper, used green opals over it and then patina stickles - just too cool!!!


And for the last background, copper, red inks with black stazon on top of that and a mixture of stickles on top of that.


What amazing backgrounds we created with just opals, stickles, copper and/or transparencies. Are you starting to see how my brain operates? I just start with one product and then add another on top of that, add a 3rd or 4th product...just keep experimenting. The results last weekend were just incredible!

And check back as there's more to come!!!

Tuesday, November 25, 2008

Opal swirls on seaglass

OK, I LOVE opals!!! What fun to just experiment and play with them. Here are just a few of the pendants we made over the weekend. Want some jewelry?

For this one, we melted leftover opals, stickles glitter and pieces of fantasy film in the melting pot. poured it onto seaglass and drizzled stickles on the edges.  Pretty cool!


The stickles will boil up and create dimension in the opals.  We added swarovsky crystals to this.  The "red" spot on the upper right is some fantasy film that bubbled to the top.


For this one, we spooned 3 colors of Opals on top of seaglass, then used a skewer to make the designs


Just 2 shades of Opals, skewer design, swarovsky crystal.  I do really like this one!


This is the same technique, except we went back over the top and just sprinkled opals of a different color over the base color:


Then we decided to just play in the melting pot.  Threw in "stuff" and then scooped it out on top of sea glass.  Sort of fun to see what you can do with what you have!


This was leftover opals - just a lot of colors blended togther.


Orange, purple and blue.  NOT colors that I would pick, but I do like how they turned out.


If you work quickly with the skewer, you can actually plan out the design you want to make like above.  This is one of those things where you get addicted in about 2 seconds and can make piece after piece.....all day long.  

How many pendants can you make in a day?  I need to find some smaller pieces of sea glass and make some earrings to go with a necklace!!!

Oh!  It's fun to play!!!

Wednesday, August 12, 2009

Opals Embossing Enamels - certification class - FREE!!!

OK, I love the word FREE!!! So, here's the deal. If you live in Colorado (ok, Nebraska, Utah, Wyoming) and can drive to Denver, you can get certified in how to use and teach Opals Embossing Enamels for FREE this coming Monday!!!

I'll be there!!!

You must agree to teach classes - at an LSS, in your home, in your friends home - Hey Susan, can I come teach in your home??? You will be able to purchase the opals at wholesale - but you have to sell so much each year to keep up your wholesale account.

I swear....best deal in Denver this year!!!

Now, if you haven't used these, just come to the show this weekend and stop by the After Midnight Stamps booth! I'll be there demoing the UCC and Spellbinders new pendant dies. But Linda will be demoing Opals.

Opals embossing enamels are just like embossing powders except when heated, they have the most wonderful glossy pearlized look to them and they come in the best selection of colors ever!!!

Here are some of my past blogs where I used opals to make fun things!

And oh my gosh....if nothing else, come see the wonderful selection of Krafty Lady molds which are beyond perfect for metal clay!!! Not to mention the hundreds of rubber stamps that will be in the booth!

If you are interested in attending this FREE certification class, just email me back and I'll hook you up with all the inside scoop. It will be in the Brighton area on the far NE side of Denver. Monday, August 17.

And if you come visit me at the show and mention this blog....I'll give you a password to download both of my Lucy McGoo manual for free!! Oh! There's that "free" word again!!!

See you Saturday morning bright and early!!! Bring a friend and we'll just play all day!!!

Sunday, November 23, 2008

Opals in ornaments

What a fantastic day today was! More playing with products from After Midnight stamps and Linda!!!

We played with so many things, but tonight, I'm going to share ornaments. What fun! This is a 3 part process. For the first part, spoon opals inside the ornament. Then add some Diamond Dust. Swirl it around. Then apply heat with a heat tool from the outside as you move the ornament around. It will adhere to the glass as the glass starts to heat up. (OK, some of these ornaments are heavy duty plastic and that works fine, too.)


Swipe some versamark on the outside and apply opals to that. Embed swarovsky crystals. You can see the depth and dimension in this shot:


For this next one, I wanted the look of melting ice on the top. I think I got it! I did the colors inside and then mixed Franklin opals with Diamond dust and carefully heated it as I move the ornament around on the top. It really is gorgeous as it totally glitters from the Diamond Dust.


Got a great shot here. When I dumped out the excess, it looks just like "rock candy" that we bought as kids.


And here's the back - just as great!


My brain is on complete overload tonight from all the different things we did today. We have laughed and played and experimented until I think my brain might explode! It has been so much fun! Linda flies home tomorrow and I will truly be sad to see her go, but check back - I've got several more things to share in the next few days.

These ornaments came from our local Hobby Lobby store - I'm sure you can find them at any craft store.

And you can purchase the Opals direct from After Midnight Stamps - but you can email me and buy them thru me as well. No minimum order - just go to their website, pick out what you want and let me know! They are beyond fun to work with! You won't be disappointed!

Friday, March 28, 2008

Lucy McGoo's Little Store

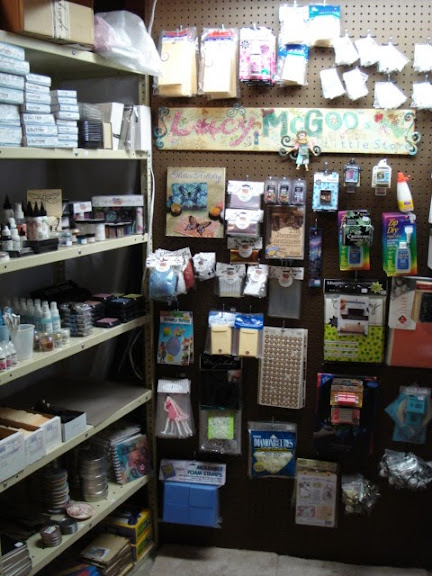
Well, I've gone and done it. Started a little store in the corner of my studio. Mostly adhesives, inks, things you might run out of when you come to take a class. OK, mostly things I tend to run out of on a day-to-day basis!


But that's not what this blog is about....this is about collaging on wood! Yep, I've moved way beyond paper...I'm on to wood now! I had to do something fun for the little store's sign! I think it's just balsa wood....something I picked up at Hobby Lobby.


I really had fun playing with so many different products on these chipboard swirls. For this one, I started out with a base of Opals embossing enamels from After Midnight Stamps. I stamped some glue ink onto the chipboard, then put the powder on that. Using both my heat-it tool and my milwaukee gun, I melted the opals onto the chipboard. Next, I laid on some pearl opals. Heated them. Then I tapped on some more glue and sprinkled on Art Institute glitter. Covered the whole thing with Glossy Accents. It is like a wonderland of layered dimensions!
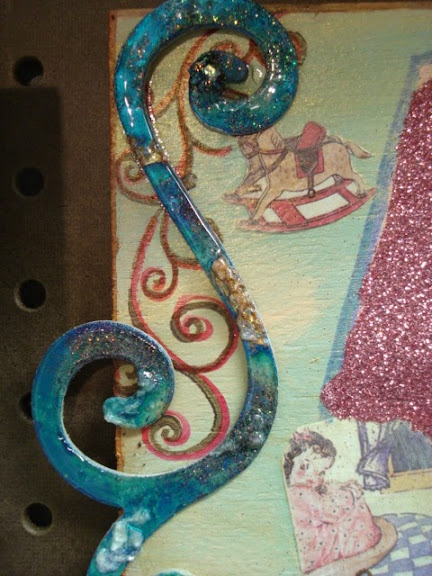


This end is a little different. I started with a base of Deep Image Crystals. They come from Once Upon A Stamp in the UK. They are amazing, textured embossing crystals....and just fun! On top I layered rainbow opals and glitterl
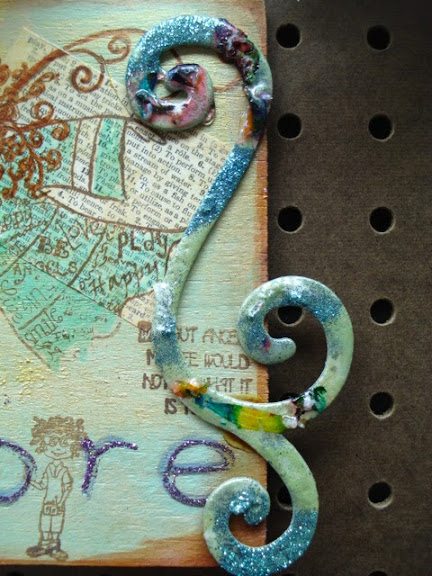


Beyond dimensional...and between the glitter and the opals....they truly sparkle!
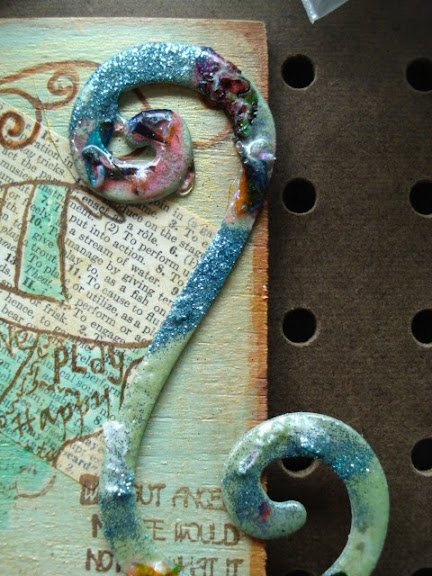


The wood is painted with a mix of blue and green acrylic paints mixd with Medium mat gel. And then covered with a layer of metallic gold acrylic mixed with the mat gel. The edges are inked with Rust alcohol ink.


So, since it's Lucy's store, I had to use Lucy's stamps. But I also played around with Rangers new white pen. Not bad on wood at all! The "O"s are painted with a thick past made of water and perfect pearls.
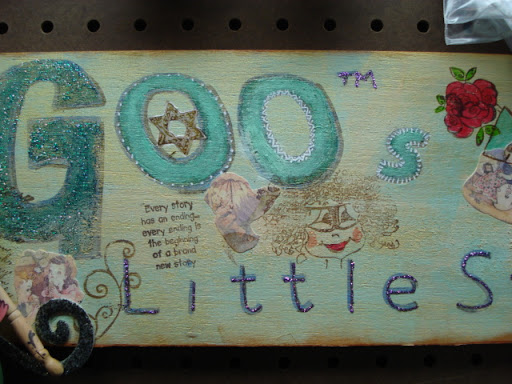


The M & G are painted with Stickles. I used lots of brush markers to bring out color. Outlined some of the sentiments with the white pen. Bits and pieces of patterned paper collaged into the wood.
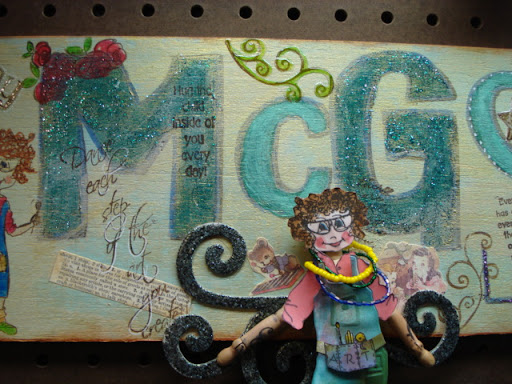


The turquoise swirl is one that I diecut using a sizzix die in the Wizard. I really love making my own chipboard elements. This one is covered with the Deep Image crystals. The longer you heat them the more they melt from crystal (textured) to smooth-as-glass.


Here's an example of the embossing crystals just lightly heated. Really textured. Looks like rusted metal almost.


Loads of art glitter on "Lucy"
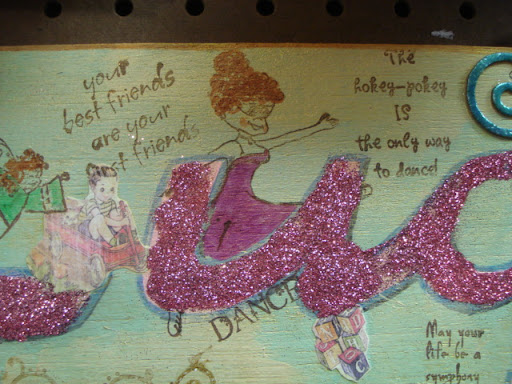


I do think this is my first collage on wood. But what a great way to just play with products and mix them up!
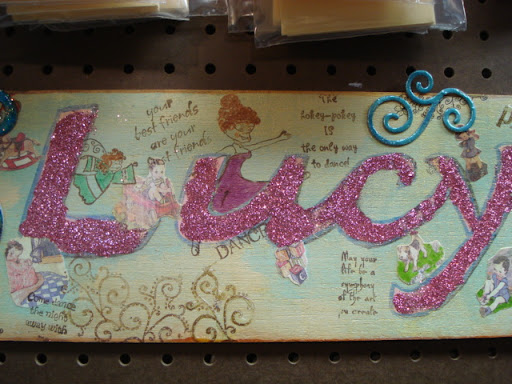


I'm thinking a wood journal cover might be in the near future. If I could find a pair of wooden dutch shoes....wouldn't it be great fun to collage them? OK...I know....a very light shade of wood cigar box! Now...I should have one of those somewhere in my stash!

I think this sign is about 4' long. Yep, it took a couple of days....just to get it all to dry! And I keep thinking I could add more and more layers...but I think this is just fine! Wonder what I will find to collage next? The concerete walls in my studio? LOL!

Thursday, August 20, 2009

Friendly Plastic O(oooh!!!)pals!!!

Today was the best! Linda Hanson from After Midnight Stamps was here for the second time with the Basement Babes. And our goal was to experiment with Opals Embossing Enamels (they come from Australia and Linda is the US distributor for them) and Friendly Plastic.

So, of coure, Linda Peterson skyped in. And I have to say, Kerry is just brilliant! He set it up so Linda appeared on the wide screen TV in my studio - how cool is that???


I mean - it was just like having her right here with us......like she was just sitting there working away!


even making a Friendly Plastic crown! Hmmm....I wonder if she is thinking about going off to London to see the Queen? Hmmmm....I wonder if I can crawl in her suitcase and go with her!!!


We spent the day trying to see what we could do by combining Opals and Friendly Plastic. Our first technique is here and yep, I'll be sharing more tomorrow. This is just beyond fun!!! And I totally love the results:

Pink, then purple.....the color combinations are absolutely endless!!! I know you are going to want a tutorial on how to do this.....but hang on because I need a few days to get that together! Today was all about coming up with the idea, the technique and repeating it at least 3 times so that we knew it would work....

and I think my fav is the turquoise. (OK, OK.....I will learn the colors of the opals! But NOT tonight!!!)

This technique involves layering Friendly plastic between colored and clear Opals embossing enamels


So check back tomorrow night for yet another new idea using these 2 incredible products! Oh! I love it when we get together and experiment! What a great day!!!

Monday, August 17, 2009

Opals Embossing Enamels Certification

OEEC? Hmmm....wonder what the new intials will be? I completed the very first certification class today and you now what.....I guess Linda forgot to tell us if we passed our certification or not! LOLOL! But all I can say it that this is just the most fun class I have ever EVER taken! Held at Maria B's house - what a wonderful hostess! She lives on an airstrip and we got to watch planes take off and land all day long. Absolutely amazing! Maria B - the sizzix lady - many of you know her store: Album Memories!

She grilled hamburgers up for lunch on the back deck and the weather was absolutely perfect.

And yes....that's her airplane hanger in the back yard - how cool is that!


It didn't take long for us to make a total mess on our class table


This is a future pendant made with Franklin opals over metal flakes on Midnight Glass. So cool!

And this is opasl on chipboard - perfect for card or layout embellishments.


I made a ton more today and hope to finish them up tomorrow so I can post them tomorrow night. And yes...I'll be teaching opals here in my studio soon. Can't wait to see how they do on Metal clay! Will be so much fun to experiment!!!


This whole week is a "play" week. Linda will be here Thursday for Basement Babes and we are going to experiment with Opals embossing enamels and Friendly Plastic! I just can't wait! In the meantime, I'm working on new make-n-takes for the show this weekend in Colorado Springs. Two more days of non-stop play! I may just have to sleep all next week!


Sunday, August 23, 2009

After Midnight Pendants

The certification class was last Monday and I finally turned some of what we did into pendants. But I found it interesting that you could actually wrap two pieces together......


You know, it's just so hard to decide which one you like the best!


These were all made using Opals Embossing Enamels on seaglass - this one was done without the fantasy film, and no stamp - we adhered metal flakes, dusted them off, then Franklin Opals over the top and I really like it.

And in this one, I used Opals, Frozen Opals and Midnight Starz.

And no, I'm not done yet - I need to get a couple of tutorials done this week. Today I was in Colorado Springs again doing our final day of demos and tomorrow, I run Kerry out to the airport - he will be gone all week - s0 I hope to get those videos done!!!

Saturday, November 22, 2008

Fantasy film day

What an amazing day! So much fun to sit and play with artists! Linda showed us what to do with leftover scraps of fantasy film. Just sprinkle a little opals over them, place them between 2 non-stick craft sheets and iron them.


what a gorgeous patchwork quilt!


that you can even diecut......


We did some copper watercolor painting, diecutting, made some opals pendants, quilted on copper,  mixed opals with other products, poured it into molds that Linda gave away!  Jane gave away stamps and Marcia gave away beeswax.  Kelly and I shared our latest scarves.  It was truly a totally fun day.


And I got so busy playing that I forgot to take photos!  I promise I'll try to do better tomorrow!

Huge thanks to everyone who came over today - it was great!