Showing posts with label recycled art. Show all posts

Sunday, December 8, 2013

Sneak Peek Sunday

Me, Amaco's Pewter, Copic airbrush, Spellbinders dies and glass.  I have had so much fun playing  all weekend on this little fun project and while I'm not quite done, I couldn't wait to share a sneak peek!!!

It all started with an empty bottle from the thrifty store.


I combined my copic airbrush, and a few other ingredients to come up with this colored faux mercury glass look (which I absolutely love!)  And it's just so easy with the airbrush!!!


Took some of Spellbinder's dies and some pewter and made a gorgeous bottom border…


and a ring for the top...

Used a label die for the center with a little wedding bling from Hobby Lobby….


and the end result is something that I absolutely love!!!


Just a little sneak peek of things to come in a few days!!!  Can't wait to share it all!

Monday, November 25, 2013

Let it Snow!!!


It's been snowing here for a couple of days, but most of it is melting as fast as it comes down.  Roads are dry, so my sis and I went thrift store shopping today.  I was in a snowy mood for sure!  Found this cute photo frame:


and this metal photo frame:


and this metal sleigh:


and this candle ring


came home and started taking the frames and the candle ring apart and reassembling them on the sleigh on top of the snowmen that were there.  You can see the metal showman from the frame on the lower right and the plastic snowmen to the left of him:


the other metal tree to the left.  I painted the entire sleigh with Cool Pool Blue Ranger dabber.  OK, that dabber is 6 years old and the paint inside is still good! I think that's pretty amazing.


I put the greenery around the bottom, added a ribbon, stickled the background, the greenery with crystal stickles.

It's got great depth.  I love all the shadows as well as the detail….


So much better than the original sleigh.  And the colors are updated.  I'm going to let it dry overnight and then hang it outside by my front door in the morning.


Recycled art - something that I love doing.  All 4 items totaled $8.00.  Love the thrift stores around here!!!

Thursday, September 5, 2013

If you want it......

There are more gift shops in this little town than I ever knew and the other day, this was hanging on the wall.  I snapped a photo and then the more I thought about it, the more I decided it would be perfect for what I'm doing with the master bath.  I went back to the store....it had been sold!


That weekend, I found these huge bath towels at a garage sale.  More like beach towels - from Loews hotel.  The lady sold me a whole bag for $2!


I found a pair of almost new Wrangler jeans at the local thrift store.  I cut about 12" from the towel at the border line and covered it with the waist band from the jeans.


From the 12" I cut out, I made a washcloth and used the jean trim to make the border for it.


Because the "Loews" monogrammed into the towel was wider than the pocket, I just covered it with denim, then added the pocket on top.


Have you ever tried to rip apart a stiff new pair of jeans?  Ugh!  But I think I did a fairly good job of replicating the set and I'm quite happy with them.  I'm reverting to my 1970s ways of denim....they used to actually call me "Blue Jean Jenny" in the office!!!  I don't think I have ever lost my love of denim and now I'm decorating with it!


So if you see something and you want it, best buy it right then and there.  Otherwise, you'll have to be like me and recreate it.  There is some joy in saying, "I made that!"  But on the other hand, there is joy in just going to the store and buying it!  :o)

Tomorrow starts the weekend retreat at the Abbey here in town.  I can't wait!  Time to start packing and I have no idea what I'm going to do!!!


Monday, May 27, 2013

My little bed bench

I stopped by a garage sale on Saturday and this lady had a very old youth bed for $15.  I couldn't resist!   So yesterday, I cut the side boards, used some 2x6 and 2x4 boards and turned it into a bench.  I am dangerous with a skill saw!  LOL!!!

The headboard is 31" wide and the sideboards were 4' long (and I cut them to 15").  Made in Goshen, IN - still has the writing on the boards.


After a bit of gluing, sanding, nailing....I set it in front of my little cottage on my brand new deck, added a pot to it and put some trees around it.    I just love it!!!


Those are soda can flowers on the tree.  Diet coke and diet 7-up cans.  I'll have to come up with something clever to put on the other 2 trees.  They have lights and eventually, I'll get power out to the cottage or get these on a timer so they come on during the evening hours.

Notice the chair and benches on the wall?  And little women sitting on them.  Just too much fun.  I think this bench will be the perfect spot to sit and watch my flowers grow.  (OK, if I ever have a moment to just sit!)

Today, I'm starting to frame in a porch over the deck.  It's going to be a "faux" porch, just a frame, and then I'll replant my wisteria trees on each end and hopefully train them to grow up around the porch.  In the meantime, I plan to hang net lights inside the roof of the frame.  Eventually, this shed will be painted, insulated, sheet rocked, and I'll convert it to a playhouse for all the dolls that I fix up.  How fun to have such a major project!!


Two days ago, this tree was just green.  We moved in here a year ago and last year, they had an early spring.  This year was late, so I had absolutely no idea this was a flowering tree.  It simply blossomed out overnight.  A Purple Robe Locust tree.  What a bonus in my yard!


And I think it's so appropriate that this is the tree where I decided to put mom's painting and if you click to enlarge the image, you can see my chicken mesh wire dress form, "Grandpa's Girl" standing by the painting.  The latest addition is the animated, lighted deer that I picked up for $1 at a garage sale.


Some days, I think I'll never finish in the yard.  But I'm learning to just be slow and steady.  One post is in the ground and the quikrete is mixed and poured.  I have the canopy up over the pergola and it provides wonderful shade.

Life is good when you can play in the yard!  :o)


Wednesday, May 1, 2013

More ideas for your copic airbrush


On the third Thursday evening each month, we have a girls night out at the local scrapbook store.  I take a different topic each month and share ideas. I think using the copic airbrush system was probably the most fun night I've had!  Of course...it's "work" for me to come up with creative uses for some of the products I play with, but this was just plain fun!

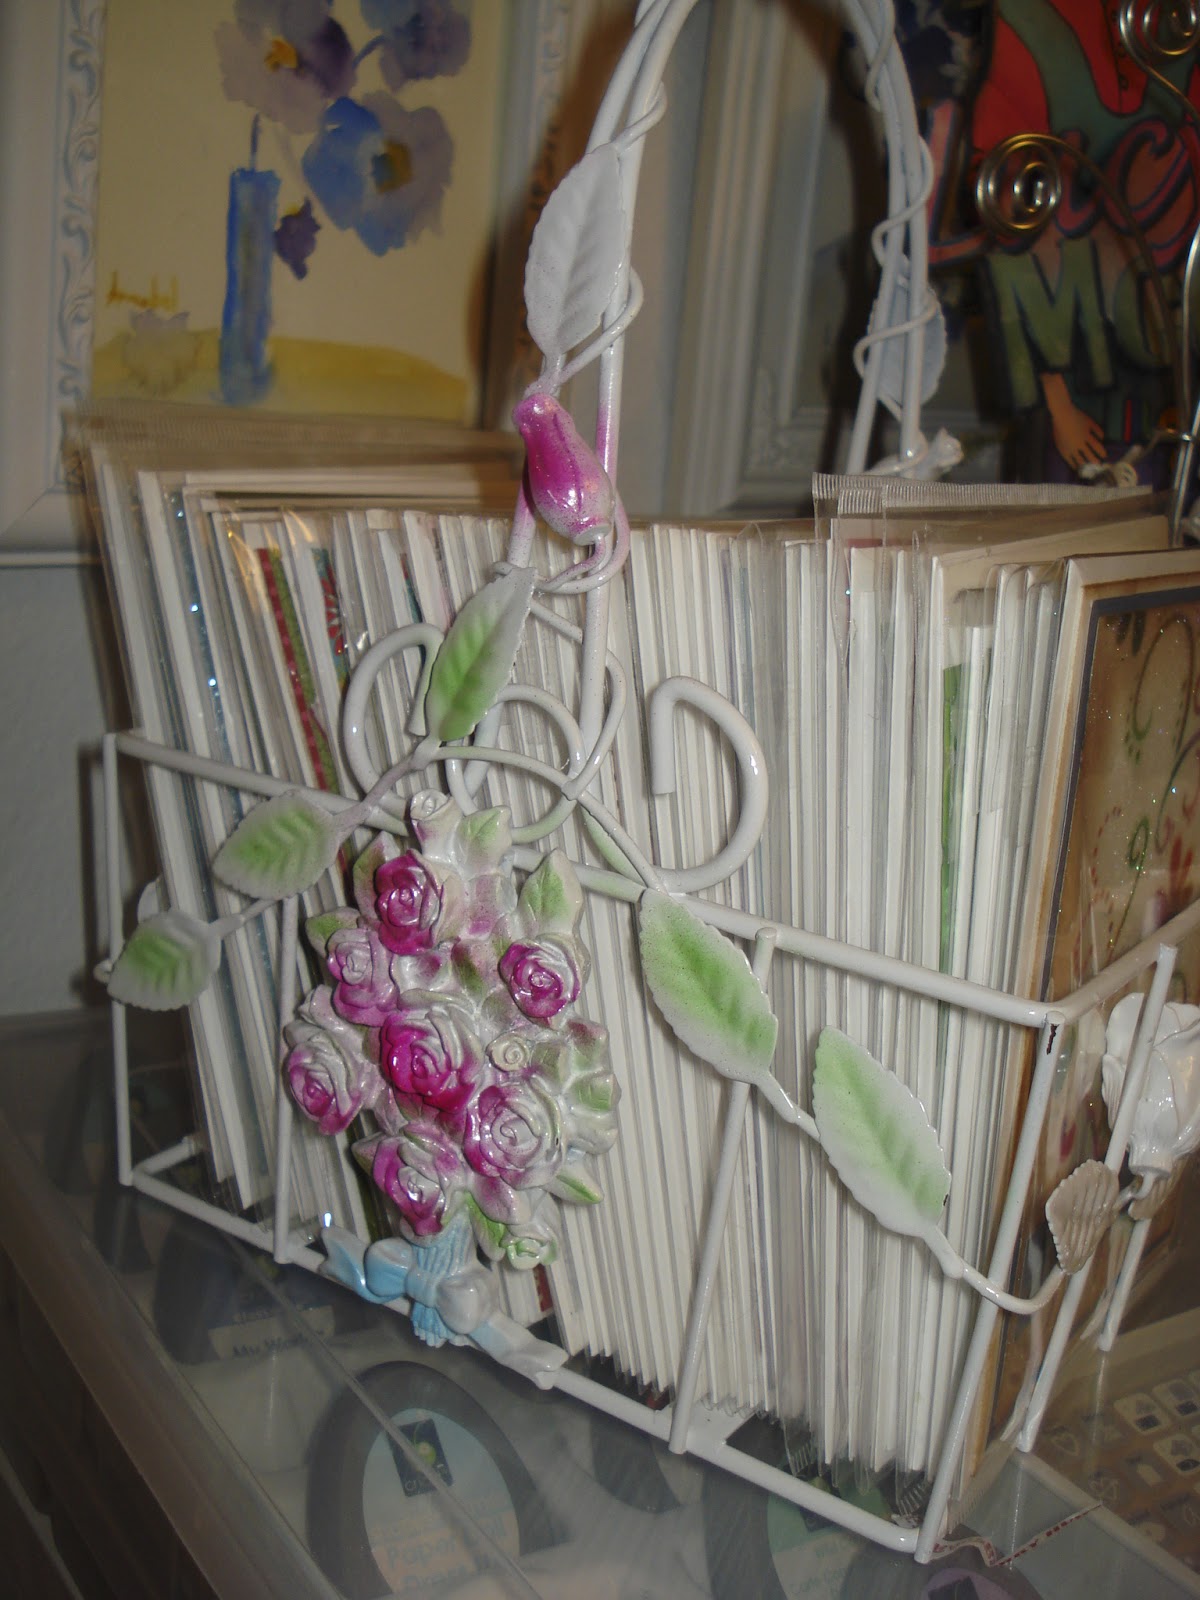
I found this old wire basket at a thrift store - it was browns, greens, reds and oranges and I just do not like those colors at all.  I sprayed the entire thing white - using a 2 part primer and paint spray.  Then I "hit" spots with pink and mint copics and now I love how it looks!  I love how the airbrush fades to the white edges.   Yes....full of cards I've made in the past few months - great way to store them.


The airbrush is great for giving fresh color back to doll cheeks and skin....but not on this little cutie!  She's wearing a Bonnie Jean dress I picked up for $2.49.  I was able to trace the flower petal pattern, cut it out in white satin, airbrush the satin pink and make the matching flower to add to the hat.


Airbrushing fabric is so easy and can give added color to existing fabric (no you probably can't wash it but I'll never wash this dolls hat) or create matching fabric to any project your are working on.  What have you airbrushed lately?


Wednesday, January 2, 2013

Recycled Art

My youngest sister is a fantastic artist....but I think she went over the top with this piece!!!  We had a recycle art contest here in Canon City and when I saw her entry - I knew it was a winner.  And it took 3rd place!!!


Click on any photo to enlarge.  She took the actual keys off a piano and put them on the board!  The background is all recycled paper.  She cut up used wood to make the black musical notes.  The frame she picked up at a thrift store.  She took all kinds of old charms that I had, painted them black and put them around the piece.

It was too cute that the ribbons were made by recycling the comic pages from the newspaper.


Here's what she wrote:

I know the keys don't look right
And the notes don't look right
But even when some things don't look right
We can still see something wonderful an inspirational.
The same is true with our lives.
Sometimes you have to see beyond
What looks right in others
To find something truly amazing, wonderful
And inspiring.


I think this should inspire all of us took at what we are going to toss out and see what we can do with it.  Imagine - piano keys!!!