Showing posts with label Grungeboard. Show all posts

Monday, October 13, 2008

Grungeboard Journal mini tutorial

Here's the journal I posted yesterday and I'm going to do a mini tutorial of sorts to get you started.


Take 2 pieces of plain grungeboard. Cut 1" off the top and 1" off the right side. Your boards should be 4" x 7".


Next, cut 2" off the right side of ONE board. This will be your front cover, the other will be your back cover. Don't cut the back cover.


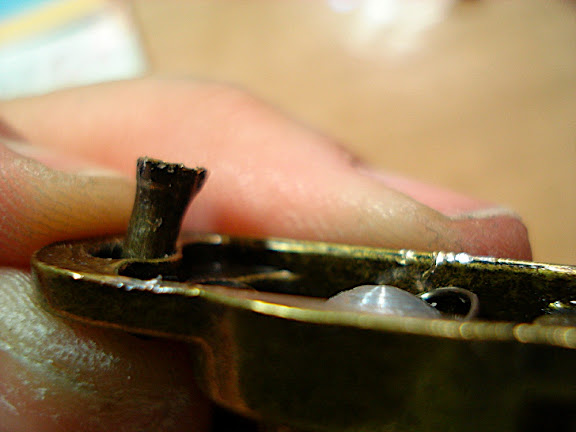
I'm sure you can buy hinges like this, but I pulled mine off an old box that I had.


Of course, the back side was like an eyelet and totally flared out.


I took some needle-nose pliars and pulled them back straight so I could reset them

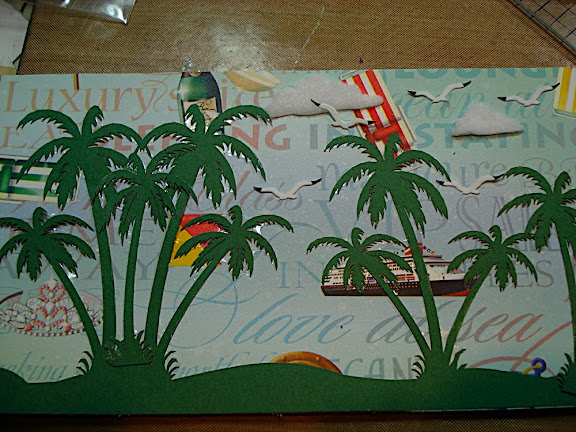
I started with the back cover to show you how I did the "stickers".  Just about everything in this journal is an altered sticker of some type.  Very little ink or any other medium.  I used my ATG gun to adhere the paper to the grungeboard, but you could use Glossy Accents, any wet glue or other adhesive.  You can see that I've added cotton clouds and seagulls from a sticker.

Here's a closer view:


Next I added some laser diecut palm trees.


The beach chair is from one set of stickers, the flips from another, and the seagull from yet another set.  Whenever I have leftover stickers, I cut them apart and stick them in little ziplock baggies by theme.  I'm sure if you look at EKSuccess's website you can find all of these because I know they are new this year - I've used parts of them for classes in San Diego.


Next, I drew in the leaves and coconuts on the palm trees:


Then I added a layer of Glossy Accents and added the life float. And decided it was done!!!


Added charms to the right side, then added swarovsky rhinestones on them.  


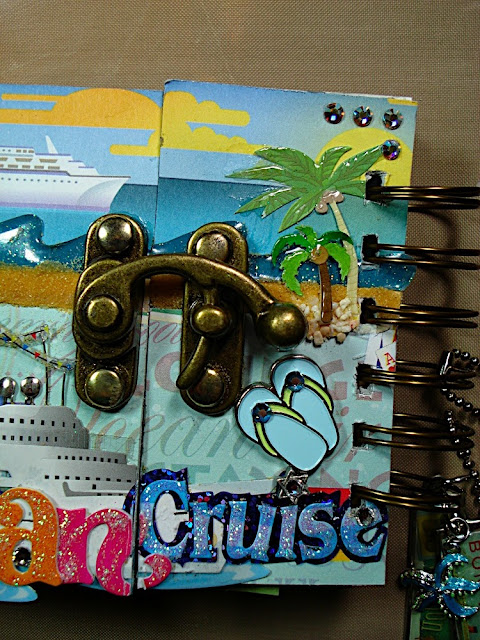
Here's the hinge in place on the front cover.  The entire journal was decorated just as above.  I take apart stickers, using undu, then re-layer them to create new designs and looks.  It's amazing what you can do!  Notice there is  real sand below the water?  It's really sand that I applied using Glossy Accents.  I put crystals on the centers of the flips.  The "I" in cruise is "dotted" with a Star of David charm that has a rhinestone in the center.  I put stickles on the letters and GA on the palm trees.  There are so many ways you can alter stickers and add your own touch to them!

Here's the left side of the cover.  That top ship is part of the background paper.  As is the middle ship.  The bottom ship is a very altered sticker!  Caribbean came from a set that said Caribbean Island.  You'll see where the "island" went in a minute.  I added stickles, a sunglass charm, and crystals to the word.  Covered the palm trees with GA.  Now take note, my stickers do not stay inside the lines!  Who says that what you put on the journal can't stick over the edges?  Gives it so much more character!!!


Now, I'm hoping you know how to assemble the o-rings and use the bind-it-all.  If not, search my blog as I've shown it before.  Here's the fun part!  When you open it up with the rings on both ends, I made some of the journal attached to the left side and some attached to the right side.  This first section is attached to the left side.
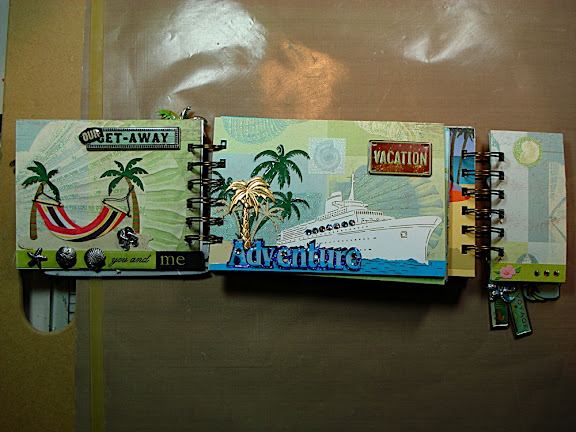

On the far right flap, I simply left a spot for my first photo.  I'm going to take my little portable printer with me and really hope to complete this journal on a daily basis!  Well, ok, I can dream!!


Here's the far right side.  Those palm trees and swing are from a set that says "Time of my life" and you'll see where I used the words later.  I love the background paper - it's embossed and has glitter on it!

For the center, I used the rest of my lasercut palm trees with another laser cut diecut of a ship with tan palm trees.  I added crystals for the ships windows and a brass palm tree.  The word "Adventure" came with the sticker on the front that said "cruise".


Are you getting the hang of it?  This next photo shows pocked pages for tickets and momentos.  They are the only pages that I inked.  The other white pages are simply 80 pound cardstock from a local office supply store, cut to the size and I can write, sketch, draw - do whatever on them.


The next section hinges to the right of the journal.  All of these inside pages and grungeboard dividers are cut 4" x 6".    The background paper is all th echairs looking at the water.  I just added a few stickers and then covered them with Glossy Accents.  A really simple page.  My divider pages are grungeboard covered with paper.


Here's the back of that divider tab - again, just a few stickers put together to make a simple beach scene.  The gravel was originally behind the sticker that had the words Caribbean Islands on it.  

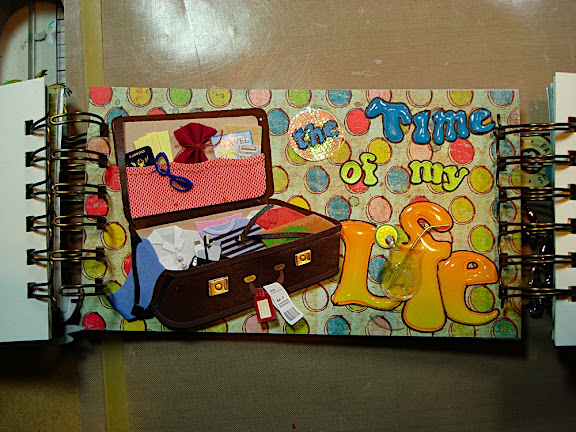
On the back inside cover, here's where "the time of my life" landed with the suitcase sticker.    

OK, I decided to do a little research to help you out, so here you go:


Ferry Trip - clouds, birds, life ring, bird on post

Cruise Adventure - I separated the words, ship, and water

Caribbean Islands - took the letters off the sand

So, even though I didn't show you step-by-step for the entire journal, I think you can get a feel for how to do this one.  I think this would make a great class!  I know I'm going to have great fun with this one on the cruise - I hope other scrappers, stampers and altered artists will notice it and it will connect us!  Imagine, 2500 cruisers - surely someone else is creative and ready to play!

Sunday, October 12, 2008

Grungeboard Journaling

Tim Holtz was on QVC last week and was selling a grungeboard journal that he decorated up so nicely. But I decided not to buy the QVC journal - it was too big. I bought some plain grungeboard and made my own, which is a bit smaller. This one measures 4" tall by 6" wide and you could make 2 journals from one set of grungeboard:


I plan to just tease you tonight and tomorrow I'll try to put together a little bit of a tutorial. When you pull open the lock, there is a section that flips from the left, then a section that flips from the right.


I actually made this one too thick and had to remove 2 divider sections! My O-rings are 1", but that's about all I wanted. I like the grungeboard for this because it's flexible, not rigid.


It's going to make the perfect journal for our cruise! We fly out early Friday morning - I can hardly wait!

Monday, April 28, 2008

Secret Treasures

I think perhaps one of my more fun classes is the one I call "Scrap the crap!" I tell students to bring in their worst piece of paper, the embellishment they "hate" the most, or the oldest thing they have....and we will turn it into a wonderful treasure box. Here's what I did with leftover bits and pieces from all the projects I've made the past couple of weeks at Scrapbook Your Life! It's called "Secreat Treasures" because I don't think we really "see" what we can do with all the leftover bits and pieces that we have.


By inking the background papers....I can mix and match almost anything I have. Here, I painted the cigar box (that I got at the swap meet for $1.00) with pink paint....then distressed the paint with distress ink. And then my ungrunged grungeboard....


By inking the diecut felt strips, cutting out elements, placing them to cover "seams"...you can do so much with the little remnants that you have. Of course, a little bling always adds to the project!


Can you identify prior blogs using this paper? Hard to say with how I've inked it!


On the very back, I made up little collages using leftover stickers...inking them to tone down some of the bright colors:


I never throw out anything! My class yesterday learned that as we used the reverse side of paper that we punched out tags from to find the words for our "high style" booklet.

I have a ton of scraps still left over and decided that I needed something to store them in at Scrapbook Your Life! until my next trip out. Oh! Just wait til I get it all finished and blog it....you are going to want to do this to everything in your play area! But that's a couple more days away! Today, I'm taking a day off. Getting a manicure and pedicure...pamper time with my friend, Lucky! Can hardly wait to get into the massage chair! Hope you do something fun today!!!

Friday, April 25, 2008

Princess Rachel

Finished up my "Rachel" book....another acrylic word book. There's still time to order your custom word...just email what you want to liz@scrapbookyourlife.com


I found a hair clip at the swap meet that was the shape of a crown. Horribly rusty rhinestones....so I blotted some cranberry alcohol ink over it and I justLOVE the results!!

Lots of stamping with white stazon ink.


and on the other side, instead of jute for the cothesline, I threaded swarovsky crystals on ribbon. Now there's a clothesline for you!!!


I also added a couple of carms tothe lower right side. I just love this book. Now, remember, Rachel is 15, and she' Liz's daughter and has epilepsy. You should have seen the look on her face when I gave this to her last night! Sheer delight!!!


And here's the page behind the cover. Used the new wood laser cut swirls, dipped in ink, covered with glitter. Just perfect on the top flower swirl.


PHoto mounts ready for Rachel to add her pics:


Is this adorable? A true princess!


My girly grunge that I blogged yesterday. Lots of white pen over ink.


OK, let's hear the oohs! and aahs! Quickutz cookie cutter 12" flourish border in pewter, textured with metal repoussee tools from MercArtUSA, painted with alcohol inks, covered in glossy accents, adhered to the acrylic page.....


and a background page added....I LOVE this die!!!


Here's a closeup of the detail of the die:


Spellbinders nestabilities, placed randomly on paper, cut out (not embossed) and I'm using the negative here over lighter paper....funky little photo frames for Rachel to use:


That was the photo mount on the left, this is the page behind the flourish border:


and the photo mount on the back of that


what a fun page! Lots of stamps on the top


more ungrunged grungeboard


and even more:


and here it is without the acrylic overlay:


This is Melissa's technique...mix glitter with faux flock and adhere on wet glue:


which is an asolutely adorable way to add fur to the poodle!!!


butterfly brads dipped in silver embossing powder


and dipped in purple glitter embossing powder


and the last photo mount


Now, back to that cover. I cut the jammies out of a sheet of paper, twice, and popped with dots, adhered to the hanger and used a glitter pen on the dark pink


the dress is an adorable stamp that I double stamped and layered with pop dots and tied a delicate ribbon around the top


and a purchased ballerina sticker. Mine look just as good!


a close up of the crown, but also an paper flower...I really like these!


Tiny little fairies stamped throuhout the book that you have to hunt to find


more of the glitter technique on wood diecuts


these little gals are about 1" tall....and they are hidden throughout the book as well


Can you tell that I truly let the little girl in me dance and play as I put this all together? I just kept thinking....act like you are 15...find the child in you, let her play.

I think we did well!!!