Showing posts with label green craft. Show all posts

Thursday, September 5, 2013

If you want it......

There are more gift shops in this little town than I ever knew and the other day, this was hanging on the wall.  I snapped a photo and then the more I thought about it, the more I decided it would be perfect for what I'm doing with the master bath.  I went back to the store....it had been sold!


That weekend, I found these huge bath towels at a garage sale.  More like beach towels - from Loews hotel.  The lady sold me a whole bag for $2!


I found a pair of almost new Wrangler jeans at the local thrift store.  I cut about 12" from the towel at the border line and covered it with the waist band from the jeans.


From the 12" I cut out, I made a washcloth and used the jean trim to make the border for it.


Because the "Loews" monogrammed into the towel was wider than the pocket, I just covered it with denim, then added the pocket on top.


Have you ever tried to rip apart a stiff new pair of jeans?  Ugh!  But I think I did a fairly good job of replicating the set and I'm quite happy with them.  I'm reverting to my 1970s ways of denim....they used to actually call me "Blue Jean Jenny" in the office!!!  I don't think I have ever lost my love of denim and now I'm decorating with it!


So if you see something and you want it, best buy it right then and there.  Otherwise, you'll have to be like me and recreate it.  There is some joy in saying, "I made that!"  But on the other hand, there is joy in just going to the store and buying it!  :o)

Tomorrow starts the weekend retreat at the Abbey here in town.  I can't wait!  Time to start packing and I have no idea what I'm going to do!!!


Wednesday, May 1, 2013

More ideas for your copic airbrush


On the third Thursday evening each month, we have a girls night out at the local scrapbook store.  I take a different topic each month and share ideas. I think using the copic airbrush system was probably the most fun night I've had!  Of course...it's "work" for me to come up with creative uses for some of the products I play with, but this was just plain fun!

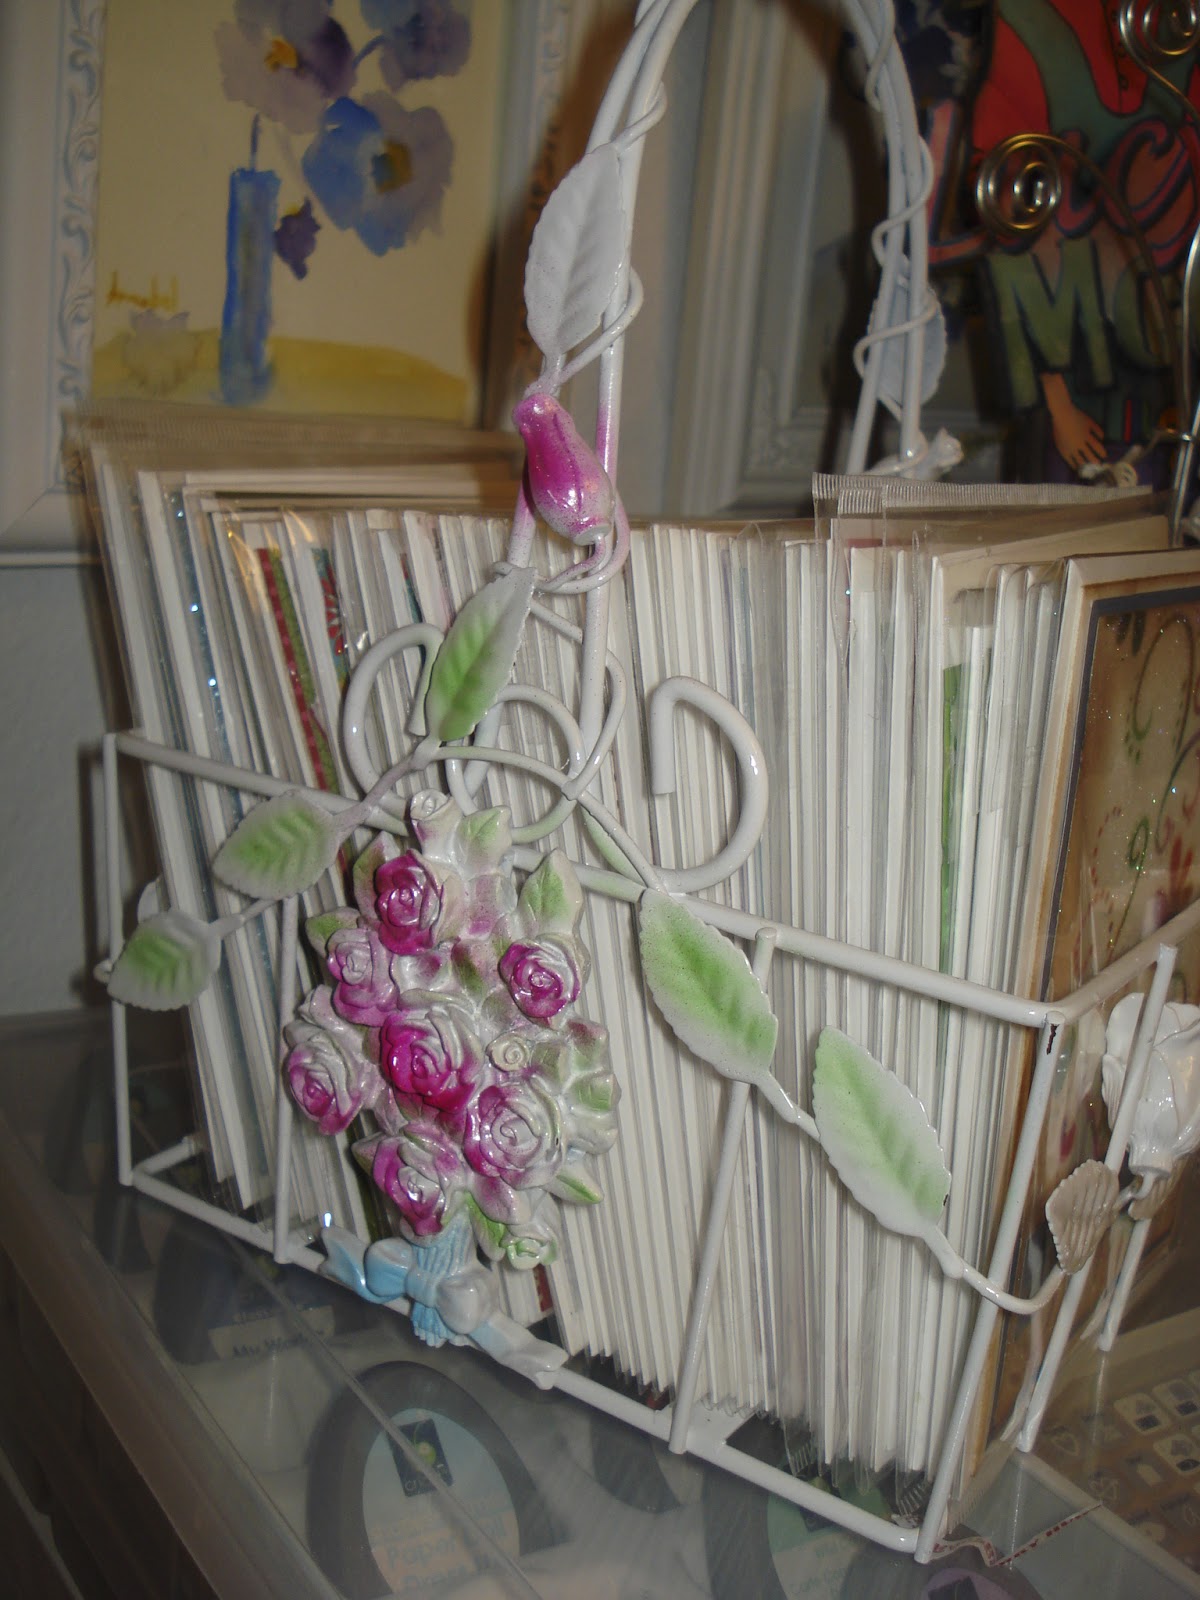
I found this old wire basket at a thrift store - it was browns, greens, reds and oranges and I just do not like those colors at all.  I sprayed the entire thing white - using a 2 part primer and paint spray.  Then I "hit" spots with pink and mint copics and now I love how it looks!  I love how the airbrush fades to the white edges.   Yes....full of cards I've made in the past few months - great way to store them.


The airbrush is great for giving fresh color back to doll cheeks and skin....but not on this little cutie!  She's wearing a Bonnie Jean dress I picked up for $2.49.  I was able to trace the flower petal pattern, cut it out in white satin, airbrush the satin pink and make the matching flower to add to the hat.


Airbrushing fabric is so easy and can give added color to existing fabric (no you probably can't wash it but I'll never wash this dolls hat) or create matching fabric to any project your are working on.  What have you airbrushed lately?


Thursday, January 31, 2013

Making the best of what you have!

Last blog, stranded in Kingman.  I'm back home in Colorado now.....with a 2013 Ford Focus.  Nice little car that made the trip home just fine.  So I had another whole week in Kingman and got the "office" and the kitchen cleaned out.  Sort of glad I had to stay as now those tasks are done.

Kerry's grandma Mae passed away 3 years ago, and they had not gotten rid of much of her stuff.  She painted china.  She was an amazing artist.  But many of her pieces have chips or breaks in them.  I didn't want to toss them and no one would buy them at a garage sale, so I decided to play.

Now, when you play like this, you do need certain aids/tools.....like chocolate, a low temp glue gun, diet coke....


The pedestal dish had a big chip out of the corner of it:


The bear and the snowman at the bottom left of the top photo were taken apart and undressed using undu.  Yep, you can use undu on fabric!!!  And the little pilgrim bear was undressed as well.  I found some broken bits of jewelry as I was cleaning up, so I used those as well.  Glued most of the pieces to the base mirror so they wouldn't slide around.  Added the matching plate on a stand in the background. Pulled apart some very old silk flowers and put them down into a little vase that matched.  Added barbie ornaments as my mother-in-law collected those.


If you click on this photo to enlarge, you can get a better view of the details.  Earrings glued to the side of the pedestal dish.  A silver bear earring glued to the bear's paw.  The other earring glued to a button on the center of the bears chest.  Earring posts clipped off and glued down into the silk flowers.  Netting and ribbon from Mae's sewing box threaded among the items.


I took apart a silk flower (on the bear's ear) and took apart a plastic hair barrette and layered the 2 together, glued it back and used it on the bear's head.  More earring studs on the shoulder on the lace.  Broken beads and one complete necklace draped around the bear and into the dish.


Once I got the flowers arranged, I simply glued them together and stuck them down in the vase.  The paintings on the 3 pieces of china "match", but 2 are wisteria and 1 is grape clusters.  Can you tell which is which?


This is the little bear that had it's arms around the snowman.  I left the arms stitched together and threaded the hanky between them.  Glued beads together to make the pearl necklace and glued grandma's earrings as a "ribbon" on the ear and a brooch.  Now this one is just too cute!!!


When my father-in-law saw what I had done with broken bits and pieces, he was quite pleased.  We decided to set this on the end table in the family room.  I don't think "trash" has ever looked quite so good!!!  Barbies, jewelry, hand-painted china, bits and pieces of lace, old hankies on a mirror - reflect the memories of times gone, but not forgotten.