Showing posts with label embossing. Show all posts

Saturday, March 14, 2009

20 second cards

Literally, about 20 seconds or so to make these cards. Used the Cuttlebug cut n emboss butterfly. Cut the bottom one, embossed the top in the card. Stamped and inked with distress ink on cut 'n dry foam squares


Embossed the diecut flower and stuck it inside. Just so fast and easy!


Same process, just different location for the cut and embossed dies....and different shades of distress ink.


Sort of bent the wings so this one pops up a little.


By positioning the folders and using 1 at a time, you can emboss both on a single card. Just too fun!


We made about 10 cards in less than half an hour....so just a really quick, fast way to pop them out. I think the stamp on this last one is going to be my life motto! LOL! Just too fun!!!

Monday, January 26, 2009

Give your own embossed design to Spellbinders dies

and how to use the flip side of an embossed die in fun ways!!


Youtube link

Here are the original 3 hearts, diecut, embossed and inked, using a Spellbinders style die:


A closeup of the one with holes in it:


Diecut, not embossed:

Sketch a new design and apply 1 or 2 layers of glossy accents over the sketched design.  Let dry.


You can see how it gives dimension to the piece:

Diecut out another heart.  Spritz the TOP with Wonder Goo.  Place it on top of the stencil you just made with glossy accents, build a sandwich and emboss the design into the new flat diecut, then apply ink to make the embossed ridges pop:

The original die, my new stencil, and the new die - as you can imagine, you can alter any design to fit the project you are working on!

A closeup of the large heart


My new stencil


The new embossed diecut:
Comparing Spellbinders design with my design.  It only works to make your dies much more versatile!!!


This is what happens if you spritz the side of the paper that you put next to the Glossy Accents...it sticks!  LOL! But never fear...it's still great - you can use it just the same!


My new design inked:


You can also ink the reverse side - the debossed side:


And you can fill the debossed areas with anything.  I used Stickles here, but in the past I've used rhinestones, mica powders, colored diamond glaze...just a number of things.  We first did debossing techniques in our Lucy McGoo manual in January 2005 - I just keep forgetting to mention a lot of what we were doing back then!

And here is a comparison of the new template, debossed, embossed, and the original spellbinders die:


Is this just too much fun or what?  So I guess tomorrow  night we will have to show you some fun things to do with Cuttlebug's cut n emboss dies.  Yes, We've shown you Quickutz, Sizzix and Spellbinders....so Cuttlebug is next!!!

Saturday, January 24, 2009

How to make your own diecut embossing template

Last August, I showed you how to make your own template to emboss a diecut with fine details. Torrey and I have put together a video tutorial for this technique because so many of you have sent questions about how to do this. I have broken this down into more than one in order to get each one under you tube's 10 minute limit. So, one per blog. That will give you plenty of time to play and experiment!

You can double click on the video and it will take you to youtube. You might be able to see it a little better/bigger from there. I will also put in the direct link to youtube. We are having just a little too much fun making videos this week before she goes home to Texas!


Youtube link

You can purchase Wonder Goo from me ($4.95 plus shipping) or from After Midnight Stamps

Here is the basic quickutz die assembled:

Here it is compared to the one that we embossed from our template:
A closeup of the embossed diecut:
A closeup comparison:

The original diecut inked (just not the same, is it?)

Glossy accents on the tree trunk (this is 2 layers):

Comparing the embossed die to the inked die:

Close up of the grass where you can see how we sketched the design and then added Glossy Accents on top of our sketch:

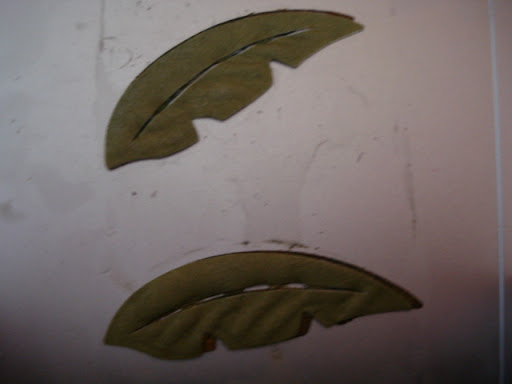
A closeup of a leaf with Glossy Accents on it:
  Tomorrow night - a video tutorial showing you what Torrey did with Sizzix flowers!


Thursday, August 7, 2008

How to emboss any diecut with fine details!

Remember the palm tree from yesterday's blog? Quickutz Revolution die available only through Archivers.


And how I embellished it with sanding paper, ink and glossy accents:


And then I remembered my make your own stencil tutorial and decided to put it to the test. Could I use what I did yesterday as a stencil to emboss a duplicate diecut? The first step was to add a second layer of Glossy Accents and let that air dry. Then I positioned a new die over the embellished die:


Covered them completely and then spritzed the top paper generously with Lucy McGoo Wonder Goo. (if you want to purchase this, please remember to add shipping!)


Next, added a piece of Spellbinder's tan polymer pad cut for the Revolution. Yes, I'm using the revolution with it's 12" long plate for this process since these are dies made for the Revolution. The paper is laying directly on top of the steel plate.


Completely cover the paper with the tan polymer pad:


Then I put the little 4" embossing mat from Quickutz on top. This mat comes with the Revolution or you can purchase replacement mats separately.


Look! Embossed leaves! Yeah!!!


Just peel the top layer away from the bottom. Here I inked everything with Vintage Photo Distress ink. But I could have sanded and added multiple colors as well.


OK my friends!! No more flat diecuts!!! You can now emboss every single diecut that you have. Once you have the first stencil made, just put it with your die (wherever you store your die) and keep it. You can reuse it over and over. I can hardly wait to try this with all my dies. I think I'll be busy for quite some time to come! But what fun! Just another way to play hard!

Sunday, November 25, 2007

Tutorial - embossing part 3, using the cut side to emboss

OK, this is the final embossing tutorial (well, unless I think of something else!) I'm actually going to cover 2 techniques here, but am going to call it embossing.

You can line up any 2 nestabilities dies or geometric dies to make a frame:


If you diecut those...you will get what is between the 2 dies, a frame. Sort of cool. Can't you envision this as a frame around a cropped photo?


But what I want to show you is how to emboss this into a piece of paper, using the cut ridge to do the embossing.

The sandwich for this is a little different. I think (just my personal opinion) that some of the newer dies are a little thicker than some of the older dies, so you will want to adjust the sandwich and I will tell you where and how.

For this, use:

Blue mat (from the charm emboss kit)
Thin white spacer plate
dies lined up as a frame, cut side up
paper
tan polymer pad
Cut mat, cut side down.


The dies should emboss, but not cut through the paper and the design should look like this:


This is a debossed ridge. If you flip this over, the other side will be embossed, which is equally cool!

Now, if it cuts through, then remove the thin white spacer plate from your sandwich.

If it doesn't emboss, simply add cardstock between the bottom blue mat and the thin spacer plate, or if you have taken that plate out, add cardstock between the bottom blue mat and the die.

It really is an experiment because the thickness of your paper and the thickness of your die will determine how you need to shim your sandwich, but this will give you a great start.

One of the cutest dies to do this type of embossing with is the overalls die. Just too cute!

So now, you have one tutorial on diecutting and 3 tutorials on embossing. I think this is a great way to get started using your Wizard and/or Spellbinders style dies. Isn't it about time you take them out of the box and give them a try?

Saturday, November 24, 2007

Tutorial - Embossing part 2, Mirror embossing (Nestabilities)

This is a rarely used embossing technique, but works perfect, especially if you want the reverse image. You can use this technique with any Spellbinders style die. I've chosen the Paisley Nestabilities die as I'm working with some Stampin' UP paper that is just perfect!


In this next photo, I'm showing how I want to diecut 2 pieces from the sheet of paper, but they are facing opposite directions. The one on the left will be embossed, the one on the right would be debossed. I don't want that, I want the edges to be embossed the same way on both pieces.


I also wanted to show you that with the Nestabilities dies, you really get 6 separate dies. I think some of the packaging is just not clear on this. So you get 6 of the same die, in graduated sizes.


As you can see, each die has a tiny "cut" ridge that is just inside the piece.


When "nested" together, this is what they look like:


In order to get the shape you want cut, you need to come in from the back side of the paper. In order to line it up, I simply hold the paper between me and a light source. This could be a lamp, an overhead light, or a window. I can position the die around the image that I want to cut out.


Now, if I diecut and emboss this image, I'm going to get this....where it is debossed.


Perhaps this shows better....the piece that I cut that is the shape of the die is on the left and it is embossed around the edges. The piece that is the opposite shape of the die on the right is debossed and I really want it embossed.


In order to do that, I'm going to use the reverse (flat) side of the die


I'm going to center my diecut on top of the flat side of the die as such:


If you were looking at it from the bottom, you would see the die, cut side down, with the paper on top of it:


The sandwich for this is a bit different:

Cut mat, cut side up
Die, cut side down
paper, centered over the die
tan polymer pad
Embossing mat, emboss side down


If done correctly, both pieces, the right angle and the left angle, will both be embossed.


By doing this, you can turn each diecut into "two" diecuts by having both a right and left angle. It just multiplies the possibilities with your dies.


Now, I know I've done this with a simple nestability die. However, here's an example of it done with the seashell die. The shells mirror each other on the right and the left. Just one die...but I've used this mirror technique to give me twice the dies that I had.


Well, I'm all for getting as much out of a product as one possibly can, but this technique actually helps me have a die that is the exact angle (right or left) that I want for the project I'm working on!