Showing posts with label colorwash. Show all posts

Wednesday, June 18, 2008

Colorwash Backgrounds

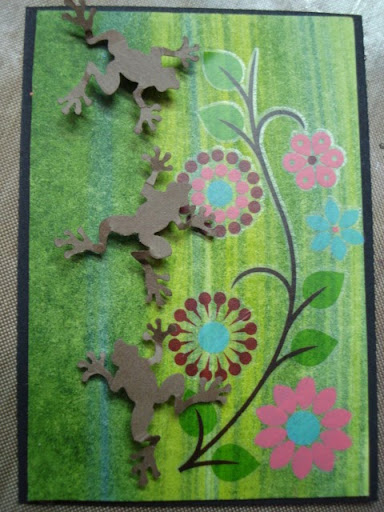
Now that I have "found" most of the things I knew were somewhere - it's time to play! Don't you love these frogs? A McGill punch, fold the legs and put a pop dot under them. Just too cute! For the background, divide a non-stick craft sheet into 3 "sections" and spray a different color of colorwash into each of 2 sections and water into the 3rd section. Dip cut n dry foam into one color and swipe it across the paper, letting it skip. Dip another piece into the second color and repeat. Dip a 3rd piece in water and swipe. Heat set. I used Bottle, lettuce and stream here. Yep - you can use more than just 2 colors!


This is a little different. Spray colorwash on the non-stick craft sheet, then take a brayer and run through it and then run the brayer over the paper. Heat set it.


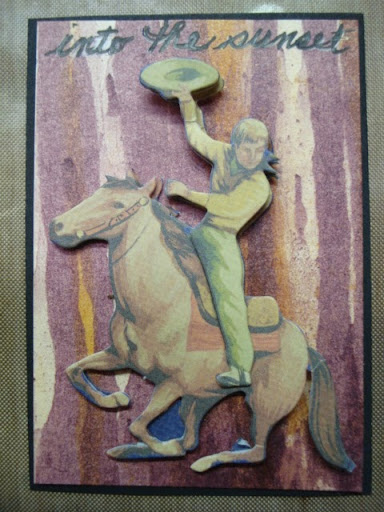
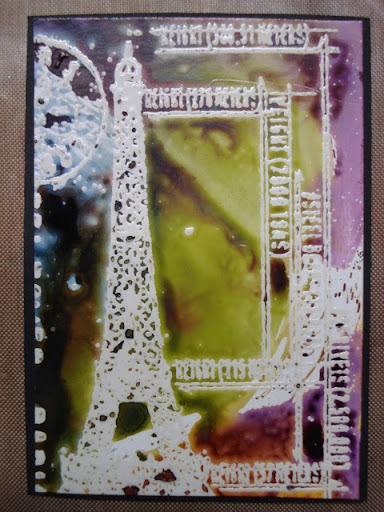
One of my favs here: stamp an image with clear embossing ink on glossy paper. Use clear embossing powder and heat set. Spray 2 - 3 colors of colorwash on the craft sheet. Then place the glossy paper face down on the sheet and swirl and pick it up. You will get a different look every single time!


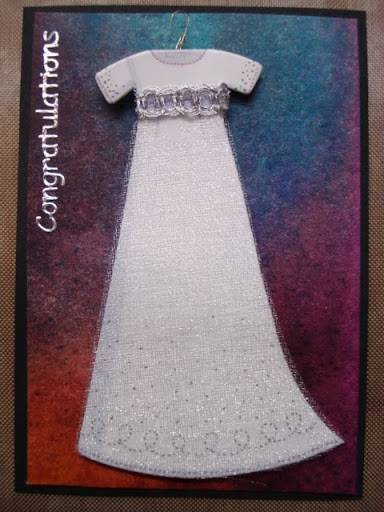
And maybe my very favorite - because it's so easy! Just wet the paper, then spray on Colorwash in at least 2 colors. Let it run together. Dry with heat tool.


All of these are ATC sized technique cards that I'm putting together for classes in San Diego next month. Gee - I think I'd best hurry up and get these done and out to the store!!!

Thursday, October 18, 2007

Itty Bitty Room Book

On the third thursday of each month, I host a play date for a group of friends. Today, the fabulous, incredible, wonderful, awesome (can you tell I adore this artist?) Susan Mostek came to show us how to do her ity bitty room book. Well, of course, I "think" so far outside the box it's just insane. I went to look at my scrap bin and the piece that struck me was not a piece of patterned paper, but a painting that mom did and she threw in the trash. Yes, everyone should go check out mom's trash from time to time! LOL!!!


When I saw the colors of this painting, I knew it's what I wanted to work with. So I cut it up (gasp!) And I stamped on it! (double gasp!) Oh! The things I will do to an original watercolor painting!!!


"Creativity is making your whole life a work of art!" This is one of my Lucy McGoo stamp sentiments!

When you open up the "rooms" just a little, you can start to see that there are pop-up elements in each room


And when you get it all the way open, it is 4 rooms. I even took white silk ribbon and quickly colorwashed it to match.


This is the first room. It reads "What you once were and who you are now becoming is where the dance of life really takes place."


The second room reads: Every day of your life is a page of your history.


The 3rd room has 3 sets of pop-up trees. I stamped on top of the watercolor trees from mom's painting. It says, "You cannot depend on your eyes when your imagination is out of focus."


The fourth room has a popup of a cabin that mom had painted and a tree in front of it. It reads "delight in life".


And on the back, I tore out her signature and stamped "Through the ages every generation has asked, what is art? Well THIS IS ART! Now that enlightenment has come upon you, go forth and create!


I really, really, really want mom to keep painting as long as she can, so I think there are some messages to her in this piece. But I'm also going to tell her, "Don't you dare ever throw away another painting!!!" Because I can take it....and make it art!

Thanks to Susan and the "Basement Babes" for another fun filled day!!! Thanks mom for giving me your trash!!!

Sunday, September 30, 2007

Tattoo Girl

A couple of days ago, I posted a picture of Tattoo Girl...she's on page 15 of the November 2007 issue of Rubber Stamper Magazine. She just makes me giggle when I look at her. I am not a stamper! But I sure used loads of stamps on her to create her "tattoo" effect. But let's start at the top and work our way down. She is a "work"...not sure it's "art"...but she is fun!


Her hair started out as raw mohair. Comes in a skein. Very fragile. I pulled it apart, laid it out on freezer wrap, spritzed with water until it was soaking wet. Strands were about 3' long. Then I sprayed colorwash on the strands. Cranberry. Stream. Lettuce. Butterscotch. I then wrapped the wet strands around drinking straws, taped the ends closed and set the straws back on the freezer wrap to dry overnight. When dry, remove the straws and just let them drop down. I glued them to a doll pate that is then glued to the center of her head. For the bangs, I simply tore pieces of mohair about 8" long and curled them on very narrow, thin straws. Truly fun to make your own wig for a doll!

Her face is porcelain. I used to make dolls and repair dolls. This is a face that had been fired just a couple of times. So I used alcohol inks on a cotton ball to dab color onto her skin. Cranberry for her cheeks...Butterscotch for a touch of tan...just play around and then let that air dry overnight.

Her mask is a Spellbinder die cut and embossed in pewter then painted with Posh Impressions metallic ink. Notice on the right...there a stamped image on her cheek...painted with a posh impressions metallic marker.

Look closely and through the film on her bodice, you can see a stamped chest.

Her necklace is melt art and the instructions are in Belle Armoire Jewelry 2.


In this image, you can see her stamped arms. I used a little bit of just about every product Ranger makes to color in the stamps. Notice on her left wrist...a mini bottle cap bracelet...flattened the caps in my Wizard! Her waistband has elements made by mixing UTEE and art glass and pouring into a mold.


For her shawl and her skirt and bodice, I took white silk and lace, laid them on freezer wrap, spritzed them with water, then spritzed them with colorwash. On the ribbons, I stamped images and then stitched the ribbons together in the center back. Notice the crystal rhinestones set into the silk ribbons....I had so much fun!!!


Here'a s closeup of her leg...all stamped. It's a wood artist's mannikin with a porcelain head attached. The shoes are shown so well in the magazine, there's no need for me to repost them here. They were made by cutting out thin chipboard to get the shape, then covering them with a mix of UTEE, flex and vintage art glass. I guess I need to start a link section to all of my favorite vendors....oh dear...that could be forever long! :o)

I just love creating things that make me smile when I'm done! She's back home from the magazine, sitting in a place of honor on the family room fireplace!

Thursday, September 27, 2007

If the barn needs painting...paint it!

My first year of college was spent at Bob Jones University in Greenville SC. I remember Dr. Bob once said, "if the "barn" needs painting, then paint it!" That was his view of the issue of women and makeup. I always thought that was just the funniest thing ever....and decided early on that I must be a "barn" as I "needed" makeup!

Mom started painting when she was age 53. She became a wonderful, international, award-winning watercolor artist. I keep telling myself that one day, I will learn to paint on a flat surface, but in the meantime, I'm content to paint on everything except flat surfaces! However, I do think painting is incredible. It allows you to recreate scenes from your past, to add color to what was black & white in old photographs, and to embellish your memories.

She painted these scenes of Grandma's farm. And they are just so true to life!


Out behind that barn was a huge horse trough. The horses and cows would linger there on a long hot summer day, drinking water to keep cool. Goldfish swam in the bottom of it. The water was so mucky you couldn't see more than 6 inches down. Green slime grew all over the inside. But getting in that horse tank was the best way to cool down! Who cared if you couldn't see the bottom? Who cared if your cousins told you there were monsters growing down there? Who cared if all you could feel was that slime between your toes and the goldfish touching your legs? (Well, I have always told myself that's what it ws I was feeling!!!) In an era with no air conditioning....playing in the horse trough on a sticky, hot, Indiana summer day was the best thing on earth!

And that barn had the best haymow anywhere around. At least I thought so! We weren't allowed to play up there much...but every now and then when our cousins came to play, we would "sneak" out there and explore. I'm quite sure our parents knew our every move, but we thought we were getting away with something! I remember lots of tack hanging on the walls. A horribly filthy pig pen that every now and then when I was really bad, I had the honor of cleaning! The timbers in that barn seemed to be a foot square. I thought nothing would ever bring it down! Climbing up into the haymow, layers of hay piled high, with loads of places to climb and play. Now, if you could only stand the smells of the horses, cows and pigs below....and all those flies on a steamy hot summer day...it was the best place on earth!

Painted memories! What a gift mom has given us....what a legacy she is leaving for generations to come! I am so grateful for her art and how she inspires me to create. I am so grateful that she and dad made the choice to raise us on a farm!

Of course, part of becoming an "altered" artist is to alter some of mom's paintings. I cut the painting apart and adhered it to canvases that were colored using Ranger's Colorwash inks. The flowers and swirls were created by spritzing colorwash on glossy white cardstock, then diecutting them. I titled this one "Play Time"...it's how I remember Grandma's farm.