Showing posts with label origami. Show all posts

Wednesday, December 21, 2011

Night 2 - Eight Nights of Lights 2011 - cleaning old candles

On this second night of lights, the tradition is to host a party and exchange gifts. To me, these are more secular traditions, probably established by merging a bit of Christmas tradition into the Hanukah celebrations. But I do agree that Hanukkah should be a joyous celebration. 

 My brother sent me this great link.....there's so much stuff here about Hanukkah it makes your head spin! And spinning the dreidle is quite the fun game - unless you end up with all your coins in the pot! 

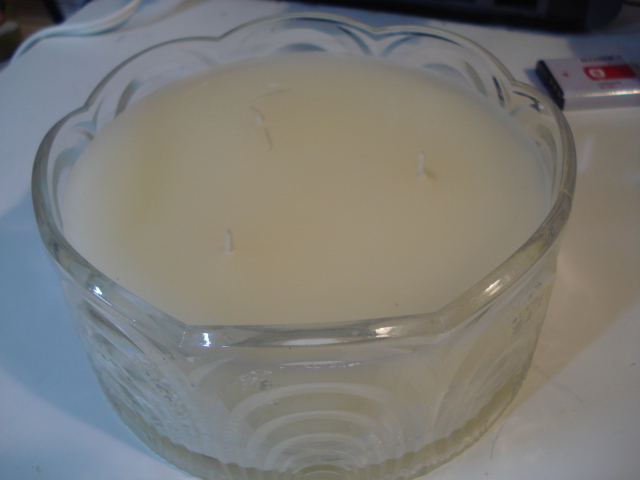
Tonight, we light the second candle.  But what if your candles get dirty from one year to the next?  Or dinged up.  Can you save them?  Or do you just toss them out and go buy new ones???  I've been tossing old candles out for years. Oh, what a mistake that was!!!

There are several wax removing products on the market, I like "Wax Away" which I get at McGuckins in Boulder (it's a hardware store.)


When you pour your own candles, you use sand paper to flatten the bottoms.  It does get wax on it quite quickly and here's my tip for cleaning it so you can use it over and over!


And now - some of my refurbished candles:


This first one was a simple ball that I just cleaned up with wax away and added the peel-off.  The candle and stand totaled $1


I found this candle and cleaned up the glass/mirrors and added mini star decals


but when I put it on this stand.....just perfect!


this candle is in the shape of a star, but gold, and quite cracked


so I covered it with silver alcohol ink


and then a layer of crystal stickles.  Covered up every crack!


This was so dirty and the wax away cleaned it right up.  Looks brand new!  It was $1


and here's the candle from the video.  I added a strand of beaded ribbon.


And finally, a new Chanukkah song - I think everyone will enjoy this one!


May He bless you to the highest heights with His miracles:


Sunday, July 25, 2010

Video # 4 - nestabilities flowers

This video shows you what 1 additional fold and 3 sizes smaller will do to change a flower. You can truly play with these over and over - again, the possibilities are endless.


Direct link to the video is here

Check back tomorrow night and hopefully I've got some cards done to show you the final product. After all, I'm not just making videos - I'm making art!

Saturday, July 24, 2010

Video # 3 - nestabilities flowers

Could I have any more fun? I am so grateful to Kerry for all the video equipment and editing software he buys - I get his hand-me-downs to play with! LOL!

Tonight's flower is a little different because the way you fold it automatically gets you a built in background.


Direct link to this video is here

Give it a try and post back here and let me know your results!

Friday, July 23, 2010

Nestabilities Folded Flowers - Video 2

I think this is my favorite flower design -but I'm always working on new folds, so who knows?


Direct link to the video is here

I really think there are endless possibilities for folding your nestabilities into wonderful flowers. I have a few more ideas floating around in my head - wonder what we could do with the scalloped heart dies? Always more to try!

Thursday, July 22, 2010

All new Nestabilities folded flower tutorials (No. 1)

These are so much fun to make! I did several different designs over a year ago when I was demoing with After Midnight Stamps. And I'm finally getting around to doing tutorials on more of them.

Linda at After Midnight Stamps actually did the first video. I created the design and here's a link to her video:

AMStamps


The second design is HERE


So now on to the next 4 designs - here's the first one:


If the video doesn't show up, just click here

Here's hoping that by the 4th video I also have my card samples all done to share! So keep checking back each night just to see what's new!

Saturday, April 18, 2009

New nestabilities flower folds!

The show is over, so I'll share pics of the new flower folds. It will be a few days before I can do videos on how to do these....just let me know which one you'd like to learn first!

Pinwheel flower

Tipped circle:

Victorian bells

Petite squares

Snowballs


I think my fav is the tipped circle.  

Won't it be fun to learn how to do all of these???

Friday, January 30, 2009

teabag origami flowers

This is a make-n-take I designed for After Midnight Stamps. Totally fun and just so quick and easy to do!


Youtube link

AFter watching the video, I decided we don't need closeup photos. Hope you have fun with this one!!!

Saturday, December 20, 2008

My first video! How to make an origami paper folded box


I feel like I'm back in Kindergarten. And I made so many mistakes - but I promise, I will only get better!

First, I said Michael Murray paper - what was I thinking??? It's Michael Miller Fabric Paper!

And at the end....I stuck the back of my head right in front of the camera. Well - just laugh! I will try to not do that again!

Let me know what you think about camera position and sound. I tried real hard to keep everything in the middle of my table. But hey - I'm doing this all by myself, so not real bad for my first try!

This is a video of a tutorial that I completed earlier on this blog - Origami Box


Hope you enjoyed it!

Monday, March 17, 2008

Nesting Nestabilities, part 2


Yesterday, I showed how to fold the Nestabilities circle die into a cute flower on a tag. I do think you can nest and fold these into unlimited ways. I have a tiny amount of experience with origami, and decided to play some more with this concept.

Once again, start with a half folded circle. Same products, inks, papers as yesterday. You want to bone fold this crease.


Fold up in half again, but do not bone fold or score this fold line.


Pretend the center of the straight side is letter B. One end is letter A and the other end is letter C. The center of the scalloped edge is D.

You want to fold from D, straight down to B. But because this is the scalloped edge you ar folding, don't worry about getting it perfect. Just fold it over like this!


Fold the other side up the same way. They will overlap. Looks a little like a heart.


Open up the scallops and fold the center top down. Again, Don't crease any of this, just do it with our hands. You don't want a scored fold....just what I call a soft fold.


Definitely time for a manicure! LOL! OK, from another angle...open the scallops and fold in the tips


Do that to both sides:


Pull the centers up and it should look just like this. You can shape it to look more like a petal like this:


Look what happens if you set these as a square. Hmmm....I might have to do something with this!


This is 3 circles folded:


This is 4 circles folded:


Next I used the Sizzix scalloped tag die in my Wizard and then embossed it with the new music embossing folder from Cuttlebug in the Wizard. No look at this. Do you see my intentional mistakes?


The paper is upside down and it is debossed, not embossed. Seriously. Would you purposely do this all backwards and upside down? Well, why not? It makes you step outside your box and see things a little differently. Hold on, I think you might like it!

Attach the flower. I decided to go back to just 3 circles. I like it much better


Add a stamp, som swirl stamps, some fiber, and those are vintage paper flowers in the center of the nested nestabilities.


So, upside down paper, debossed music score, stamps, and nested nestabilities. Would you rather make this tag at the show in San Diego? And don't you dare email and tell me you want ot make both tags! There's just not enough time! LOLOL!!!

Sunday, March 16, 2008

Nesting nestabilities

I'm at my in-laws all week and rather bored in the evenings.....so lots of tutorials!!! During the day, I visit my friend Jody, who happens to live in Kingman AZ. Today, she showed me a z-fold flower that she had made. I decided that it could be done with a Spellbinders Nestability die....or a Quickutz Cookie cutter die. Any circle die about 2" in diameter will work.

Cut out 8 circles. Ink all the edges. Fold in half and ink the fold.

My first lesson was that you do NOT want to fold them like this (half way through a scallop)


You want to make the fold between the scallops:


Next, count up 3 scallops from the left and make a 90 degree fold. I used my bone folder to get a good fold.


Starting at the bottom, fold up 45 degrees to the left. What was on the bottom top should now be on the left side, top.


Next, take that long bottom side and fold it behind everything on a 45 degree angle:


Use double sided paper. Did I mention that? This is Scrapperdashery's new line and I just love it. I reversed the paper with every other diecut.


And then slide them together at the center:


I used a Sizzix tag die, some Lucy McGoo stamps, and attached 3 Swarovski crystals.


There is a bit of depth to this, but I just absolutely love how it came out.


Thanks Jody for showing me how to make these flowers!!!

This just might have to be the make-n-take at the show in San Diego!! What do you think? Would you sit in the After Midnight Stamps booth and make one of these to take home with you? Let me know!!!

Friday, December 21, 2007

Origami box

Updated to show that I now have this as a video tutorial - just click here

Tis the season to have lots of candy out and about....anyone want to come over Tuedsay? I'll be making Grandma Hazel's home made caramels. Possibly the best caramels on earth!!! And I need cute little boxes to set the candy in. (Like I think it will last long enough to actually go into a box?) LOL!


I'm using the new Colorbox queues and a 12x12 piece of white embossed paper. 1442 Flourish impressions by Doodlebut Design inc. Nice paper!


First, I'm going to just lightly rub the top of the ink pads across the paper. As you can see, the embossed areas will pick up darker color and the debossed (or flat) areas will be lighter. This is one of my most fun things to do...color paper!


And you can use any ink pad, any paper....even emboss your own paper in your diecut system. But this took about 2 minutes!


Next, we're going to fold the paper in half, both directions. When the peaks are up like in this photo, those are "mountains". If you flip this over, you would have "valleys". So to start, you want your peaks or mountains pointing up like this photo.


Next, take the lower right hand corner and bring it up to the upper left hand corner and press down on the diagonal. Notice you now have valleys on the top. That's good! And I often use a bone folder to press the creases down. I like the one Ranger makes.


Now, open that fold up and flip it over, so that the mountains from the diagonal fold are pointing up. You will want to pop the center down and your paper should look just like this:


Have I lost you yet? If so, just go back and start over! The first time I tried this...it took me 27 attempts! LOLOL! Nope, I just don't give up easy! Next, you want to grab the ends of the diagonal fold and bring them up together in the center.


And while you are holding on to the tips, just lay the entire piece down on the side.


You can flatten this out and you have just completed a basic napkin fold!!!

For me, the important part is to keep the bottom of the fold like I am showing here facing you. It's easy to turn this around as you start making folds from this point on, so take a look from time to time and make sure the bottom looks like this...that it's closed, not open.


The next thing to do is to fold the flaps in from the top down. Notice the open edges of the outside of the paper get folded in right along the center line.


You want to do the other side the same way and look! You have a graduation cap! This is actually a cute little embellishment for graduation cards! But no! We're only about half way done at this point!


The next step is to open the bottom of that last fold like this....


flare it out and press it down.


You want to do that to both corners -


And then flip the whole thing over and repeat these steps on the other side. When you are done, it should look like this:


Now, before you look at the next photo, note you have a front and a back that where the folds are out. You also have 2 "insides" and if you flip one tab over, it should look like this:


When you look closely, you can see a fold line from a prior fold:


You want to fold that inwards, on both sides:


And then flip over 2 tabs....


and you will find another "page" that looks like this:


Again, look for the fold lines and fold inwards on both sides:


and now, you should have what I call an "ice cream cone". OK....I did this at the Mr. Ellie Pooh booth summer before last...we made over 2000 boxes....and we had kids as young as age 5 making them with no help! So come on...don't give up! We're almost there!!!


This time, look at the top. Don't worry that it's torn...that happens..it's paper that you fold 27 different times! It won't show, I promise!


Grab one flap and fold it down as far as it will go:


Should look like this:


Then flip a page over and pull down the next flap....


And continue to do this 4 times. The end should look like a little pocket:


You may need to fold one flap back over to get it to be even like this:


Hey! We're just about done! Now, stand the pocket on it's end:


And very gently start working your hand down inside the top, sort of pushing out the sides. It's paper...so go easy, or you will split the corners open (which I simply tape shut!)


As you tap your fingers around inside, a box will start to form. You can press out any creases in the bottom and it should look something like this:


If you want a flat bottom, just pince a crease with your fingers:


But usually the weight of the candy will hold it down flat! - Well, unless you eat it all!


At this point, just take a little tape and tape the flaps under the box, pressing them square. But note, you can tape them together up over the top and make a basket, or curl them up or down....all kinds of fun variations!


When done, you've got a fun box!


Of course, if you want to make one of these out of Mr. Ellie Pooh paper, be sure to give it to a 10 year old boy and then whisper in his ear what's really in the paper! LOLOL!!!

Still have questions on how to make the box? Just post them here in the comments! I'll get back with answers. Now I'm positive you won't eat all the candy...you'll save some to put inside these cute little boxes!