Showing posts with label Wizard. Show all posts

Monday, July 13, 2009

Announcing the birth of.....

my newest "baby"! Well, it feels like it. I've been talking about doing this forever.....and it is finally here....today!!!

What???

I've produced my first DVD and I hope it is just the first of many to come! Well, ok, Kerry produced it! But I really feel like we co-parented our way through this.

Simply called "Art Clay Silver Paper Type Tutorials".


There are SIXTEEN tutorials! I'll bet you didn't know there was that much to do with paper type metal clay! And I only touched the surface!

It's actually pretty professional with chapter segments, background music...the works! Kerry did a great job.

So what's included? Well, it's over 1 1/2 hour long! (Remember, this is for those who want to learn how to use paper type metal clay....but I show a lot of things to do with diecuts.)

1. Using pewter
2. Spellbinder's wizard
3. Punches & Scraps
4. Revolution by Quickutz
5. Sizzix by Ellison (Big Shot)
6. Cuttlebug by Provo Craft
7. Erasing mistakes
8. Metal Repousse Tools
9. Stamping & Etching
10. Use any image to design with
11. The 1/2 sheet challenge
12. Quilling paper type
13. Pasting paper type
14. Pasting quilled pieces
15. Turning paper to clay
16. Make your own Mold
17. Samples

The tutorials come up 6 at a time and a 10 second clip starts to play so you can see what the clip is and just click where you wan tto go. You can also pop up the slider bar at the bottom (depending on what software you use on your laptop to view the DVD with) and fast forward through the entire thing in just a few seconds.

Where is it available? Well, for right now, right here! I'm taking orders and we will ship the first week of August. Kerry is burning 50 copies for me to take to the Metal Clay World Conference next week.

Price? $25 retail, $12.50 wholesale with a minimum order of 5 DVDs. Add shipping, of course.

Does it work in Europe? It is NTSC format, so we don't know if it's going to work in Europe. Kerry thinks he can produce it using PAL format - who wants to be first?

If you are taking my pre-conference workshop at MCWC...you get a free copy.....without music! LOL!!! Well, hey! It's free!!!

And I must give credit to Susan Mostek for editing the entire thing for us....and to Colleen Lee for letting me use her art in the video.

So what will our next "child" be?

I'm going to produce a DVD in August that will cover fusing paper type metal clay inside layers of dichroic glass, how to do the watercolor painting on copper, and if there's room, I'll show you how to etch on copper.

I'm just so proud of us....our first "child"! LOL!!!


update: Totally sold out at MCWC! Making more next week!

Wednesday, January 28, 2009

Diecutting transparencies and more

Torrey left to go back to Texas last Saturday....but I still have videos! This is the last one and she is going to answer your questions about diecutting transparencies. Of course, if you still have questions, just post them here and we'll do our best to answer them!


Youtube link

Here's the sizzix daisy - look how well itcut the lines:


The edge of the nestability circle:

The nestabilities inked with alcohol inks


The quickutz ballerina - just look how clearly it cut the face:

  The inked stencil from the ballerina - not shown up close in the video but I know I can do something with this!


This is the ballerina that Torrey inked on plain typing paper, using alcohol inks from the stencil she made above:


And yes, you can cut any "plastic" this way.  If your plastic is soft/flexible it is going to be less likely to cut with your thin rule dies.  But if it's like regular printing transparency sheets - it will cut just fine if you build the sandwiches like Torrey shows in the video.

Now, go thumb through the Lucy McGoo manuals and let us know what you'd like to see in video format.  We'll make a list and put together more videos in the future.  Hope you have enjoyed these!!

Saturday, April 5, 2008

Make your own stencil

Taking off from yesterday's blog, here's the next step to make your own stencil. I'm doing this with the stamp I used yesterday, but the possibilities are endless. You could print anything from the internet, use any photo, tear a page out of a magazine. The more you do this, the more you will love it!

Using Glossy Accents or Diamond Glaze, or any substance like that, run a layer around the parts of the picture that you want to be your stencil.


You don't even have to stay inside the lines!


In fact, you can make up your own lines....draw whatever you want! If you get some big blobs like this, just take a toothpick and smooth them out.


When the first layer is dry, then add a second layer right on top of it. It will appear quite thick. That's what you want. Now, of course, you can do this with just a single layer, but I think 2 layers makes a much more defined stencil.


When it is completely dry, run it through your Wizard using the embossing sandwich:

White emboss mat
stencil
metal or paper
tan polymer pad
white cut mat

You can also do this same technique in any of the other diecut systems....Sizzix and the Cuttlebug now both have rubber mats that are available to purchase as well.

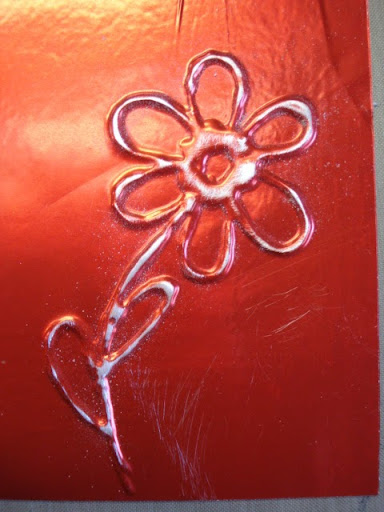
You can see here that the flower embossed into the metal:


Lightly sand the top off using one of those fingernail buffing blocks. The silver will show through the painted metal.


Finally, add it to a card or layout, or just use it as an embellishment!


A couple of hints: 1. If you cut up a soda can, the inside of it is just about the cheapest metal around! And there's one brand of Coors Gold beer cans that have a wonderful turquoise inside to them! Great to emboss using this technique. 2. You can do this also with heavy duty aluminum foil....and then color it using alcohol inks!

This is just a simple flower...but again, the possibilities are just endless! One more way to use your diecut systems...without a die in sight!

Sunday, March 23, 2008

Layering dies, can it be done?

Some days I think only the tip of what you can do with die cuts has been discovered. So here's something you can try...layer up your dies! Yes...literally stack them on top of each other like this. I used the Seed packet die and a little square embellishment from the Sweet Garden edgeability die.


Do not emboss, just die cut. It's the standard sandwich in the Wizard. It won't hurt a thing. Just remember to put both cut edges facing up!


A sweet way to showcase a photo and have a little embellishment left over. :o)


You can do this with any combination of dies. Here, I'm layering one of the stars form the star nestability die with the seed packet:


Just cuts so perfectly!


Again, I could put a photo in here, add a tag, just about anything. The key...cut, do not emboss. As long as you don't emboss, the word "seeds" will not show up and you can have new options for an older die!


So stay tuned. Tomorrow, I plan to kick this technique up a level! Bet you are wondering what I could do next?

Tuesday, March 18, 2008

Recycle that old suede jacket!!!

The other day I blogged about diecutting suede and I used a sixxix doll clothes die to dress Lucy McGoo.

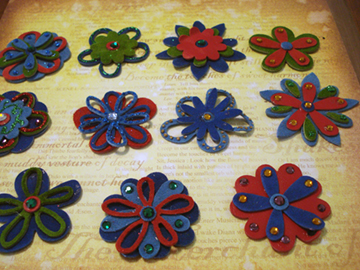
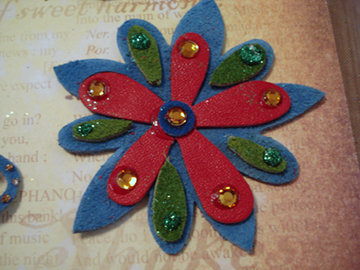
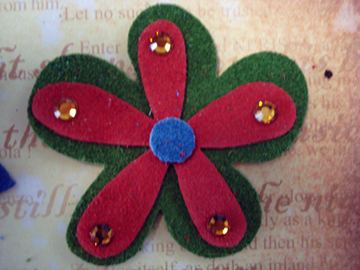
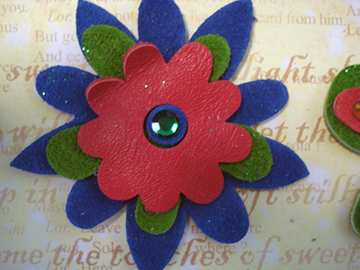
Today, I decided to use 3 different sizzix dies in my Wizard to make a wonderful array of suede flowers. Sad to say the photos do not do these justice!


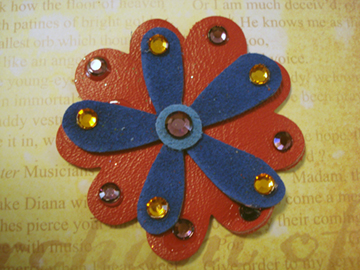
You can mix and match these in a nearly endless ways. For this one, I put the leather side up on the red, the suede side up on the blue and added Swarovsky crystals.


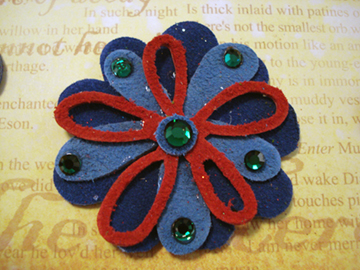
All 3 layers are suede side up for both of these:


Then I decided to try Art Institute glitter on them. These are tiny little dots of glue covered with glitter:


The green is free form Art Insitute Glitter. The red is Ranger's stickles covered with Art Insitute Glitter. Goes on a lot thicker.


Th gold dots are Art Institute Glitter. I just love all the different combinations you can get out of these 3 flowers:


Gold Swarovsky crystals, green Art Institute Glitter


Back to simple and plain. The sandwich for these in the Wizard is:

Sizzix die
Suede/Leather
Universal adapter mat


Another thread of Art Institute Glitter


The red is leather side up. I really like this one!


Four layers of suede on this one, but what can I say...it's stunning!


Never toss out anything! Just cut it up and run it through your Wizard or other diecutting system! Recycle, Re-use, Re-purpose, Re-generate. And just look at what incredibly wonderful embellishments for some future project.

Got any blue suede shoes? They would work just fine!

Sunday, March 16, 2008

Nesting nestabilities

I'm at my in-laws all week and rather bored in the evenings.....so lots of tutorials!!! During the day, I visit my friend Jody, who happens to live in Kingman AZ. Today, she showed me a z-fold flower that she had made. I decided that it could be done with a Spellbinders Nestability die....or a Quickutz Cookie cutter die. Any circle die about 2" in diameter will work.

Cut out 8 circles. Ink all the edges. Fold in half and ink the fold.

My first lesson was that you do NOT want to fold them like this (half way through a scallop)


You want to make the fold between the scallops:


Next, count up 3 scallops from the left and make a 90 degree fold. I used my bone folder to get a good fold.


Starting at the bottom, fold up 45 degrees to the left. What was on the bottom top should now be on the left side, top.


Next, take that long bottom side and fold it behind everything on a 45 degree angle:


Use double sided paper. Did I mention that? This is Scrapperdashery's new line and I just love it. I reversed the paper with every other diecut.


And then slide them together at the center:


I used a Sizzix tag die, some Lucy McGoo stamps, and attached 3 Swarovski crystals.


There is a bit of depth to this, but I just absolutely love how it came out.


Thanks Jody for showing me how to make these flowers!!!

This just might have to be the make-n-take at the show in San Diego!! What do you think? Would you sit in the After Midnight Stamps booth and make one of these to take home with you? Let me know!!!

Tuesday, March 11, 2008

Wizard-kutz

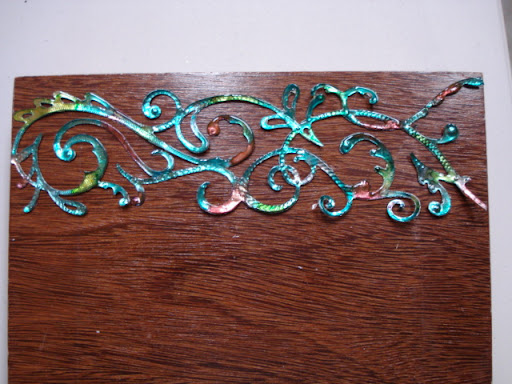
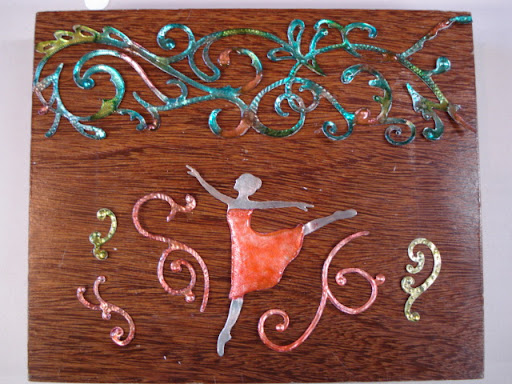
Well, tonight I'm going to share the new Quickutz Flourish die cut with the Wizard. Not a tutorial this time, just a sample. If you go to my website and click on videos, Torrey and I did one that shows you how to emboss long things in the Wizard. Just follow that. It's the video called "Rustic Bling".


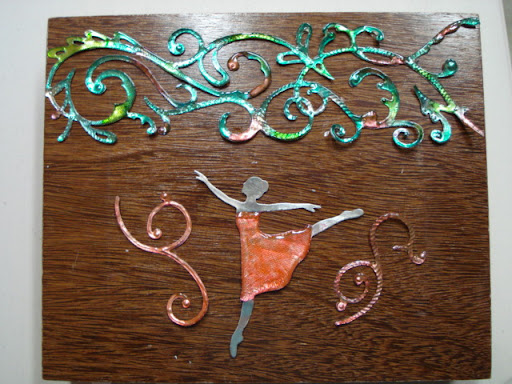
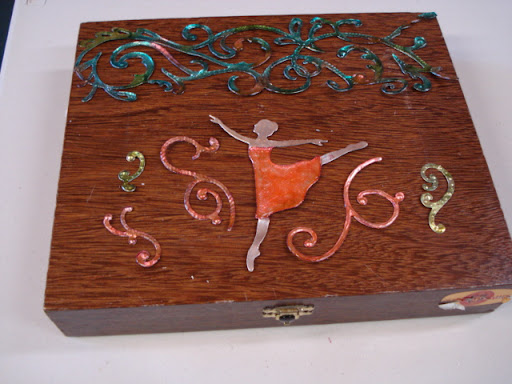
Is that just stunning? This particular cigar box had such gorgeous wood that I decided I didn't want to cover it. So I used undu to remove the label (remember, it's Bestine!)

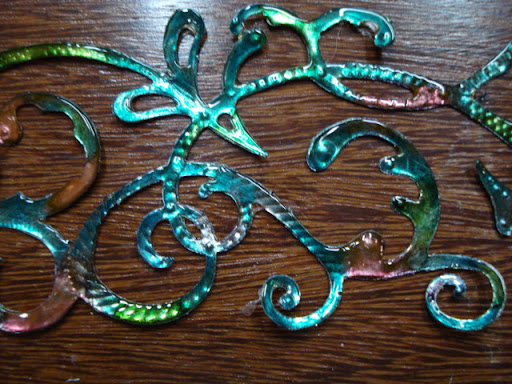
I diecut this 12" die in the Wizard using Amaco Pewter. I then used my MercArt tools and added some texture to the pewter, and added the raised dots.


Then I "painted" the silver pewter by using my 1" x 2" pieces of Ranger cut 'n dry foam and tapping on alcohol ink. Pour some ink on your craft sheet, pick it up with the foam, and tap it onto the metal. You can get a very nicely blended color by doing this....and void the "polished stone" technique. Next, I applied a layer of glossy accents and let it dry clear.


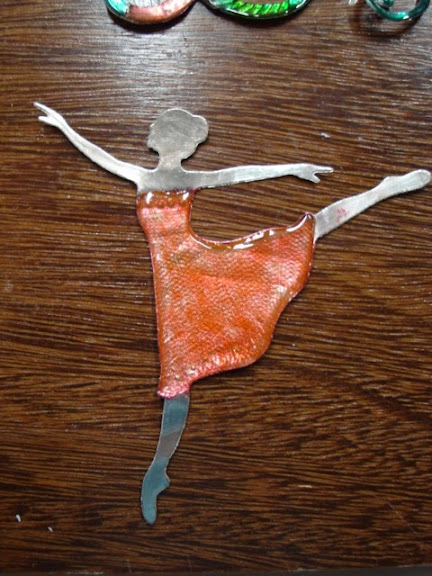
The ballerina is another quickutz die cut in pewter. I used my tools to give texture to her dress area, sponged on cranberry alcohol ink and applied GA to just the dress. Isn't she darling?


There is a 3rd Quickutz die that I used to make the smaller flourishes that I added around the ballerina:


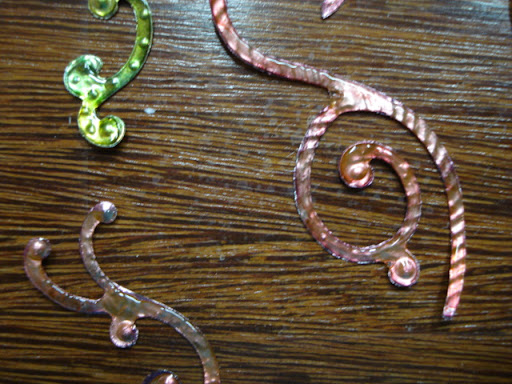
And added a couple of flourishes colored with Meadow


A closeup of some of the texture


This was done with a textured roller


You could do any arrangement you wanted....I sort of liked her dancing through the swirls!


This way I preserve the beautiful wood from the box:


This will definitely make a wonderful treasure box for some little girl....but I think for the time being I will keep it on my dresser! How fun to make such pretty little things using my Wizard and a few Quickutz! A little ink, a little metal, and a little glossy accents. Doesn't take much to make something so pretty. And once again, I'm using a cigar box....something the local smoke shop would toss if I didn't grab it!