Showing posts with label candles. Show all posts

Friday, February 14, 2014

Frosted glass

OK, I have to say, I LOVE how this turned out!  It started as a clear glass jar from the thrifty store.  Look at the bottom - it has frills on the glass!  It was sort of scratched up and yellowed with age.  I cleaned it as best as I could and then I airbrushed the inside of the glass with my copic system.


I took some of the double-sided tape  (using a lot of Elizabeth Craft Designs products on this one)  and put the sticky side up and placed the peel-off on top of that.  I've used the brand new doll peel-offs.  Covered it with microfine (cool) glitter, burnished the glitter, cut out the shape, then peeled the back off and stuck it on the outside of the glass.  Note - I airbrushed the inside of the glass.

Next, using q-tips and 91% rubbing alcohol, I removed the "paint" from the inside of the jar where the oval was:


This gives me a totally glittery, frosted look to the glass!


Tied a silk ribbon around the bottom, added some bling, stuck a candle down inside the jar....and I think it's just perfect!

I haven't done a youtube tutorial in quite some time, but this may just be the next one I do!!!


Saturday, December 14, 2013

Mercury glass and more - 1

Oh what fun it is to play…..


I'm going to spend the next few days sharing how I made these.  So first, you need to go to your local thrifty store and find glass.  Almost anything will do.  Clear glass, colored glass….all sizes and shapes.  Here's an example of a bottle and a candle votive that I found (of course, they were clear glass when I picked them up).  


While you are in the store, stack them together.  Get different heights.  Get some that will use votive size candles, tall tapers, short fat candles….and pick up used candles while you are at it.  I have several youtube tutorials showing you how to repair, restore and reuse old candles.  


In the days to come, I will share a variety of techniques, but for the look above, you will need Krylon's looking glass paint  (Walmart is the cheapest place if you can find it there).  You need a fine mist spray bottle filled with a mix of 1/2 water to 1/2 vinegar.  I don't think it matters what type of vinegar.  

For this particular bottle, I sprayed 1 coat of paint on the outside of the glass, then patted it off with a Viva paper towel (Viva is soft and flat, no embossed design in it).  Let it dry for a couple of seconds, then sprayed another layer, patted it off….did that 3 or 4 times.  

Next, I immediately spritzed the outside of the glass with the mix.  Let that set for 2 minutes.  It might not be dry, but that's ok.  Pat it off with your paper towel.  It will remove a little bit of the paint.  If you want a different look, rub it a little.  If you don't like the results, just soak the glass in 1 cup of vinegar in a sink full of water and rub all the paint right off.  I make several mistakes so always need a useable remedy!


I've made 23 of these in the past couple of weeks, so lots of experiments, loads of failures, and I'll be sharing different shots of the sun reflecting through them all.


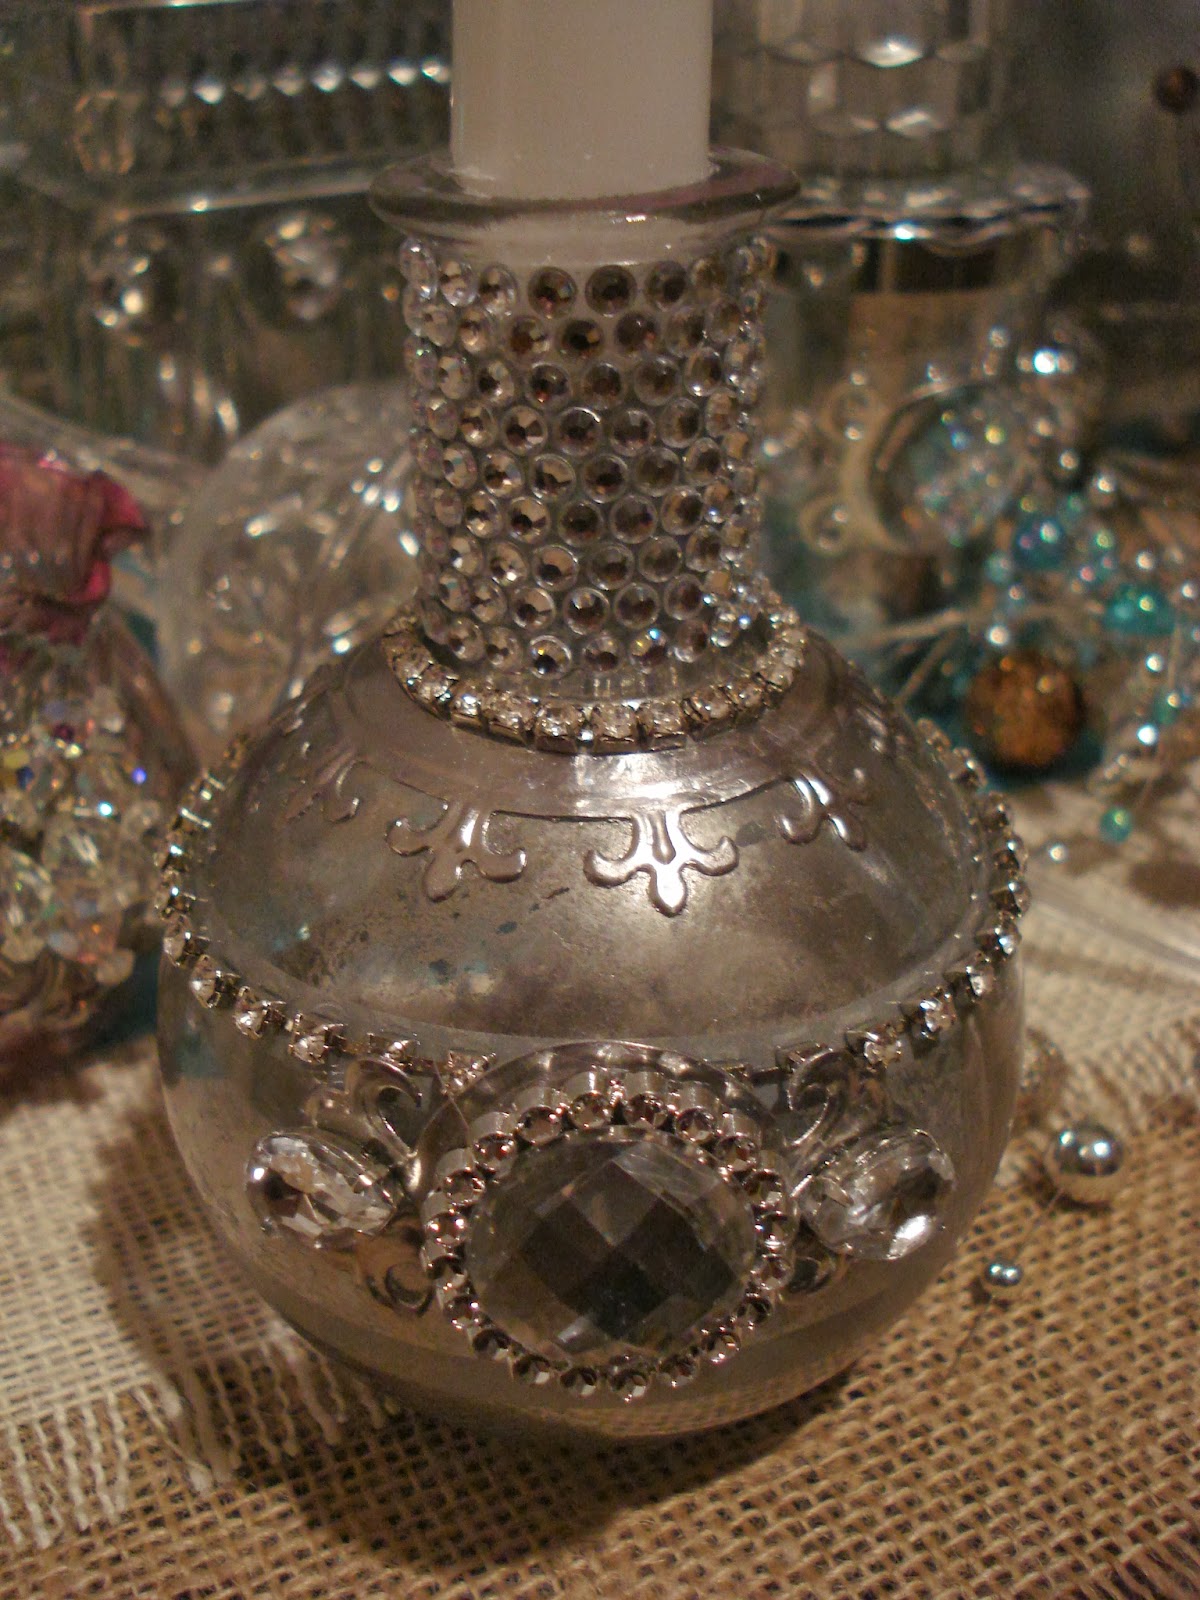
 First up is this little glass bottle.  Remember - it started out clear.  It was someone else's junk.  Now it's my little treasure!  Rows of adhesive crystals around the top and then at the bottom of the top, a row of sequins.  These are the kind that you can buy by the yard in the fabric section at Hobby Lobby.  Note, you can slide them apart, or scrunch them up close together which is what I did here.

Below that is a Spellinder's die.  This is from the Fleur de Lis Motifs and the center was removed using #3 from the Standard Circles Large die set.  Cut using Amaco's pewter - which is very flexible and will bend down around the glass and stretch to fit whatever you need.


In the front center of the glass, I used the medallion from the Fleur de Lis Accents set.  The bling on top of it comes from a half off ornament at Hobby Lobby.  Look at the ornaments carefully as most of them will just pop apart with a little bit of undue.  

Note that I'm using just the paint on these.  Tomorrow, we'll add a bit of color using the Copic Airbrush system!  Can't wait to share!!!

Saturday, November 30, 2013

Glass totems by Colleen

A couple of posts back, I shared some of Colleen's work.  Here's more.  These are so much fun.  She's put individual LED lights in the base of most of her totems…just makes the glass sparkle.  You can use them to serve candy….


She has all kinds and sizes…


The bring so much light into a holiday display!


Personally, I think they make me want to just eat more!  Not what I need!!!


She made this display cake out of fabric and hat boxes…..used glass for the topper and the risers. I'll blog close-ups of it later on.  But just look at all the ways to serve your guests using her totems.


This one is decorated specifically for a wedding or party.    Yes, those beads are edible!


We set up this wine display just for fun...


Cheese, crackers, cookies and scarves…. 


Here's my little burlap deer in the midst of this display with fruit added….


And here are the totems serving cheese and crackers amidst the antlers and candles.  I think this is just the perfect winter display!


All of her totems are now for sale in our little store in the Marketplace Shops here in town.  But if there's something you'd like me to price, just let me know.  We are truly having fun being creative together!!!

Saturday, September 21, 2013

What does your eye see?


There was this lamp at Hobby Lobby and it was half off, but I didn't like it.  I didn't like the stark white shade or the silver post.  But I bought it anyway.  You know, it was half off!!!  LOL!!


In my "mind's eye", I could see it completely different!

So, did you know you can spray paint a lamp shade?  It works just perfectly and is a great way to revive an old, dusty, stained lampshade!  But this was brand new and white and I just used a can of spray paint.  Looks a bit like burlap.


For the stem of the lamp, I sprayed it black matte, then I hand painted some acrylic turquoise paint and wiped it off before it dried so the black showed through.  Next I spritzed it with water, then used Krylon's mirror paint to get the silver look.  It is so shimmery and is simply perfect now!!!

The bird below was hot pink!  Seriously - neon hot pink.  Same technique as the lamp and now I just love it!


I made the sign using my cricut as a template.

Wrapped jute and hot glued flowers to old spindles:  (and the mason jar above)


and my little lamp corner is complete!


If you had seen this lamp at Hobby Lobby, would your eye have seen this?  Mine did.....and I have to wonder why!  Seems these days, I never look at things the way they are....but at how they could become!  I simply love living in an artist's world!