Showing posts with label copic storage. Show all posts

Wednesday, June 7, 2017

How do you store your copics?

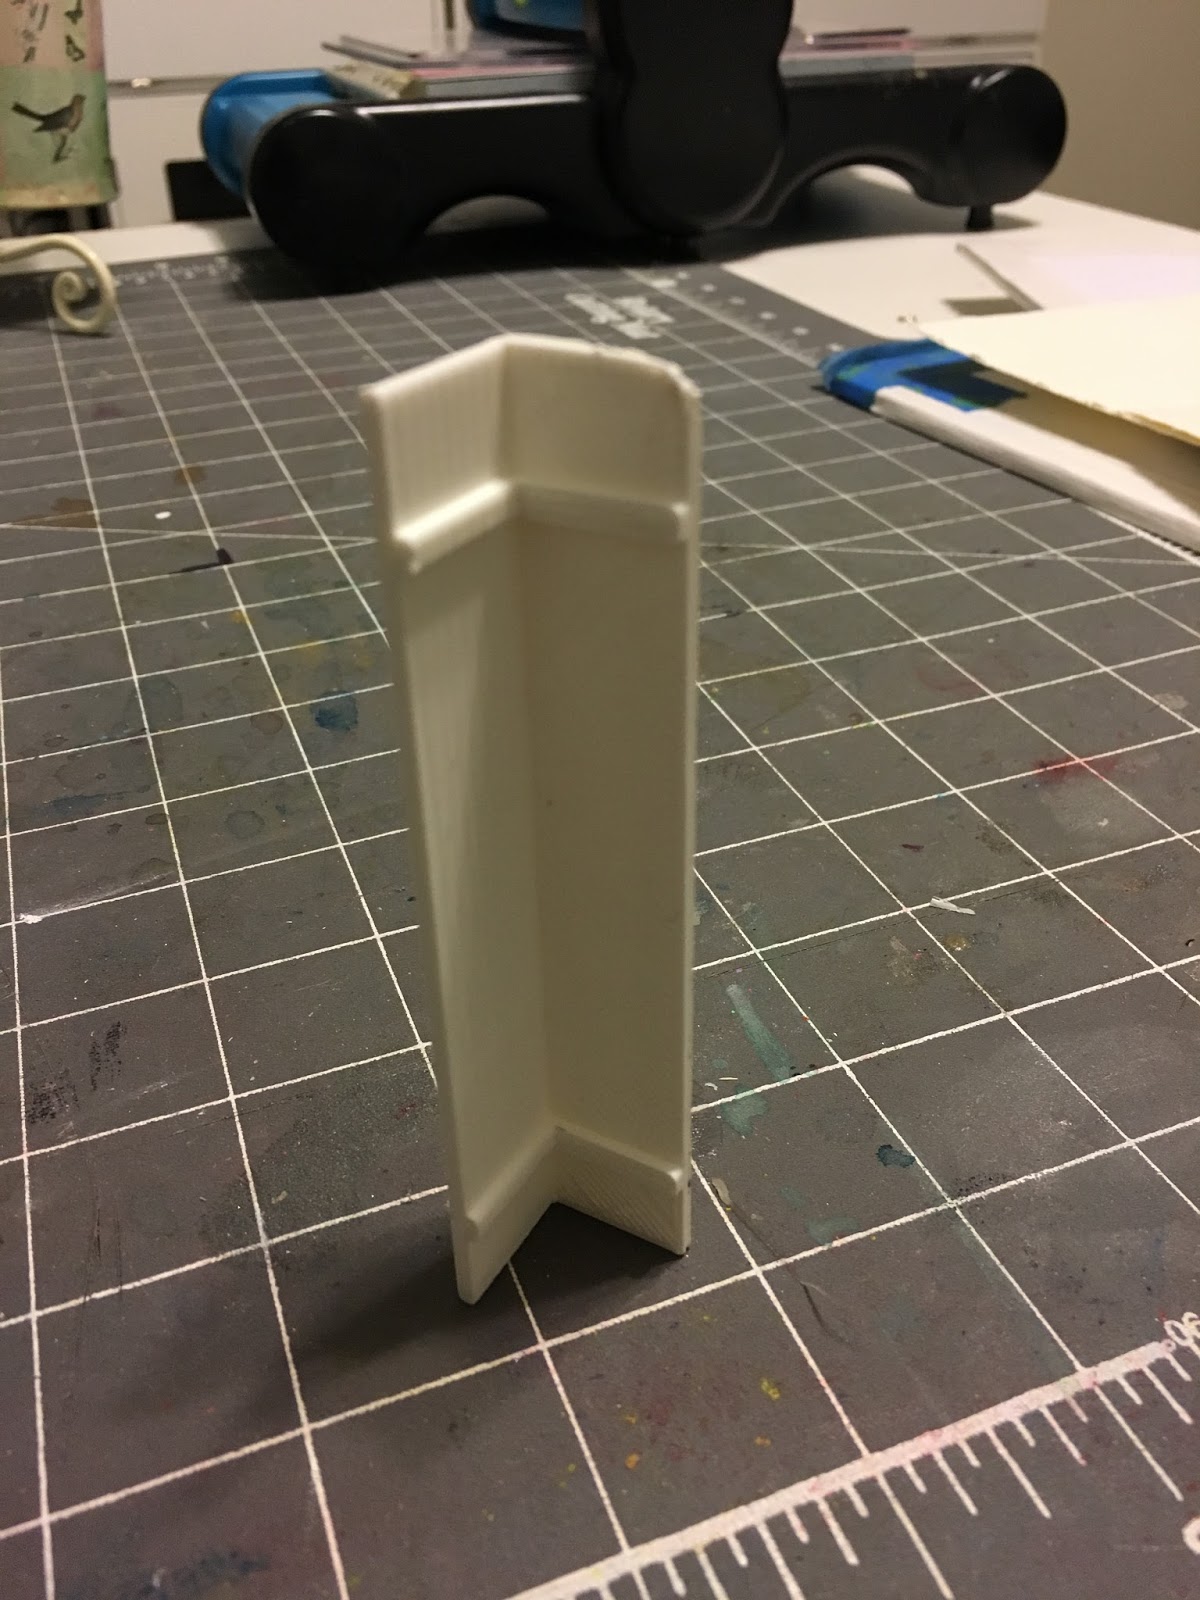
We have a 3D printer and this past week - it got a workout!  I have one of the copic black bags, but I do not like the little "basket" inserts that go in it.  So I got the egg carton light grid and after doing research and not liking much of what I saw out there, asked Kerry if he could create something with his printer.  He came up with some corner posts that I E6000'd to the grid and made a rack like this


(did you know that e6000 was a verb?  LOL!)

I figure out of the 300+ markers copic makes,  I really only need about 150 for now and that left  some space at the end of my bag.  


The corner posts look like this with little "rests" for the grid to position just above.  Worked out perfectly!  I used some tiny fabric clips that I found in the sewing department at Walmart to hold them together until the E6000 dried.


I needed something to put in the space at the end, so I had Kerry print a couple of boxes.   Yes, the 3D printer will print custom sized boxes.   This first one was too high as I can't get my fingers around the ink pads, so he made a shorter one next.


 Then I had him make dividers for the boxes so stuff wouldn't move around.    The dividers are E6000'd in place.  It all fits nicely down into the bag with room on the ends for my texture cloths and light templates.  This is looking down into the bag.


When I'm coloring, the bag will sit on it's sides and the boxes will come out and rest on the top.  In the left box are my square copics (I do a lot of airbrushing and use these colors the most) and my Momento Ink pads.  On the right are a variety of spritz and dropper bottles filled with blending solution and my white opaque copic paint.  In the tiny slots on the top - that's where I put my extra nibs for the markers.  I tested it out this afternoon and I'm pretty happy with it.  I love that we could use the 3D printer in the art room!  There was even space for my microns pens in the lower right hand slots.


This morning, I picked fresh strawberries out of my back yard.....


Those berries inspired me to use some of these copics because they are such berry-licious colors!  LOL!!!    I used Jenn Dove's tutorial to make this card.


I decided to do some more practice coloring.  Sometimes I think you need to repeat the same thing until you get it like you like!


But then, you need to make a card with your practice coloring!  Made this one for someone very dear to me who's having a birthday tomorrow!


I hope she likes it berry much!  

I am loving my "new-to-me" copic storage.  Now that the markers are organized and not falling all over the place I might actually use them!!!

Once again the 3D printer has amazed me with what it can do!  Kerry is now printing corners and center posts for some of my friends so they can do the same thing!


Wednesday, January 15, 2014

My copic marker storage

When I was at Jenn Dove's Arizona boot camp, I saw so many wonderful, clever ideas for storing copic markers.   I liked bits and pieces of all of them, but I also know that I will never have all 358 markers.  And I want the re-inkers for the markers I do have.  So I combined what I saw and came up with something that is going to work for me!

I took the big copic storage bag  (I hate the flimsy little storage bags in it) and inserted these chipboard boxes that I found at Hobby Lobby.  It is an extremely tight fit!


Next, I cut the fluorescent light grid to go over just the bottom half of the boxes.  Glued it on top of the boxes using E6000.   There are 3 individual grids - 1 in the bottom of each of these boxes and my markers go perfectly straight down through the top grid and snap inside the bottom grid.

If I filled up all 3 grids I could easily store 147 markers across the bottom.  More than enough for me!

My re-inkers are in the 2 top left boxes and the right top box stores my colorless blending solution in a variety of mister and drip bottles - plus my re-inking pens are in there.


It will sit on it's side with the top flap back up over the top on my shelf.  I LOVE this!  I can pull the markers out quickly to use....and there's room on the sides for a few other items (like the book I use to keep track of the colors I have)


and when I don't want to look at it, I just close the top!


Yet it's all in a single bag that has a nice shoulder strap and I can simply grab this and go when I'm off to the next crop or class.  My airbrush system is on the shelf right under the copic storage.


Sometimes, you just have to give it a little thought to come up with the perfect solution for what works for you.  Thanks to all of you at boot camp who shared your creative ideas!!

(just as a side note - my auto spell check wanted to use "ringer" or "reindeer" every time I typed in "re-inker"!!!  Pretty funny!!)