Showing posts with label necklace. Show all posts

Sunday, May 8, 2011

Starting to play......

Well, I've been busy with ebay and building an etsy store, but tonight, I decided to make a necklace.  This one is sterling silver with swarovski crystals.  I love using large loops that you can dangle things from.  A few tiny stars scattered throughout and a very unusual one at the bottom.


Each crystal is wire wrapped on to the main loops


The star is actually 2 separate pieces


Watch as they start to come together....


To form a star of david.  Found this in Israel last fall and just wanted to make something special for it.


I'm hoping to get back int my playing mode in a couple more weeks, but first....vacation to Ft Lauderdale starting this week!  Kerry is doing quite well - he's made an amazing comeback.  So we're going to test the waters with a trip.  Should be fun!

Be sure to check out these links: My Etsy Store: http://www.etsy.com/shop/jenlowedesigns My ebay auctions: http://shop.ebay.com:80/4mooregirls/m.html?_dmd=1&_ipg=50&_sop=16&_rdc=1

Thursday, October 29, 2009

Friendly Plastic for every occassion

I thought it might be fun to make 3 necklaces - one for every occassion, so here goes. This first one is for everyday wear. I think I could have fun with it!

Just inked up a pice of white Friendly plastic, cut a circle, popped into an old K&Company finding, dropped a bling into it and covered it with Glossy Accents....then strung it with just a few simple beads:


This next one is business casual. I dismantled 2 pair of earrings and turned them into a necklace....
and a scrap of Fracture n Fusion cut and popped into another K&Company finding. Maybe an hour tops?
But just too cute for the office or just for fun!

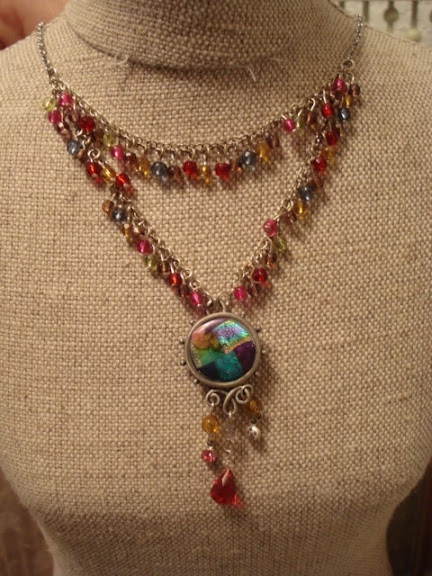
And here's one for formal nights. Used Linda's latest technique - Glisten and Glimmer in a Nunn Design finding.....
and strung it with lots of crystals and bling.

All 3 necklaces made in a single afternoon using bits and pieces of old jewelry and scraps of Friendly Plastic. Can it get any more fun than this?

Wednesday, September 9, 2009

Paula Best's best!

I'm feeling the "call" to make jewlery this week. And I bought this sterling silver charm from the Paula Best booth at the show in Colorado Springs. Oh - how I love anything Paula Best! Just so much fun!!!


I pulled out my best glass beads, lampwork beads, swarovski crystals and sterling silver spacers......


and when it all came together - I'm just as pleased as punch!


Did you notice the 3 little dangling star-of-davids? I have to order some more of those - they are just 1/8" deep and 1/4" wide....smaller than most crystals!

So, I started another necklace today, ran out of beads, placed an order online and will have to sit and wait til stuff gets here. Don't you just hate that? Ideas rolling and you don't have what you need when you need it?

Sort of like being out of chocolate!!!

Saturday, June 28, 2008

Button Necklace

I remember Grandma’s button box tucked neatly in the bottom of her dresser. If I was good, I could look at it and pick out a button! Oh! They were so pretty! I wanted them all, but could only have one at a time! I do think it was a pretty sneaky way to make me behave!!!

And then I saw a bag of clear Foofoola buttons and knew that I would soon have all the pretty buttons I could ever want! For this project, I took the Foofoola buttons and applied alcohol inks to both sides of the buttons. Using wire, I threaded the buttons together using 3 or 4 layers of buttons at a time. And in the very front of the necklace, I’ve added 5 uninked buttons just to make it look a bit more festive!

Grandma would be so proud! I can just here her now….she’d probably let me have all her buttons at once!!!


Supply list:
Foofoola clear buttons
Adirondack Alcohol Inks, Ranger Industries, Cranberry, Stream, Bottle, Lettuce, Butterscotch, Wild Plum; Applicator
Amaco Fun Wire


Instructions:

1. Apply alcohol inks to both sides of buttons, dry.
2. Cut a piece of wire. Bring it up through the bottom of the first button, back down through the second hole and down into the first hole of the second button.
3. Bring the wire up through the second hole in the second button and through the first hole in the third button.


4. You can layer as many layers as you like continuing in this pattern. Each row of buttons will be in an alternating pattern rather than straight up and down on top of each other.
5. Make sure that the opening is large enough to fit over your head
6. To tie off, simply lay the ends together, lining up layers and run the wire through each layer of buttons. To tie off, simply twist the wire 3 times around a button bottom and then clip the wire.


As you can see, it will change colors depending on the color you put behind it. Like wearing a "new" necklace with each outfit!


The fun thing is that you can make this as short or long as you want. Use up all of Grandma's buttons, buy new buttons, or use clear ones like I did. I think the possibilities are just endless!