It takes me awhile to get my videos edited.....but this one is just fun. Made the day that Linda Peterson surprised me at Stamping Details - I just wanted you to see what a fun stamp and altered arts store this is. About 30 minutes northeast of Scrapbook Your Life and downtown San Diego.....if you are ever in southern California...it's a "must do" event!!!

Showing posts with label Rubber Stamps. Show all posts
Showing posts with label Rubber Stamps. Show all posts
Thursday, May 14, 2009
Monday, May 11, 2009
Crafts n things
I'm in the latest issue.....can you believe I literally forgot what I had submitted to them and had to get the magazine before I could share??? LOL!!!

The coolest part of this is that I've used my very own rubber stamps on the cards! So Lucy McGoo has finally made it into a magazine! Woo Hoo!!! :o)

You can purcahse the stamps directly from me or from After Midnight Stamps.

There are only 36 stamps total (so far) and they come on 3 full sheets of unmounted rubber. But if you catch After Midnight at a local show, you can buy them individually cut up in the bins. I know - I know, I need to get busy and get the next set done, huh? Well, all in good time!!! For now, I'm going to enjoy the fact that these 2 got published!

The coolest part of this is that I've used my very own rubber stamps on the cards! So Lucy McGoo has finally made it into a magazine! Woo Hoo!!! :o)
You can purcahse the stamps directly from me or from After Midnight Stamps.
There are only 36 stamps total (so far) and they come on 3 full sheets of unmounted rubber. But if you catch After Midnight at a local show, you can buy them individually cut up in the bins. I know - I know, I need to get busy and get the next set done, huh? Well, all in good time!!! For now, I'm going to enjoy the fact that these 2 got published!
Friday, January 23, 2009
Lucy McGoo video tutorials
Well, I just thought you might like to see our introduction video....it's worth a few good laughs!!!
Youtube link
OK, we do tend to have a little too much fun when we get together. Imagine what life was like before she moved to Texas!!! We were always in our labora-torrey experimenting!
And we totally forgot to say our little logo poem:
Lucy McGoo is the child in you...she wants to play every day!!!

I guess we are both really getting old because we didn't even mention our TWO diecut manuals that we have available to download for only $2.00 each!!!
Lucy McGoo's Unofficial Wizard Manual
Lucy McGoo's Technique Academy
You can purchase Wonder Goo and/or our Lucy McGoo stamps direct from me, or at After Midnight stamps. Their link for Wonder Goo is here, and the link for our stamps is here.
And we can't thank Susan enough for helping out with our fun videos this week! Susan is a designer for B-Line Designs!
So sit back and stay tuned as there will be a video a day for the next few days! We hope you enjoy them and that you learn a little as we have been having so much fun putting them together just for you!
PS...if you think this video is funny, you ought to see the parts I cut out!!!
Monday, January 12, 2009
Stamping library
Several years ago, dad bought 5 of these libraries. He said there was one for each of his children. I have treasured mine and it has probably been used in every room in the house. So now, it's in my studio and I'm storing all my unmounted rubber stamps in it - yep, about 2500 of them.

I decided to use scrap pieces of leftover paper and do a patchwork "quilt" inside the glass on each shelf. Then I'm going to be adding photos....or rather photo collages to the "frames" that were made by the paper. I've got a couple of them started. This one is 2 photos, one of mom, the other of dad, that I have always loved. I scanned them in, merged them, then changed them to black and white. I just love it!
 On the lower left, I covered a little mini book with leather and stamped the letters "BIBLE on the front, then inked up the leather. Inside are lots of verses from scripture. On the lower right, I tore up a card that mom had painted on and made a tiny little collage of flowers, broken bits of jewelry and velvet leaves.

I decided to use scrap pieces of leftover paper and do a patchwork "quilt" inside the glass on each shelf. Then I'm going to be adding photos....or rather photo collages to the "frames" that were made by the paper. I've got a couple of them started. This one is 2 photos, one of mom, the other of dad, that I have always loved. I scanned them in, merged them, then changed them to black and white. I just love it!
On the lower left, I covered a little mini book with leather and stamped the letters "BIBLE on the front, then inked up the leather. Inside are lots of verses from scripture. On the lower right, I tore up a card that mom had painted on and made a tiny little collage of flowers, broken bits of jewelry and velvet leaves. They taught me how to study so many things. Religion, art, life. They taught me 2 Tim 2:15 "you-be-diligent yourself to-stand-along-side approved to-the God, (a) workman unashamed, cutting-straight the word of-the truth." (A Consistent New Testament - Mount Publications where hyphenated words are read as one word)... in the KJV: Study to show thyself approved unto God, a workman that needeth not to be ashamed, rightly dividing the word of truth.
Friday, October 24, 2008
Just For Fun
What a fun name for a stamp company!!! I've been using their stamps for over 2 years now and just love them. Most are quite fun, playful and just downright adorable!!!
and what fun art in their gallery!
Search for these stamps on their site:
Best Friends
Girl with Bow
Little Girl Cube
School Days
I have all these stamps and more....but do you ever see a stamp and say, "Whoa! That's ME!!!"?


I don't know, but I think I have a twin out there somewhere!!!
and what fun art in their gallery!
Search for these stamps on their site:
Best Friends
Girl with Bow
Little Girl Cube
School Days
I have all these stamps and more....but do you ever see a stamp and say, "Whoa! That's ME!!!"?


I don't know, but I think I have a twin out there somewhere!!!
Thursday, October 23, 2008
Stampotique
Time for a little more enabling around here! Have you been to Stampotique?
I first met them while wandering around CHAs trade floor a couple of years ago. I just fell in love with a few of their images:
Like Olive Rose
and Little Friends
And now they have a blog that not only incorporates art from their products, but is a great way to show us what's new in their product line!
Don't you just love sites with on-line stores? You never have to leave home to do a little shopping!!!

Saturday, September 13, 2008
Act Clay Class Project
I'm "killing 2 birds with 1 stone" a lot this week! Need to write an article, so yesterday, in our metal clay class, I made this pendant and photographed the steps along the way for a "how-to" piece:
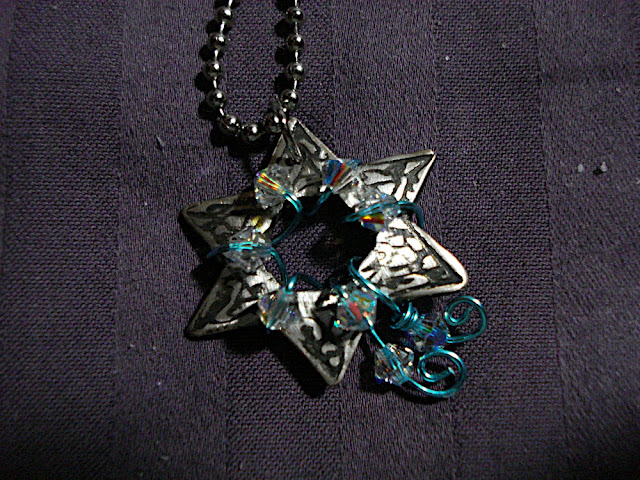
Made with the Star of David from my Lucy McGoo stamps, Art Clay Silver, Liver of sulfer patina, turquoise wire and swarovsky crystals. Took a total of 1.5 hours from start to finish.....and I was teaching 2 other students while making this and doing the photos!
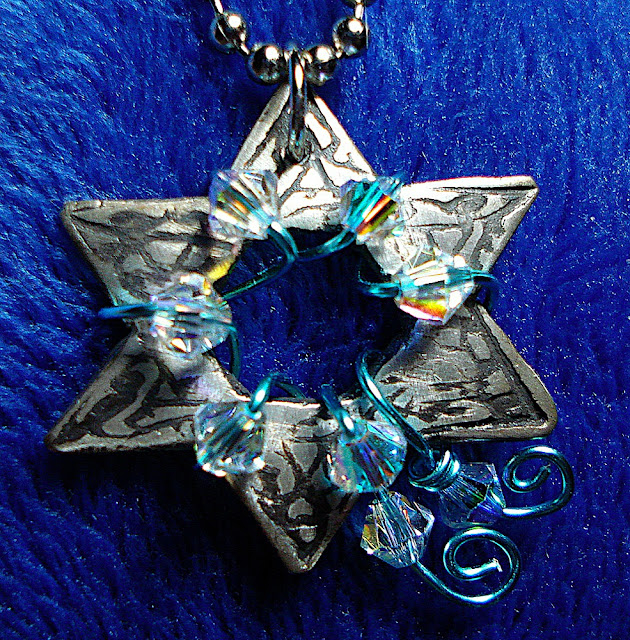
I do think taking a class from me is sort of like being in the middle of a 3-ring circus.....but it sure is fun!!!
Wednesday, May 28, 2008
Altering your rubber stamps!
Oh! GASP! CUT UP my rubber stamps???? Well, maybe after you pick me up off the floor! I USED to be such a purist. My stamps had to be perfectly clean, in order, sitting on the shelves. Row after row after row. Even the wood was clean!
First there were a hundred stamps, then two hundred.....then a thousand...then two thousand....no, I'm not a stamper at all! But I can't resist a cute little stamp! And they literally took over my work space. So I unmounted all of them!
Once you unmount your stamps (it took 2 full weeks....and I saved 75% of my space) you get some kind of freedom. I can't really explain it....but it is a new kind of freedom - to PLAY!!!
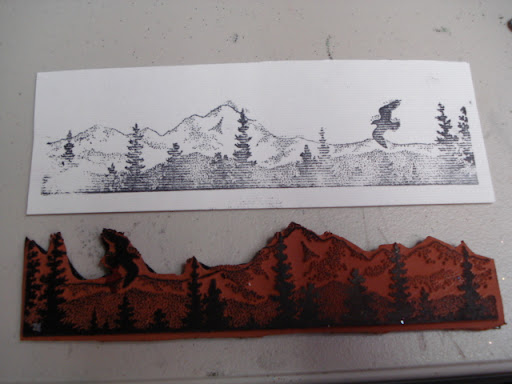
Example 1. I might use this stamp a handful of times as it is. A nice western collage.

But I decided to cut the stamped image apart and use the individual elements from it. Now, I know, I can mask and stamp, but that seems a bit of work on a lazy day!

Dare I cut the actual stamp apart, I thought???
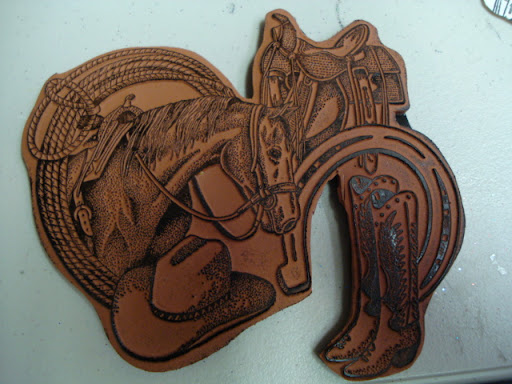
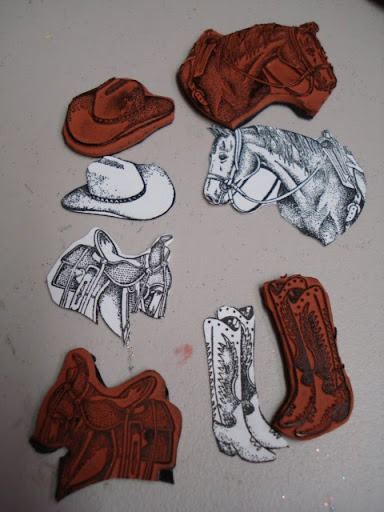
What freedom! Of course I did it! And now....do I count this as ONE stamp or as 4? LOL! I think I will get a whole lot more use out of it this way!
Example 2. I truly like this stamp. But I don't like it as a border. I wanted the sky to be open so it would "flow" upwards....not limit me to the size of this stamp.

So I whacked the top off!!! But look what happened! I absolutely LOVE this stamp now!!!
Ya gotta be BRAVE to do this!!!
Example 3. Do you ever have so much open space in a stamp that you get that "smudge" from the ink? Oh I do this all the time! And it can ruin a card in half a second!
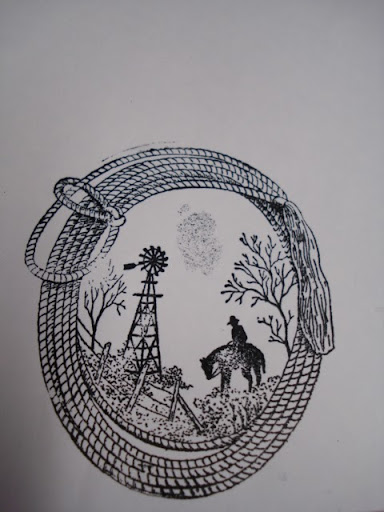
So, yes, I cut the inside out!

Don't worry, I left the inside perfect, so I can put it back and have the original image. But I can also stamp anything else in the center of the rope now!

All of the above stamps are from Talkabout Images. So reasonable I can buy 2 of each!
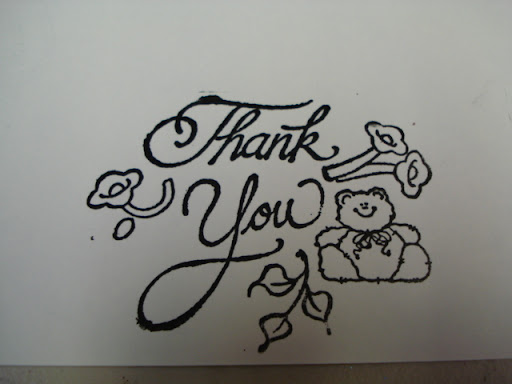
And next....the reverse. Why not take little stamps and create a collage out of them? One of my readers has been so generous and has sent me supplies for the local home school moms. This last batch had a lot of tiny little stamps in it, some dated back to 1996.
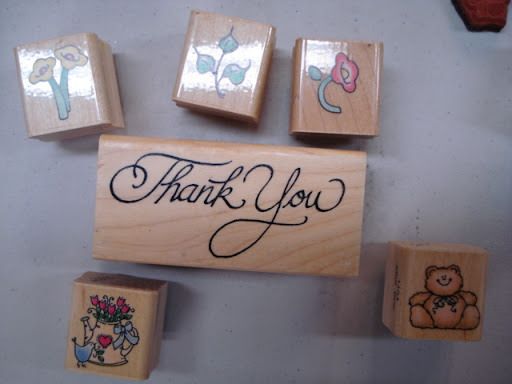
Because I unmounted them, I could then collage them back together to give an interesting new look to something over 12 years old!
And yes, different brands as evidenced by different types of rubber:

Put together on Sunday International's thin mount:
The stamp will go to the kids as a collage. But they can still cut it apart if they don't like what I did!
I know so many stampers who get bored with what they have. I say "UNMOUNT IT ALL! Cut it up! Make new collages! PLAY! PLAY! PLAY!"
And YES! I have unmounted ALL of my Stampin' Up sets! Even the ones on wheels! LOLOL!!!
After all, I've got to downsize this year...I've got to save on space! I've got to plan for hubby's retirement and a one level, 2 bedroom condo!
I'm just not sure I'm going to succeed!!! I do love stamps!!!
PS. If you are going to do this, use KIA or Tim Holtz scissors, and cut as close as you can to the image you want to preserve. I use EZMount to back them with and I'm still looking for my favorite acrylic block....but I do like several different brands.
First there were a hundred stamps, then two hundred.....then a thousand...then two thousand....no, I'm not a stamper at all! But I can't resist a cute little stamp! And they literally took over my work space. So I unmounted all of them!
Once you unmount your stamps (it took 2 full weeks....and I saved 75% of my space) you get some kind of freedom. I can't really explain it....but it is a new kind of freedom - to PLAY!!!
Example 1. I might use this stamp a handful of times as it is. A nice western collage.

But I decided to cut the stamped image apart and use the individual elements from it. Now, I know, I can mask and stamp, but that seems a bit of work on a lazy day!

Dare I cut the actual stamp apart, I thought???

What freedom! Of course I did it! And now....do I count this as ONE stamp or as 4? LOL! I think I will get a whole lot more use out of it this way!

Example 2. I truly like this stamp. But I don't like it as a border. I wanted the sky to be open so it would "flow" upwards....not limit me to the size of this stamp.

So I whacked the top off!!! But look what happened! I absolutely LOVE this stamp now!!!

Ya gotta be BRAVE to do this!!!
Example 3. Do you ever have so much open space in a stamp that you get that "smudge" from the ink? Oh I do this all the time! And it can ruin a card in half a second!

So, yes, I cut the inside out!

Don't worry, I left the inside perfect, so I can put it back and have the original image. But I can also stamp anything else in the center of the rope now!

All of the above stamps are from Talkabout Images. So reasonable I can buy 2 of each!
And next....the reverse. Why not take little stamps and create a collage out of them? One of my readers has been so generous and has sent me supplies for the local home school moms. This last batch had a lot of tiny little stamps in it, some dated back to 1996.

Because I unmounted them, I could then collage them back together to give an interesting new look to something over 12 years old!

And yes, different brands as evidenced by different types of rubber:

Put together on Sunday International's thin mount:

The stamp will go to the kids as a collage. But they can still cut it apart if they don't like what I did!
I know so many stampers who get bored with what they have. I say "UNMOUNT IT ALL! Cut it up! Make new collages! PLAY! PLAY! PLAY!"
And YES! I have unmounted ALL of my Stampin' Up sets! Even the ones on wheels! LOLOL!!!
After all, I've got to downsize this year...I've got to save on space! I've got to plan for hubby's retirement and a one level, 2 bedroom condo!
I'm just not sure I'm going to succeed!!! I do love stamps!!!
PS. If you are going to do this, use KIA or Tim Holtz scissors, and cut as close as you can to the image you want to preserve. I use EZMount to back them with and I'm still looking for my favorite acrylic block....but I do like several different brands.
Saturday, May 24, 2008
Talk about images
OK, that's the name of a brand new stamp company that I worked for this weekend! And for those of you who attended the show today, here's the tutorial I promised.
Start with an acrylic tag. Well, of course, you can use any shape and as I showed today, you can use clear transparencies as well.

Any 3 colors of alcohol ink. I used Ranger, but Pinata inks will work as well.

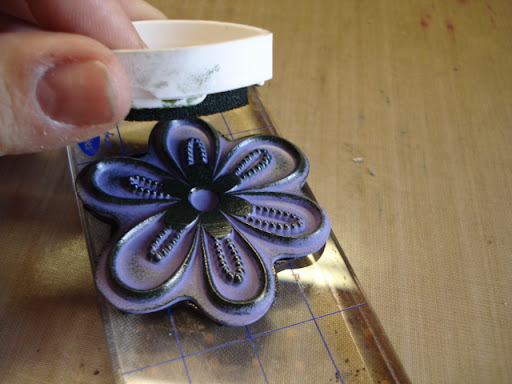
Using felt on a wood block, apply ink to the "count of 2".

It will absorb into the felt and look a bit like this.

Dab it onto the acrylic until the acrylic is covered.

If you don't like what you get, clean it off with blending solution and start over. I like what we got for this one. This is called polished stones and I first learned this technique from Michelle Bodensteiner in the summer of 2004. Thanks Michelle!!!

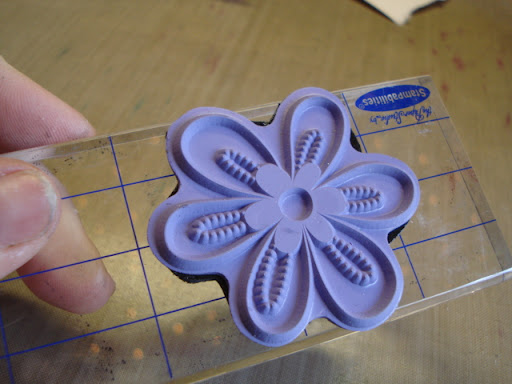
Next, take a stamp. I'm using stamps from Talk About Images. If you want to purchase any of these stamps, feel free to email them. talkaboutimages@yahoo.com

Ink it up with permanent black ink. I like either Jet Black Archival ink, or black Stazon ink.

Ink right into the alcohol ink, same side.

Let dry just a little bit. You don't want wet ink for the next step, but if you wait too long, it won't work.

Using Viva paper towels (remember....Mom said "always use Viva!"), start wiping off the black ink.

It will wipe off all the black ink AND wipe off all of the alcohol ink where the image was stamped.

And the end result is a cool see-thru look!

Many of us learned this technique by mistake! We stamped something we didn't like, tried to rub it off....or accidentally rubbed off an image that we liked! Ranger University teaches this as "alcohol ink resist". Is it "resist" or is it "rub-off"? Either way, it's a truly fun technique! Just something else to do with your rubber stamps!
And then I added a snowflake flower to the top! Just too cute!

Stay tuned! Today is the technique. Tomorrow I will post pictures of all the different stamps I used to do this technique with at the show today. And then on Tuesday, I'll blog more about the flowers and how to make them. Just so many fun things to write about, but I worked a really long day today and right now....I think it's time for the heating pad! LOL!
Start with an acrylic tag. Well, of course, you can use any shape and as I showed today, you can use clear transparencies as well.

Any 3 colors of alcohol ink. I used Ranger, but Pinata inks will work as well.

Using felt on a wood block, apply ink to the "count of 2".

It will absorb into the felt and look a bit like this.

Dab it onto the acrylic until the acrylic is covered.

If you don't like what you get, clean it off with blending solution and start over. I like what we got for this one. This is called polished stones and I first learned this technique from Michelle Bodensteiner in the summer of 2004. Thanks Michelle!!!

Next, take a stamp. I'm using stamps from Talk About Images. If you want to purchase any of these stamps, feel free to email them. talkaboutimages@yahoo.com

Ink it up with permanent black ink. I like either Jet Black Archival ink, or black Stazon ink.

Ink right into the alcohol ink, same side.

Let dry just a little bit. You don't want wet ink for the next step, but if you wait too long, it won't work.

Using Viva paper towels (remember....Mom said "always use Viva!"), start wiping off the black ink.

It will wipe off all the black ink AND wipe off all of the alcohol ink where the image was stamped.

And the end result is a cool see-thru look!

Many of us learned this technique by mistake! We stamped something we didn't like, tried to rub it off....or accidentally rubbed off an image that we liked! Ranger University teaches this as "alcohol ink resist". Is it "resist" or is it "rub-off"? Either way, it's a truly fun technique! Just something else to do with your rubber stamps!
And then I added a snowflake flower to the top! Just too cute!

Stay tuned! Today is the technique. Tomorrow I will post pictures of all the different stamps I used to do this technique with at the show today. And then on Tuesday, I'll blog more about the flowers and how to make them. Just so many fun things to write about, but I worked a really long day today and right now....I think it's time for the heating pad! LOL!
Tuesday, May 6, 2008
Stamping on the Wall
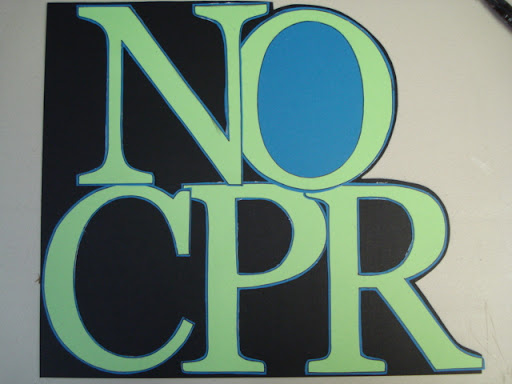
Well, there's "scrapbooking on the walls", so I thought I'd do "stamping on the walls". Mom just moved into a retirement center and said she wanted a sign for her door that says, "NO CPR".
So I traced some 5 1/2" tall letters on green cardstock, then backed them with blue and then mounted them on black. It's really a 12x12 cardstock that I cut out the right side. So pretty huge letters. Do you think anyone will be able to say, "I didn't see that?" LOL!
And look what a few stamps, a white pen and a black marker will do! Just amazing! Now, I could do a whole lot more to this, but decided to keep it simple as again, I don't want someone to say they didn't see the words for all the other stuff. Personally, I think this will look great on her door!
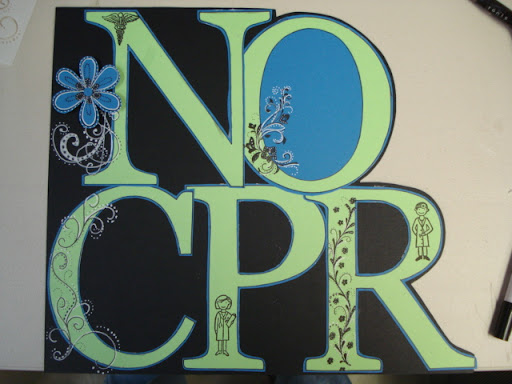
So I guess this is "stampin on the door", not on the wall!!! Found the cutest little medical stamps while in San Diego. The flower is SU cut out of blue paper and popped up, and then an Album Leaves flourish.

Another new stamp I found on vacation. I added a bit to it.
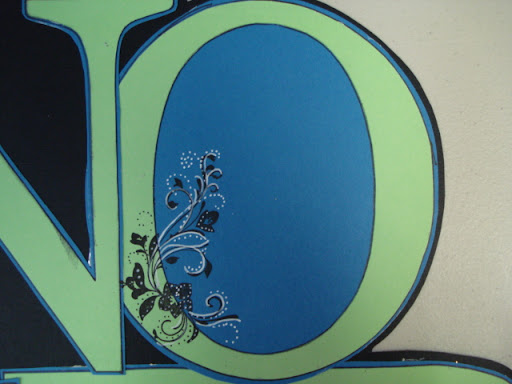
The white pens work great in the Crafter's Workshop stencils. I love alternating black and white as you go from dark to light backgrounds. Looks cool!
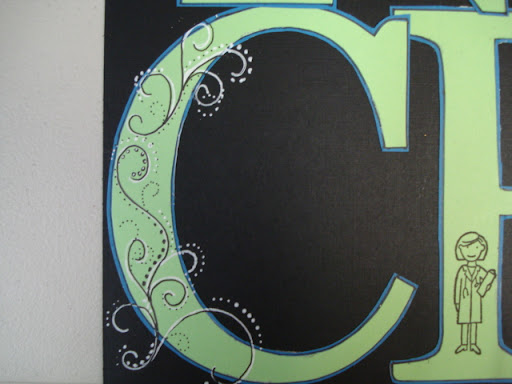
The nurse is just about 1 1/2" tall. Just too cute.
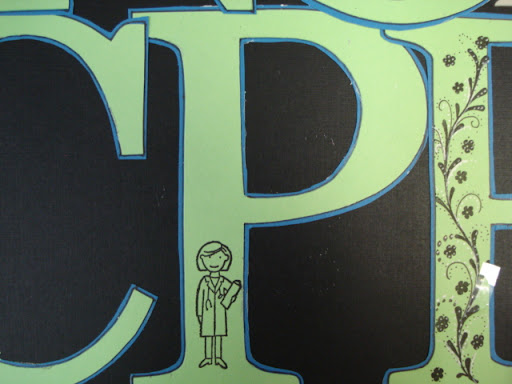
And I love this border flower/flourish. Once again, I added a bit to it, but just so much fun!

I showed this to Kerry and he said it was rather "grim". Well, not sure how one can un-grim such a phrase....but I think people will notice it!
So mom, what do you think? Look ok? Shall I start over? Did you get the blue and green....to match your bruises? :o)
Now to finish the layout that will go right below this.
So I traced some 5 1/2" tall letters on green cardstock, then backed them with blue and then mounted them on black. It's really a 12x12 cardstock that I cut out the right side. So pretty huge letters. Do you think anyone will be able to say, "I didn't see that?" LOL!

And look what a few stamps, a white pen and a black marker will do! Just amazing! Now, I could do a whole lot more to this, but decided to keep it simple as again, I don't want someone to say they didn't see the words for all the other stuff. Personally, I think this will look great on her door!

So I guess this is "stampin on the door", not on the wall!!! Found the cutest little medical stamps while in San Diego. The flower is SU cut out of blue paper and popped up, and then an Album Leaves flourish.

Another new stamp I found on vacation. I added a bit to it.

The white pens work great in the Crafter's Workshop stencils. I love alternating black and white as you go from dark to light backgrounds. Looks cool!

The nurse is just about 1 1/2" tall. Just too cute.

And I love this border flower/flourish. Once again, I added a bit to it, but just so much fun!

I showed this to Kerry and he said it was rather "grim". Well, not sure how one can un-grim such a phrase....but I think people will notice it!
So mom, what do you think? Look ok? Shall I start over? Did you get the blue and green....to match your bruises? :o)
Now to finish the layout that will go right below this.
Monday, May 5, 2008
Cleaning stamps
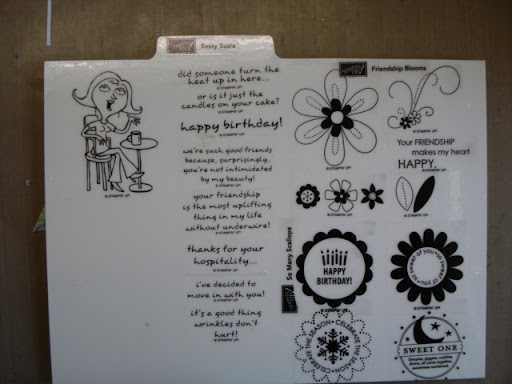
oh my! I don't clean stamps during classes and perhaps I should! I've spent the last 3 hours cleaning them! And look how dirty they were!
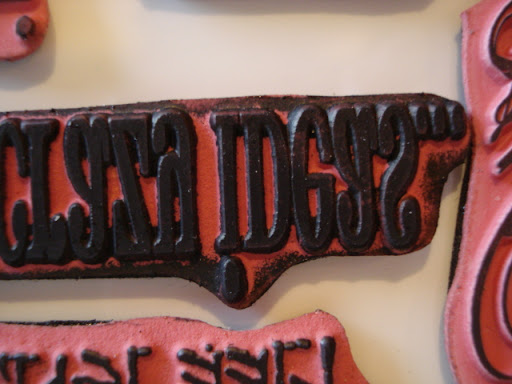
Of course, I ruined my stazon cleaner bottle and totally ran out of stuff
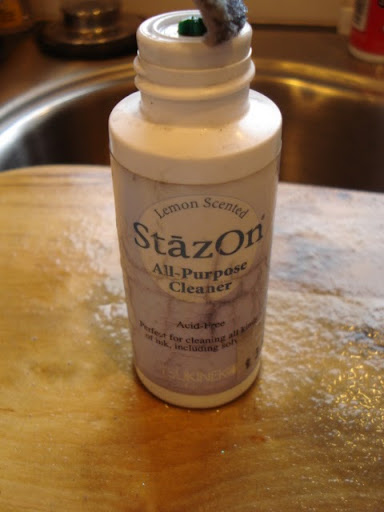
And then I remembered I had this stuff. Motsenbocker's Lift off 3. Takes off pen, ink and marker. So I thought I'd try it on my stamps.
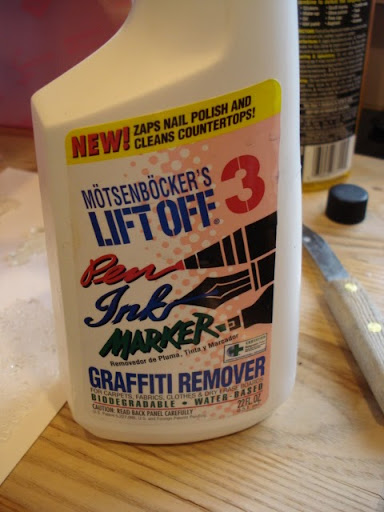
It works exactly as good as stazon cleaner! And so much cheaper! You just spritz it on and I used a veggie scrubber to clean the stamps with. Got it at the hardware store, but you can buy it online. Lift Off. (Edited to try and fix this link. Hit return when you get to that URL, or just type in liftoffinc.com and then select # 3.) I love it when I find a product that saves me money! OK, I know, it's just money I will spend on something else!
I spent the morning unpacking and know that I had too much fun shopping in San Diego. Still one more box to arrive. Can hardly wait to start playing with everything I found! So stay tuned!
Friday, April 4, 2008
Unmounting my stamps
Lots of you have sent me emails with questions about my decision to unmount all of my rubber stamps, why I picked the products I picked, if I'm happy......so I've decided to just show you all here!
But first....If you are a Stampin' UP rep....or love their stamps....do not read this! LOLOL! I just don't want to be responsible for anyone having a heart attack! Yes....I unmount my SU stamps, my Tim Holtz stamps (gasp!)...everything!!! If there are plastic stickers on the wood, I will use undu and take it off and then adhere it to the front of my Stamp n Store panels.
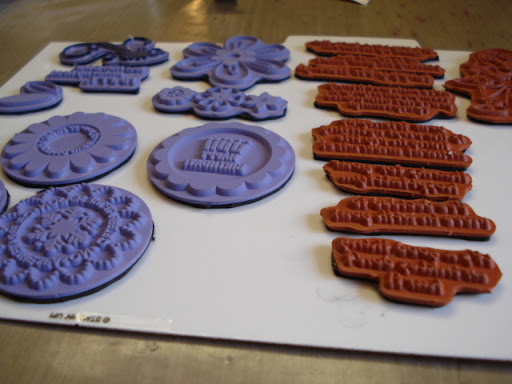
I like these panels because the stamps cling directly to the back of them, and they are tabbed across the top. I simply cut them to the size that I need.

I have mounted some of my stamps on EZMount, but have decided to go with the Thin Mount for all my current and future stamps. It truly is quite thin and it works extremely well.
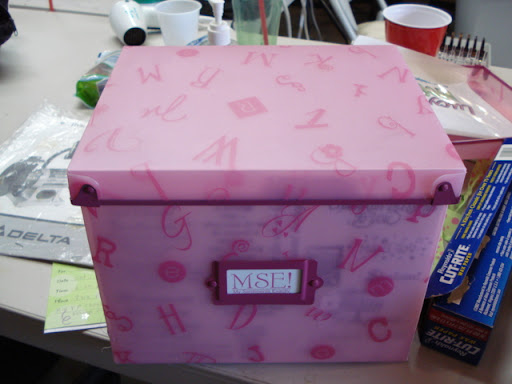
I cut the Stamp n store panels to fit inside my new MSE stamp storage boxes....and these are the stamps that I travel with. You can see that I can also drop in Tim's new sheets as well....that's the game sheet right in front. But yes, I've unmounted all his wood stamps and love them in this system. So easy to find and see!

The lid goes on and this box sits on the corner of my main work table. It's absolutely perfect!
Using the thin mount, I find the stamps are a little more flexible. Now, that may not be important to you, but I tend to stamp on some rather lumpy surfaces and find this is so helpful.

I just stick it on anything acrylic. My metal clay rollers work wonders with these! Oh, by the way, I also unmounted all of my wheel type rubber stamps and they are all now flat!
Just put the ink directly on the stamp
And flip it over and stamp. With these gridded positioners you can pretty much get your spot right every single time.

Now, we all know how unconventional I am! So I should tell you that I will often unmount a wood stamp and then trim the rubber just as close as I can....that way when I get to this step, I can have even better luck at positioning my stamp! Just a suggestion!
So, this is really a 2-part tutorial because from this, I plan to show you how to make your own stencil to emboss in the Wizard. That will be for tomorrow!
In the meantime, I have ordered all of these products and should have them in our little store in the next week. If you are interested, just email me.
EZ Mount - $4.50 for each 8x11 sheet
Thin Mount - $4.50 for each 8x11 sheet
Stamp N' Stor tabbed panels, package of 5 - $6.99
CD case storage panels, package of 10, $3.49
MSE storage case - $15.99 Actual Storage Kit Size 7.75" tall x 10"deep x8" wide
But first....If you are a Stampin' UP rep....or love their stamps....do not read this! LOLOL! I just don't want to be responsible for anyone having a heart attack! Yes....I unmount my SU stamps, my Tim Holtz stamps (gasp!)...everything!!! If there are plastic stickers on the wood, I will use undu and take it off and then adhere it to the front of my Stamp n Store panels.

I like these panels because the stamps cling directly to the back of them, and they are tabbed across the top. I simply cut them to the size that I need.

I have mounted some of my stamps on EZMount, but have decided to go with the Thin Mount for all my current and future stamps. It truly is quite thin and it works extremely well.

I cut the Stamp n store panels to fit inside my new MSE stamp storage boxes....and these are the stamps that I travel with. You can see that I can also drop in Tim's new sheets as well....that's the game sheet right in front. But yes, I've unmounted all his wood stamps and love them in this system. So easy to find and see!

The lid goes on and this box sits on the corner of my main work table. It's absolutely perfect!

Using the thin mount, I find the stamps are a little more flexible. Now, that may not be important to you, but I tend to stamp on some rather lumpy surfaces and find this is so helpful.

I just stick it on anything acrylic. My metal clay rollers work wonders with these! Oh, by the way, I also unmounted all of my wheel type rubber stamps and they are all now flat!

Just put the ink directly on the stamp

And flip it over and stamp. With these gridded positioners you can pretty much get your spot right every single time.

Now, we all know how unconventional I am! So I should tell you that I will often unmount a wood stamp and then trim the rubber just as close as I can....that way when I get to this step, I can have even better luck at positioning my stamp! Just a suggestion!
So, this is really a 2-part tutorial because from this, I plan to show you how to make your own stencil to emboss in the Wizard. That will be for tomorrow!
In the meantime, I have ordered all of these products and should have them in our little store in the next week. If you are interested, just email me.
EZ Mount - $4.50 for each 8x11 sheet
Thin Mount - $4.50 for each 8x11 sheet
Stamp N' Stor tabbed panels, package of 5 - $6.99
CD case storage panels, package of 10, $3.49
MSE storage case - $15.99 Actual Storage Kit Size 7.75" tall x 10"deep x8" wide
Subscribe to:
Posts (Atom)